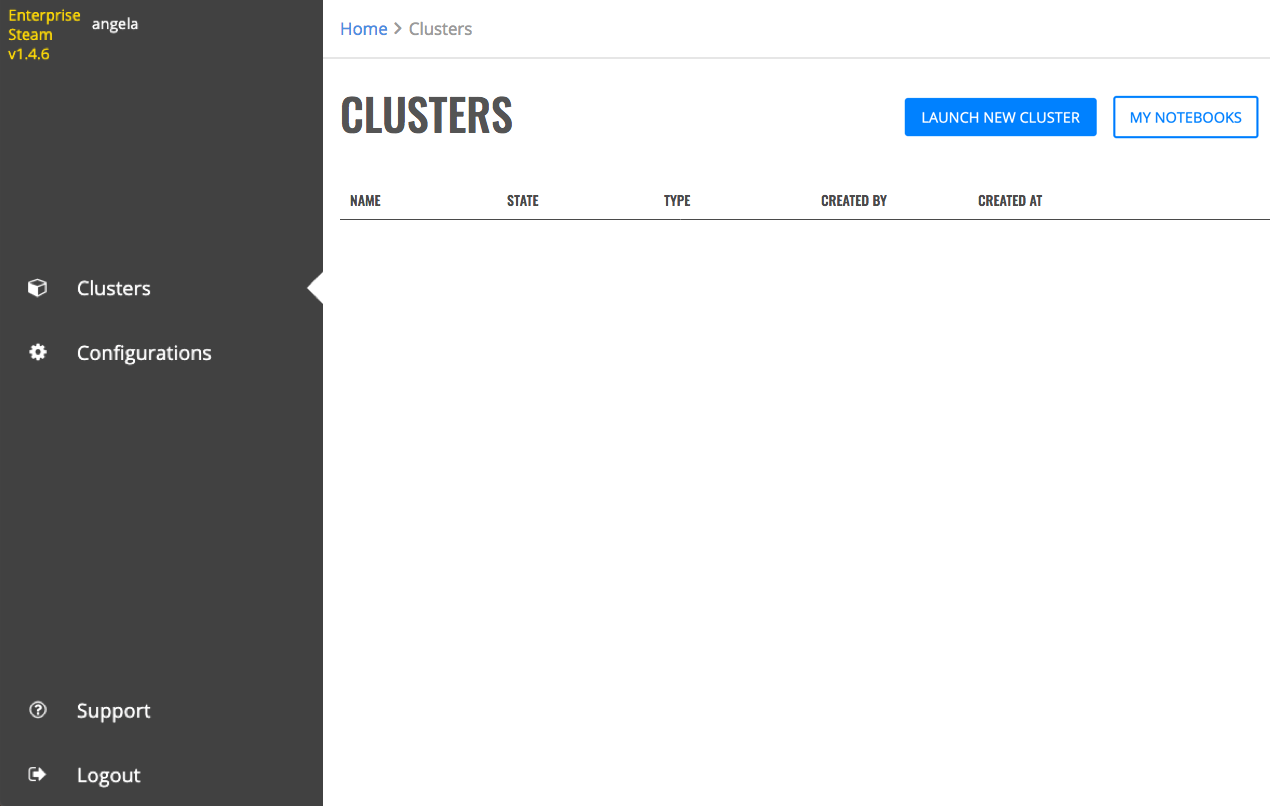
Clusters and Notebooks
The Clusters page shows clusters created by the current user, the state of the cluster, the cluster type, and the cluster creation date. From this page, you can launch a new cluster, view details of a cluster, or delete a cluster. You can also click the cluster name beside a “Started” cluster to access H2O Flow (see Using Enterprise Steam with H2O Flow).
Note: When Enterprise Steam is started for the first time, no clusters will appear in the UI.
Launch a New Cluster
- In the Enterprise Steam UI, navigate to the Clusters page and select Launch New Cluster.
- Select the Cluster Type from the dropdown menu.
- Select a Cluster Profile from the dropdown menu to use when setting up the new cluster. Cluster profiles are configured by the Admin on the Configurations page and provide the allowed min and max values for each options in a cluster profile.
- Specify values for the options below. Once added, other Enterprise Steam users will be able to connect to this cluster.
Cluster Name: Specify a name for this cluster.
H2O Version: Specify the H2O version to use.
Number of Nodes: Specify the number of nodes for the cluster.
Java Memory per Node [GB]: Specify the amount of memory that should be available on each node.
YARN Virtual Cores per Node: Specify the number of virtual cores.
H2O Threads per Node: Specify the number of threads (CPUs) to use in the cluster. Leave this blank to use all available threads.
Extra Memory: Specify the amount of extra memory for internal JVM use outside of the Java heap. This is a percentage of memory per node. The default (and recommended) value is 10%.
Maximum Idle Time [HRS]: Specify the maximum number of hours that the cluster can be idle before gracefully shutting down. Leave this blank to turn off this setting and allow the cluster to remain idle for an unlimited amount of time.
Maximum Uptime [HRS]: Specify the maximum number of hours that the cluster can be running. Leave this blank to turn off this setting and allow the cluster to remain up for an unlimited amount of time.
Leader Noe ID: Optionally specify whether to connect to a different leader node.
YARN Queue: If your cluster contains queues for allocating cluster resources, optioanlly specify a queue for this cluster. Note that the YARN Queue cannot contain spaces. Leave this empty to use the default YARN queue.
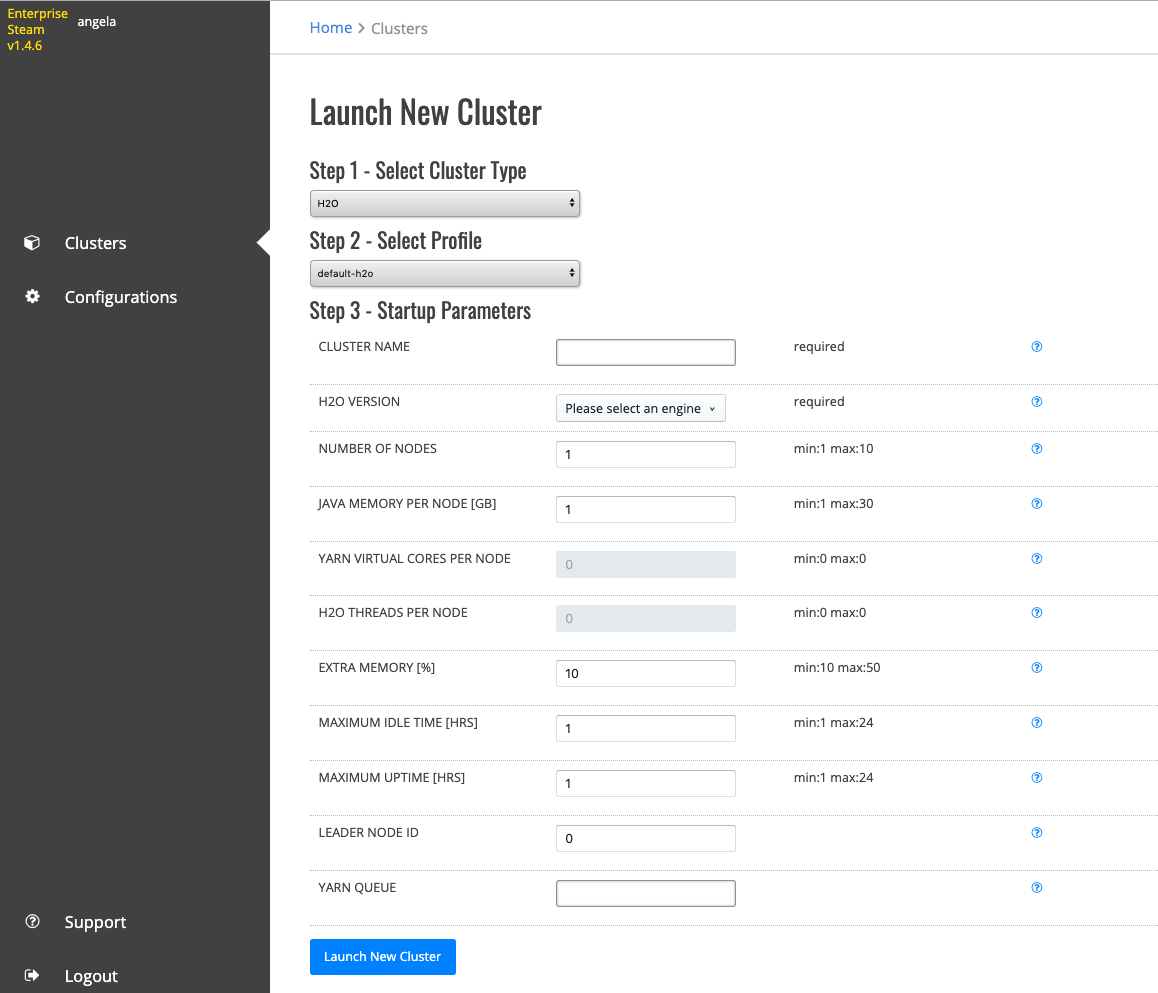
- Click the Launch New Cluster button to start the new cluster.
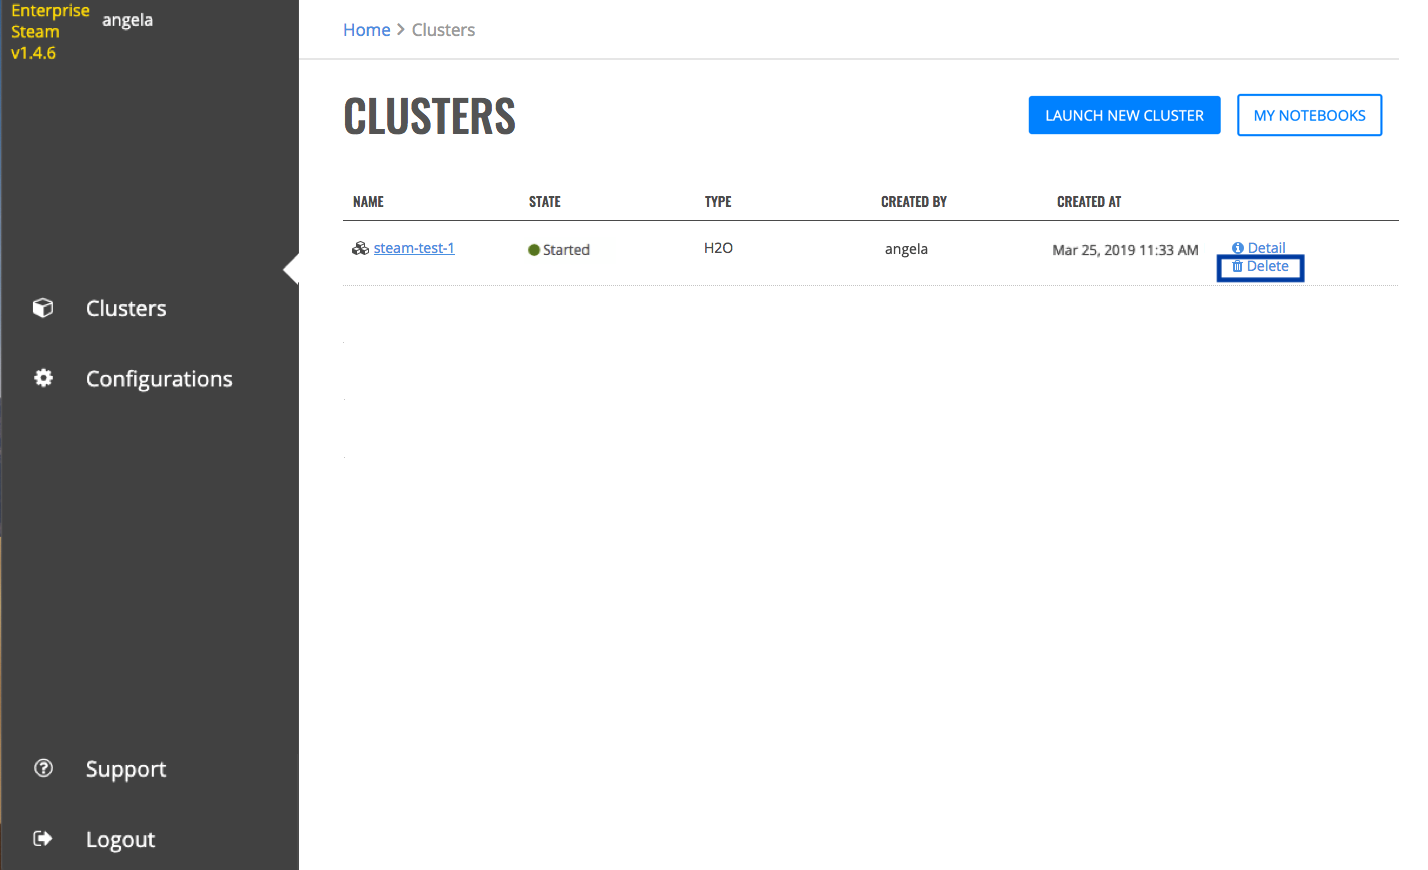
Upon successful completion, the cluster will appear on the Clusters page.
Deleting Clusters
Click the Delete icon beside the cluster that you want to delete. A confirmation message will display. Click Confirm to continue. This action stops and then removes the cluster.
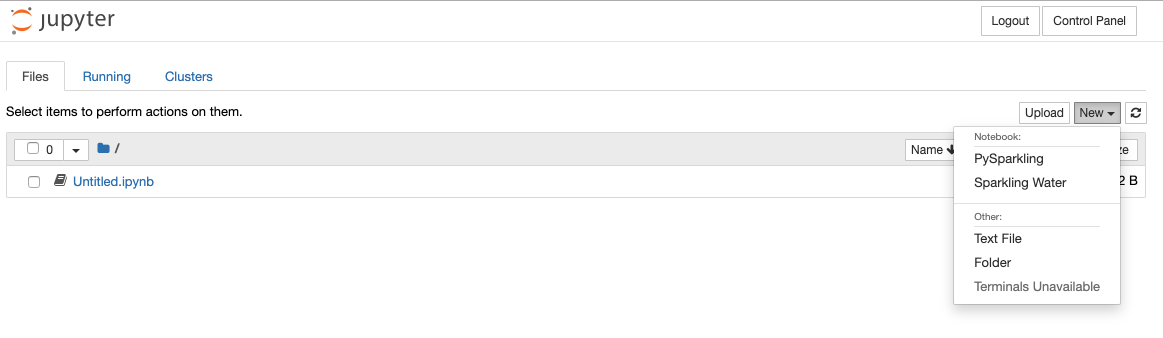
Launching Notebooks
Enterprise Steam allows you to upload and run Jupyter Notebooks from within the cluster. In the Enterprise Steam UI, navigate to the Clusters page and click the My Notebooks button in the upper-right corner to view available notebooks. More information about Jupyter Notebooks is available here: https://jupyter.org/
Creating New Notebooks
On the Jupyter Notebook Files tab, click New dropdown and select the type of notebook or other file that you want to create. Then create and save the new notebook.
Adding Notebooks
- On the Jupyter Notebook Files tab, click the Upload button.
- Browse to the location on your local machine where your notebooks is stored.
- Click Upload to complete the notebook upload process.
