Service Catalog EMR-ML Lab
This Page https://tinyurl.com/y298k84u
EMR Lab
- The Lab Objective is to quickly create your own Service Catalog EMR environment
Pre-requisites:
- DO NOT use your ROOT user
- Create a user called emrscadmin, give it an an Administrator policy (optional if you have a user with an admin policy)
Setup the Lab Environment
- Login to your AWS Account using the emrscadmin user (or an admin user)
- Launch this stack that will create the Service Catalog environment

- On the Create stack page, choose Next,
- On the stack details page, fill in the parameters and then choose Next
- On the Configure stack options page choose Next
- On Review page, choose the check box for I acknowledge that AWS CloudFormation might create IAM resources with custom names. Choose Create Stack
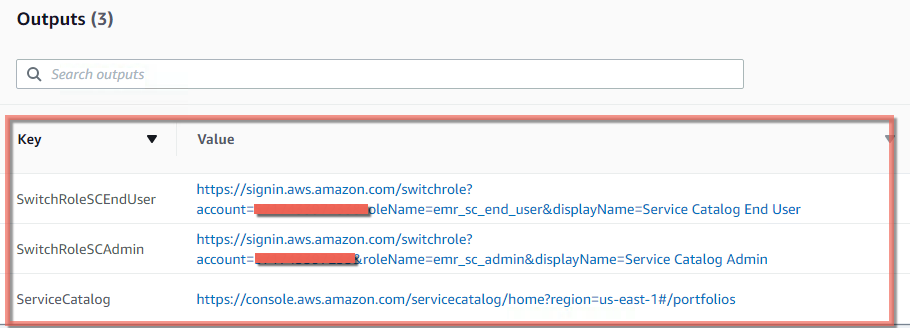
- When the stack has completed click the Outputs Tab
- Copy the Output URLs into a text document or in the box below
- Stack Parameters
| Stack Name | EMRLABsetup |
| PortfolioName | EMRloft |
Launch the EMR product
- Copy the URL with the SwitchRoleSCEndUser Key
- Open a new browser tab, paste the URL, hit enter
- Choose the Switch Role button
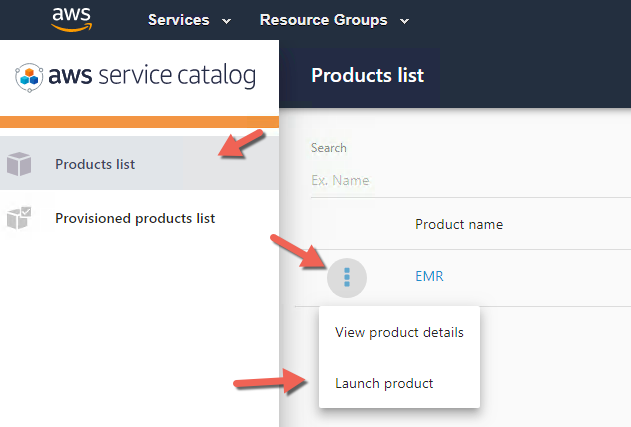
- Go to the Service Catalog console
- Choose the EMR Service Catalog Product
- Choose LAUNCH PRODUCT button
- Enter a name myemrlab
- Choose verison V1
- Choose Next
- Choose a VPC
- Choose a Subnet (choose a public Subnet/network)
- Choose a Remote Access CIDR Block "Enter a Remote Address CIDR Block (That you’ll access EMR from) * Note Click here to get your ipaddress copy it
- Enter it in this format paste_the_address_you_copied/32 e.g 100.122.122.22/32
- Choose Next
- On the TagOption page Choose Next
- On the Notifications page Choose Next
- On the Review page Choose Launch
- This will take about 15 minutes to complete
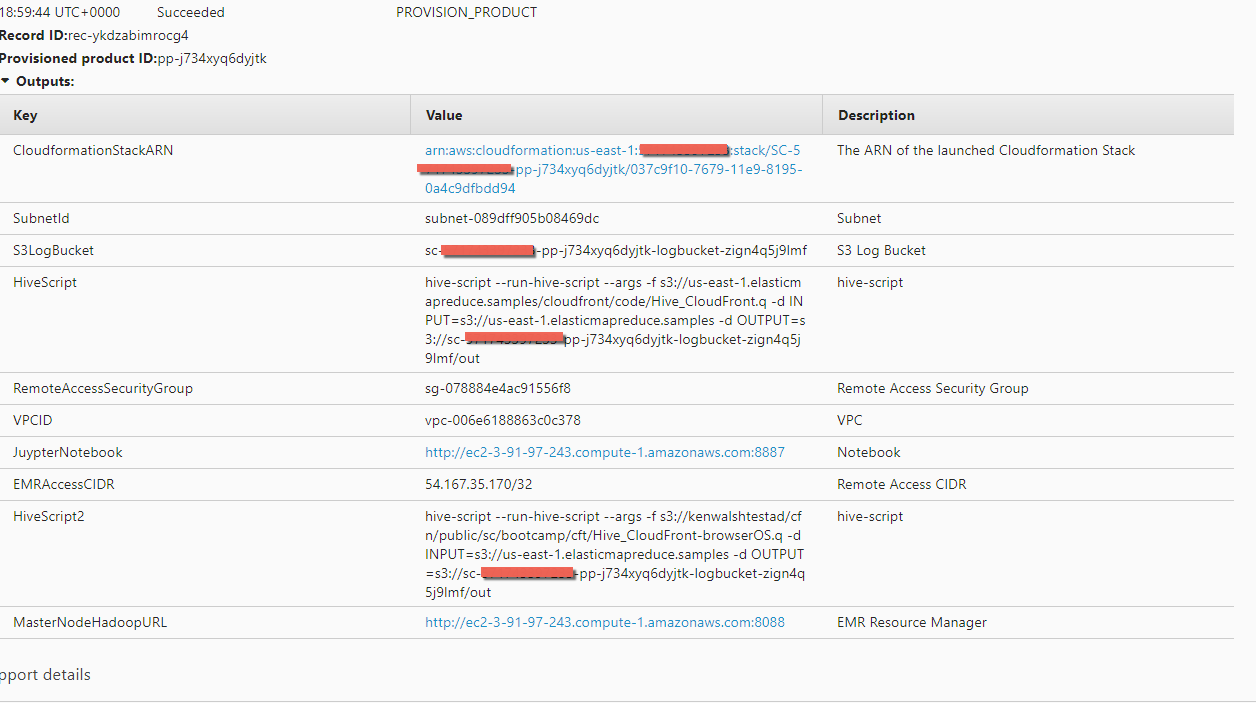
- View the output
- Copy the value of Hive Script you will need it to run the query
- Copy the value of S3LogBucket you will need it for the lab clean up steps. Paste it here
Running the EMR Query
Use Case: There are logs of who accessed an important website. We need to know what kind of computers were used to access the website so we can improve the website. The query will give us that information
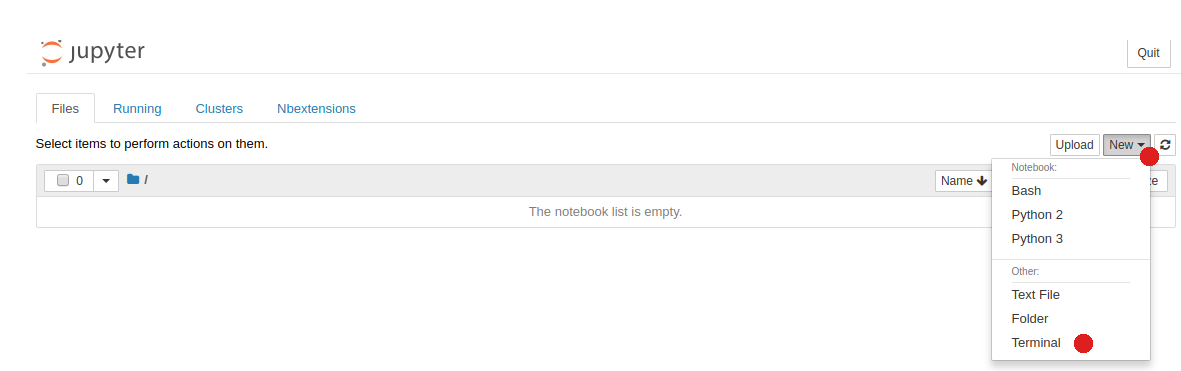
- Open the JuypterNotebook link in a new bowser tab, right click,Open Link in new Tab
- Open a new terminal:New,Terminal
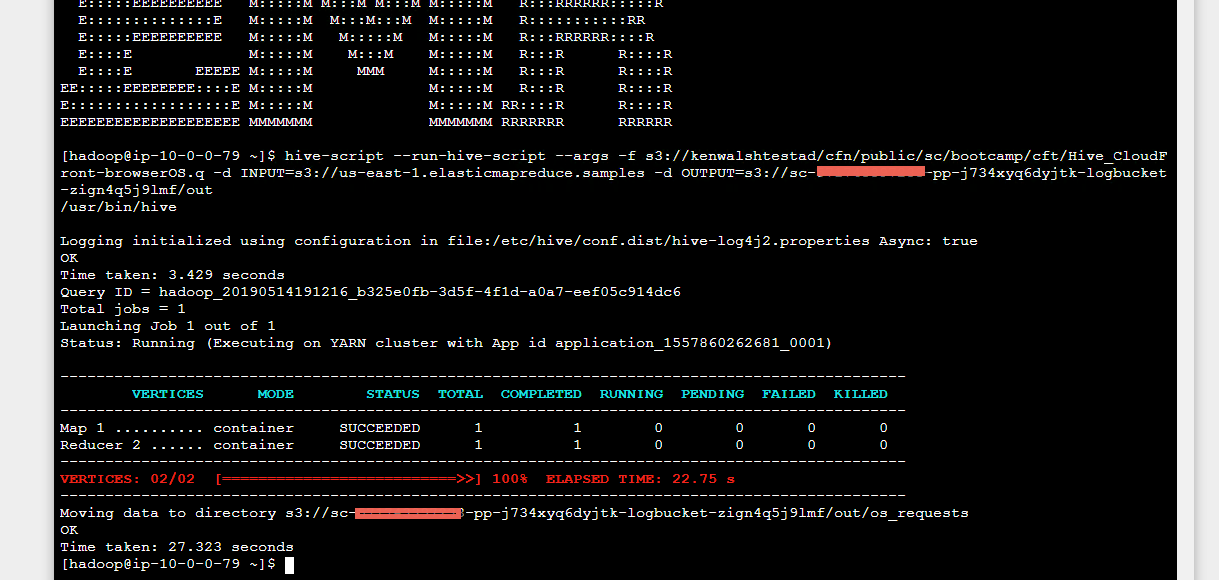
- Paste the hive script
- Hit Enter, this will run for about 1 minute
- In the same EMR window
- Run the command below to view the results of the hive script. Replace the bold text with the ‘Moving data to directory’ s3 url copied from the previous command’s output
- aws s3 cp --recursive s3://sc-9999999999-pp-btjexf5pcesao-logbucket-1d5ejm5a251rx/out/os_requests/ here
- cat here/000000_0 Your results should look like this
- Close the browser tab for EMR
- Close the jupyter browser tab
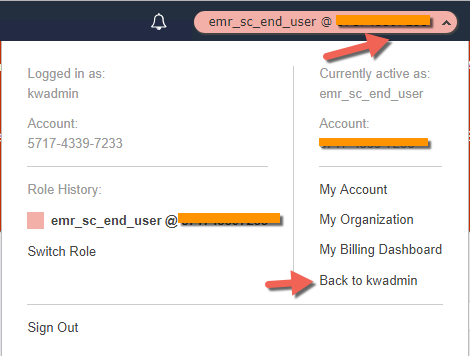
- Switch Back to the emrscadmin (or the user you used to create the initial stack) user
- Open the Cloudformation console
- Choose the stack created by Service Catalog it will have a SC-99999999-pp format
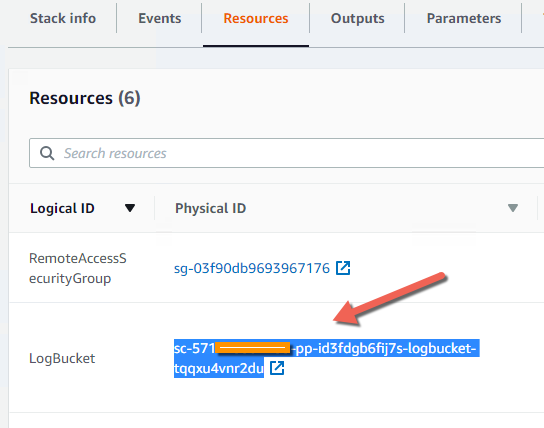
- Expand the Resources section
- Copy the name of the Logging S3 Bucket to the clipboard
- Open the S3 console
- Paste the bucket name into the “Search for Buckets” box
- Select the bucket
- Click Empty
- Paste the bucket name again, into the “are you sure” dialog box and press Confirm
- Open the Cloudformation console
- Choose the stack created by Service Catalog it will have a SC-99999999-pp format
- Choose Delete
- Choose Delete stack Wait for deletion to complete - use refresh if needed * Note if the delete fails Repeat steps 5 - 17
- Choose the EMRALabSetup stack created for this exercise
- Choose Delete
- Choose Delete stack Wait for deletion to complete - use refresh if needed

View the results
Android855
Linux813
MacOS852
OSX799
Windows883
iOS794
Clean up the environment so you don't incur extra costs
Manualy empty the bucket