REMOVAL
NOTE:
The compressor clutch assembly can be serviced with the refrigerant system fully-charged.
NOTE:
Typical A/C compressor and clutch assembly shown in illustrations.
1.
Disconnect and isolate the negative battery cable.
2.
On 2.8L equipped models, remove the air cleaner housing
(refer to 9 - ENGINE/AIR INTAKE SYSTEM/HOUSING-AIR CLEANER - REMOVAL).
3.
On 3.8L equipped models, remove the coolant recovery container
(refer to 7 - COOLING/ENGINE/COOLANT RECOVERY CONTAINER - REMOVAL).
4.
Remove the accessory drive belt
(refer to 7 - COOLING/ACCESSORY DRIVE/BELTS-DRIVE - REMOVAL).
5.
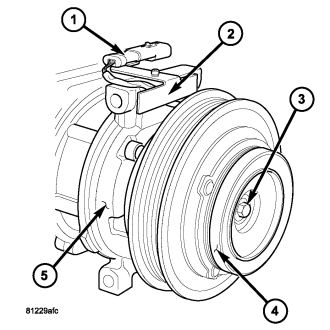
Disconnect the engine wire harness from the compressor clutch field coil connector (1) located on the top of the A/C compressor (5).
6.
Remove the screw that secures the connector bracket (2) to the A/C compressor and position the bracket and wire lead out of the way.
NOTE:
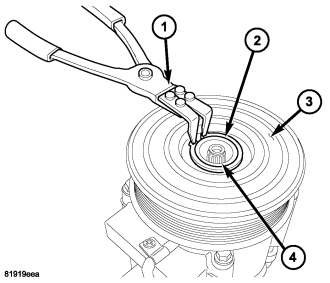
A band-type oil filter wrench or a strap wrench may be used to hold the clutch plate from turning during compressor shaft bolt removal.
7.
Hold the clutch plate (4) from turning and remove the compressor shaft bolt (3).
CAUTION:
Do not pry between the clutch plate and the pulley and bearing assembly to remove the clutch plate from the compressor shaft as this may damage the clutch plate.
NOTE:
Use care not to lose any clutch shim(s) during removal of the clutch plate, as they may be reused during the clutch plate installation process.
8.
Tap the clutch plate (2) lightly with a plastic mallet to release it from the splines on the compressor shaft (1) and remove the clutch plate and shim(s) (3).
NOTE:
The pulley and bearing assembly can be removed from the compressor by hand or, if required, with a two jaw puller.
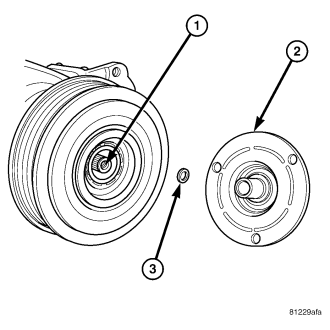
9.
Using Snap Ring Pliers 9764 or equivalent (1), remove the snap ring (2) that secures the pulley and bearing assembly (3) to the front of the A/C compressor (4).
10.
Remove the pulley and bearing assembly from the front of the A/C compressor. If required, install a two jaw puller and turn the puller center-bolt clockwise until the pulley and bearing assembly
is completely removed.
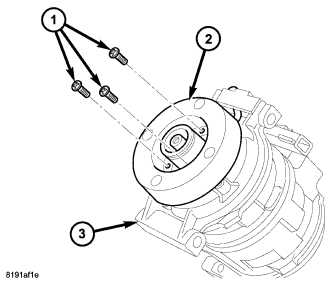
11.
Remove the three screws (1) that secure the compressor clutch field coil (2) to the front of the A/C compressor (3) and remove the field coil.