REMOVAL

NOTE:
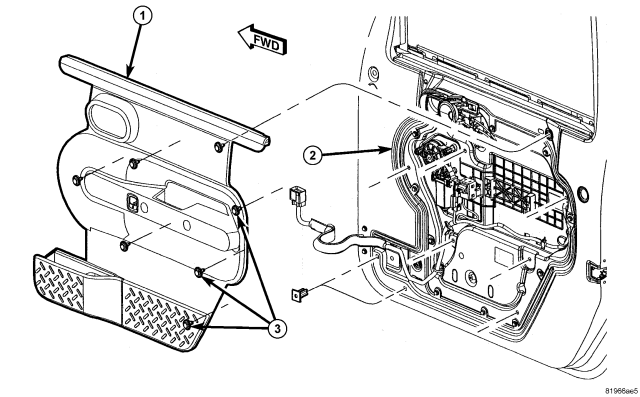
Front door trim shown, rear door similar.
1.
Position the glass into the down position.
2.
Remove the trim panel (1),
(Refer to 23 - BODY/DOORS - REAR/TRIM PANEL - REMOVAL).

3.
If equipped, using a punch or similar tool, carefully remove the glass disconnect hole plugs,
(Refer to 23 - BODY/DOOR - FRONT/CARRIER
PLATE - DESCRIPTION).
4.
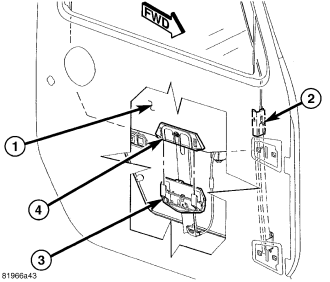
Release the two glass retainer tabs (3) and separate the glass clip (4) from the regulator lift plate and position into the full up position.
5.
Position the glass (1) into the full up position and using tape or equivalent, secure the glass.

6.
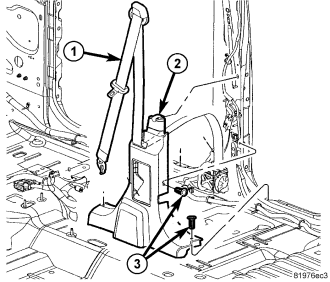
Remove the lower B-pillar trim panel (2),
(Refer to 23 - BODY/INTERIOR/B-PILLAR TRIM - REMOVAL).

7.
Disconnect the door wire harness at the B-pillar and separate the check strap from the hook.
8.
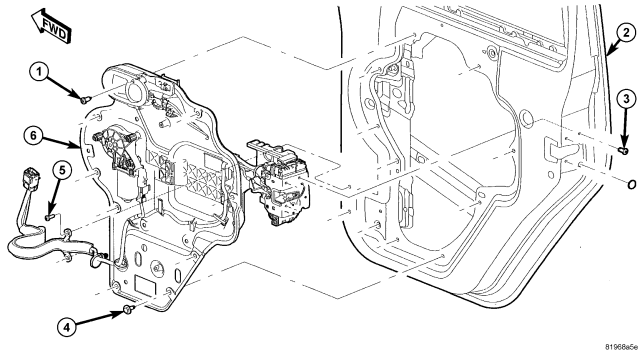
Remove the screws (5) and separate the wire harness push pins from the door structure.
9.
Remove the door handle screw (1).
10.
Remove the latch screws (3).
11.
Separate the foam seal and disconnect the exterior handle rods from the access hole in the carrier plate.
12.
Remove the carrier plate screws (4) and remove the carrier plate assembly (6) from the door.


