ASSEMBLY
NOTE:
Clean and inspect all components. Replace any components which show evidence of excessive wear or scoring.
1.
Lubricate all seals with Mopar ATF +4 prior to installation.
NOTE:
The 4C piston installation aid is only available with procurement of a new 4C piston.
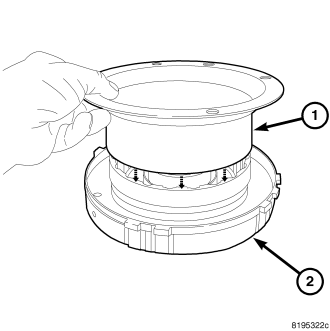
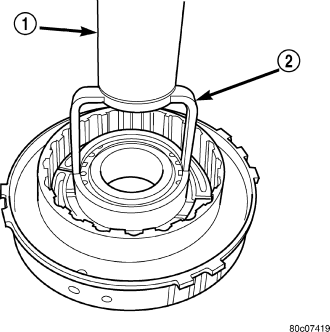
2.
Insert the installation aid (1) into the 4C retainer / bulkhead (2) .
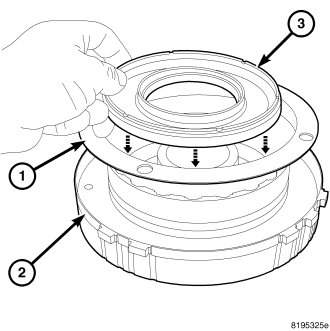
3.
Lubricate the inner and outer 4C piston seals (3) with MOPAR ATF+ 4.
4.
Install the 4C piston (3) into the installation aid (1) .
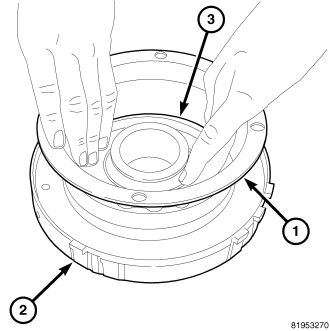
5.
Push the 4C piston (3) down evenly until it is seated in the 4C retainer / bulkhead (2).

6.
Remove the installation aid (1) from the 4C retainer / bulkhead (2).
7.
Position the 4C piston return spring onto the 4C piston.
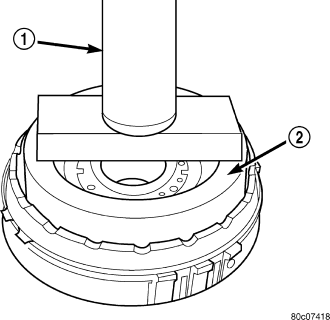
8.
Using Spring Compressor 8250 (2) and a suitable shop press (1), compress the 4C piston return spring and install the snap-ring.
9.
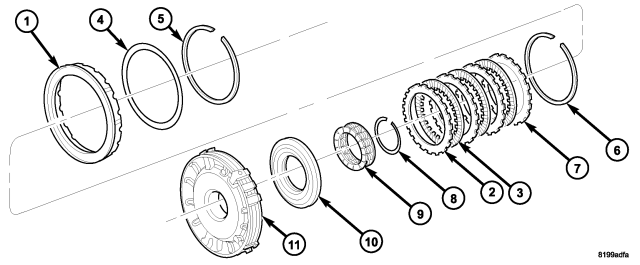
Assemble and install the 4C clutch pack (2, 3) into the retainer/bulkhead (11) with a steel separator plate against the piston.
10.
Install the 4C reaction plate (7) and snap-ring (6) into the retainer/bulkhead (11) . The 4C reaction plate is non-directional.
11.
Measure the 4C clutch clearance. The correct clutch clearance is 0.770-1.390 mm (0.030-0.055 in.). The snap-ring (6) is selectable. Install the chosen snap-ring and re-measure to verify the selection.
12.
Install the 2C piston (1) into the retainer/bulkhead (11).
13.
Position the 2C Belleville spring (5) onto the 2C piston (2).
14.
Position the 2C Belleville spring snap-ring (6) onto the 2C Belleville spring (5).
15.
Using Spring Compressor 8249 (2) and a suitable shop press (1), compress the Belleville spring until the snap-ring is engaged with the snap-ring groove in the retainer/bulkhead.