INSTALLATION
PISTON PIN INSTALLATION

1.
Secure connecting rod (7) in soft jawed vice.
2.
Lubricate piston pin (1) and piston (2) with clean engine oil.
3.
Position piston (2) on connecting rod (7).
CAUTION:
Ensure arrow on piston crown and the bearing cap numbers on the connecting rod are on the opposite side.
4.
Install piston pin (1).
5.
Install snap ring (3) in piston (2) to retain piston pin (1).
6.
Remove connecting rod (7) from vice.
PISTON RINGS - INSTALLATION
1.
Install rings on the pistons using a suitable ring expander .
2.
Top compression ring is tapered and chromium plated. The second ring is of the scraper type and must be installed with scraping edge facing bottom of the piston . The third is an oil control ring.
Ring gaps must be positioned, before inserting piston into the liners, as follows .
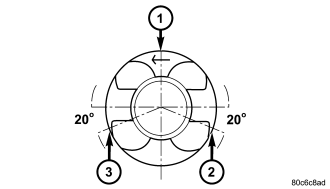
3.
Top ring gap must be positioned at the #3 position (looking at the piston crown from above) .
4.
Second piston ring gap should be positioned at the #1 position .
5.
Oil control ring gap should be positioned at the #2 position .
6.
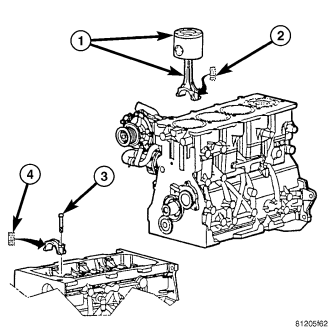
When assembling pistons check that components are installed in the same position as before disassembly, determined by the numbers stamped on the crown of individual pistons. Engine cylinders are
numbered starting from gear train end of the engine. Face arrow on top of piston toward front of engine. Therefore, the numbers stamped on connecting rod big end should face toward the injection
pump side of engine. To insert piston into cylinder use a ring compressor as shown in .
INSTALLATION
1.
Before installing pistons, and connecting rod assemblies into the bore, be sure that compression ring gaps are staggered so that neither is in line with oil ring rail gap .
2.
Before installing the ring compressor, make sure the oil ring expander ends are butted together .
3.
Immerse the piston head and rings in clean engine oil, slide the piston ring compressor, over the piston and tighten . Ensure position
of rings does not change during this operation.
4.
Face arrow on piston towards front of engine.
CAUTION:
Care must be taken not to nick crankshaft journal when installing pistons.
5.
Rotate crankshaft so that the connecting rod journal is on the center of the cylinder bore. Insert rod and piston into cylinder bore and guide rod over the crankshaft journal .
6.
Guide the piston down in cylinder bore, using a hammer handle. At the same time, guide connecting rod into position on connecting rod journal.
7.
Install connecting rod caps . Install rod bolts and torque to 10Nm (88 lbs. in.). Torque bolts the next stage to 30Nm (22 ft.lb.)
plus 60 degrees . Then with a torque wrench set at torque to 88Nm (65 ft.lb), make a tightening check.
8.
Install cylinder head
(Refer to 9 - ENGINE/CYLINDER HEAD - INSTALLATION).
9.
Install balance shaft assembly
(Refer to 9 - ENGINE/VALVE TIMING/BALANCE SHAFT - INSTALLATION).
10.
Install oil pump pickup tube
(Refer to 9 - ENGINE/LUBRICATION/OIL PUMP - INSTALLATION).
11.
Install oil pan
(Refer to 9 - ENGINE/LUBRICATION/OIL PAN - INSTALLATION).
12.
Connect negative battery cable.