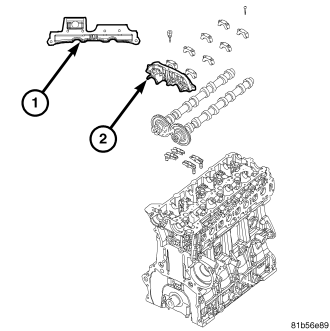
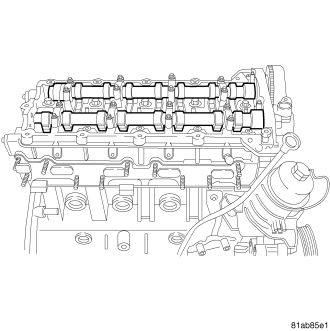
INSTALLATION - CAMSHAFTS
1.
Lubricate the camshaft journals with Mopar Engine Oil Supplement, or equivalent.
2.
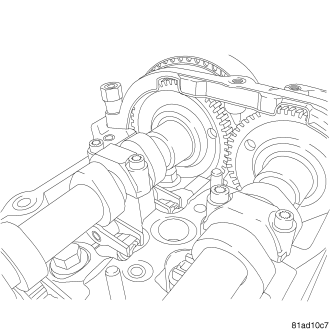
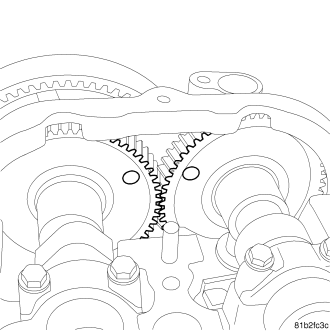
Make sure that the timing marks on the back side of the camshafts are horizontal and facing each other.
3.
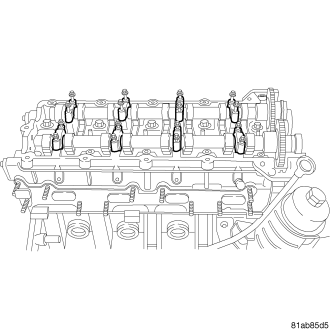
Carefully install camshafts onto the camshaft journals.
NOTE:
The dots on the back of the camshaft gears are for initial timing only. These dots are for timing the camshafts to each other. To correctly set engine timing, the camshafts
must be set to 90 degrees ATDC. The camshaft locking tool is used to correctly set the camshafts to their proper location.
4.
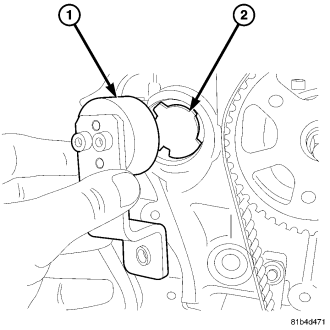
Rotate the camshafts so that the camshaft locking tool fits into place.
5.
Install the camshaft locking tool.
6.
When the camshaft locking tool is bolted in place, the camshafts are locked at 90 degrees ATDC.

7.
Install the intake camshaft oil seal (2).
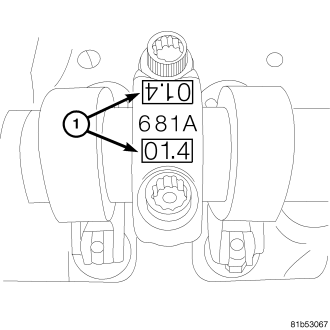
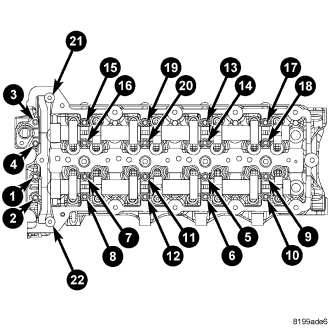
The camshaft caps have several markings. The die identification number (1) is used during manufacturing, and is not necessary for assembly.
The progressive part number (1) is printed on the intake side of the cylinder head. The last 2 digits are the same as the number on the camshaft caps.
the last two digits of the progressive part number (1) are printed on the camshaft caps and will match the last two digits of the number on the side of the cylinder head. These numbers are
stamped after the machining process and match the camshaft caps to the cylinder head.
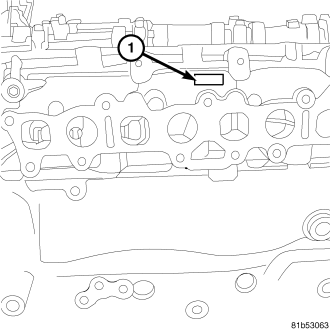
The camshaft cap locations are marked on the cylinder head near each camshaft cap. The exhaust side (1) are marked with a number and the letter “S”. The intake side (2) is marked
with a number and the letter “A”.
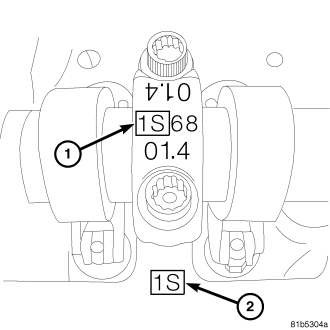
The camshaft cap must be aligned with the mark (1) aligned in the same direction as the cylinder head mark (2). In the illustration, the camshaft cap is the first cylinder (indicated by the
1) on the exhaust side of the cylinder head (indicated by the S).
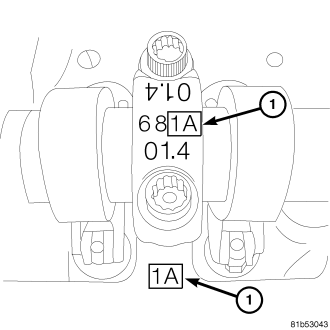
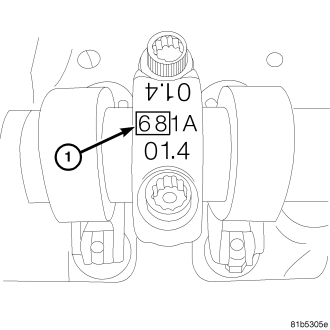
The first cylinder on the intake side is marked with the code 1A. Each camshaft cap location is marked in this manner on both the camshaft cap and cylinder head. It is critical that all of
the camshaft caps are returned to their correct locations.
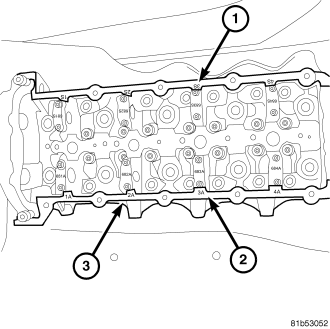
8.
Use a thin bead of Loctite 510 to the front camshaft cap (2) in the location illustrated (1).
9.
Loosely install the camshaft bolts finger tight.
NOTE:
When the camshaft caps are removed, always replace the camshaft cap bolts.
10.
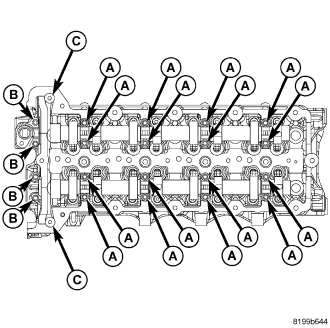
The camshaft bolts have 3 different bolt sizes.
-
Bolts A are M6 35
-
Bolts B are M6 45
-
Bolts C are M6 stud bolts.
11.
Put a thin bead of silicone on the front camshaft cap (the cap that are secured by bolts “b”).
12.
Following the illustrated pattern, torque the camshaft cap bolts to 11 Nm (98 lbs. in.).

13.
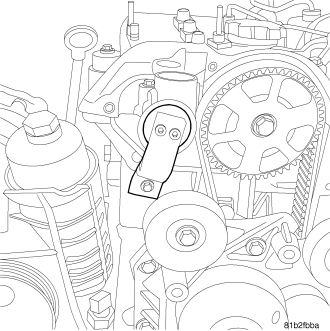
Make sure the crankshaft locking tool is in place.
14.
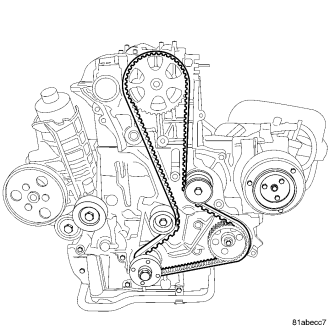
Install the timing belt.
(Refer to 9 - ENGINE/VALVE TIMING/TMNG BELT/CHAIN TENSIONER&PULLEY - INSTALLATION)
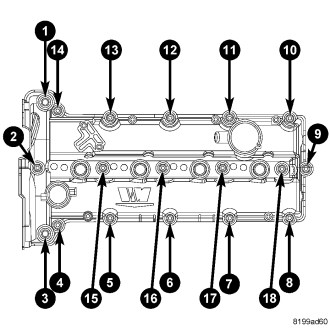
15.
Install the cylinder head cover.
(Refer to 9 - ENGINE/CYLINDER HEAD/CYLINDER HEAD COVER(S) - INSTALLATION)
CHECKING CAMSHAFT ENDPLAY
1.
After camshafts are properly installed in cylinder head cover check end play of camshafts with a dial indicator. The end play should be between 0.10 mm - 0.55 mm .
NOTE:
If the camshaft endplay is not within specification, replace the cylinder head.
2.
Measure the camshaft end play with a dial indicator. The end play should be between 0.15 mm 0.35 mm (0.006 in — 0.0138 in.).