REMOVAL
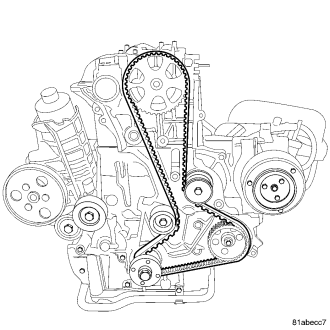
CAUTION:
BEFORE REMOVING THE TIMING BELT, THE ENGINE MUST BE PLACED AT 90 degrees AFTER TDC. FAILURE TO DO SO MAY RESULT IN VALVE AND/OR PISTON DAMAGE DURING ASSEMBLY.
1.
Disconnect negative battery cable.
2.
Remove engine cover
(Refer to 9 - ENGINE COVER - REMOVAL) .
3.
Remove cooling fan and fan drive viscous clutch assembly
(Refer to 7 - COOLING/ENGINE/FAN DRIVE VISCOUS CLUTCH - REMOVAL) .
4.
Remove accessory drive belt
(Refer to 7 - COOLING/ACCESSORY DRIVE/DRIVE BELTS - REMOVAL) .
5.
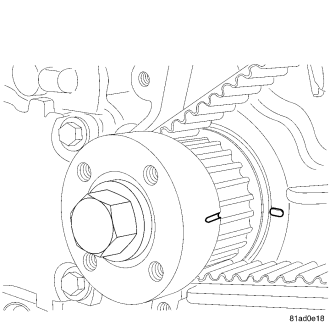
Bring piston #1 to TDC, turn crankshaft until the mark on the crankshaft lines up with the mark on the front cover.
6.
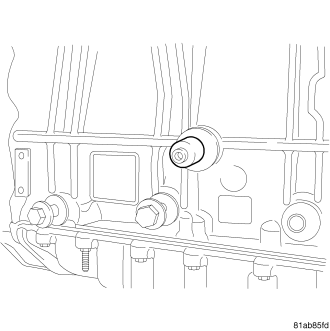
Install the 90 degrees alignment pin into the crankcase threaded hole on the right side of the engine to lock the crankcase.
NOTE:
The crankshaft locking tool threads into the block, and then the bolt threads through the crankshaft locking tool and into the crankshaft. If the bolt does not thread into
the crankshaft, the crankshaft is not in the correct location.
7.
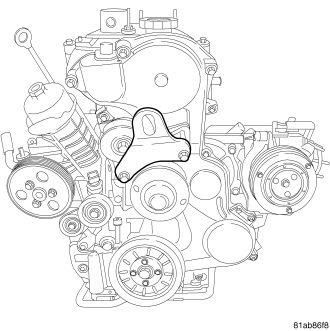
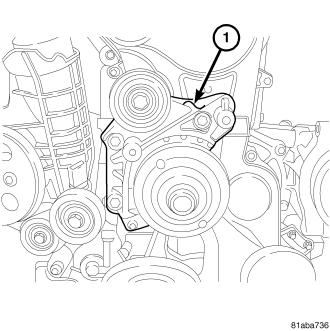
Remove the front engine lifting bracket.
8.
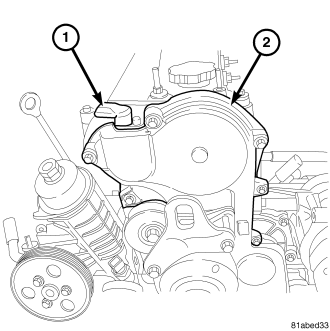
Remove the idler pulley bracket.
9.
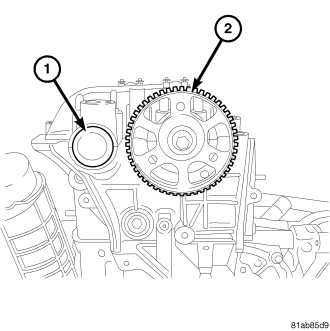
Disconnect the CMP sensor (1).
10.
Remove the upper front cover (2).
11.
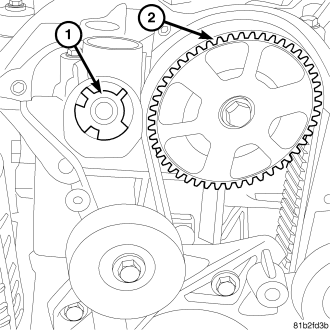
Remove the exhaust camshaft oil seal.
12.
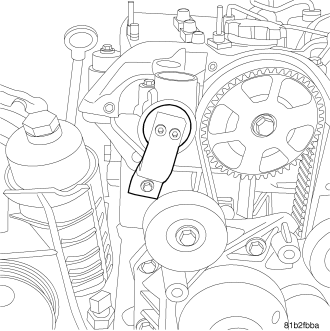
Install the camshaft locking tool.

13.
Loosen the timing chain tensioner and remove the timing belt.
14.
Remove the camshaft timing sprocket.
15.
Remove the cylinder head cover.
(Refer to 9 - ENGINE/CYLINDER HEAD/CYLINDER HEAD COVER(S) - REMOVAL)
16.
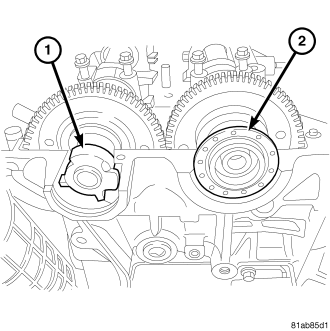
Install the camshaft timing tool on the exhaust camshaft (1).
17.
Remove the intake camshaft oil seal (2).


