INSTALLATION - UPPER INTAKE MANIFOLD
1.
Remove covering on lower intake manifold and clean surfaces.
2.
Inspect manifold gasket condition. Gaskets can be re-used, if not damaged. Position new gasket in seal channel and press lightly in-place. Repeat procedure for each gasket position.
3.
Position upper manifold on lower manifold.
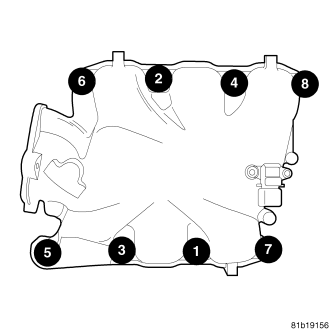
4.
Apply Mopar Lock & Seal Adhesive (Medium Strength Threadlocker) to each upper intake manifold bolt. Install and tighten bolts to 12 Nm (105 in. lbs.) using torque sequence.
CAUTION:
The special screws used for the composite manifold attached components must be installed slowly using hand tools only. This requirement is to prevent the melting of material
that causes stripped threads. If threads become stripped, an oversize repair screw is available.
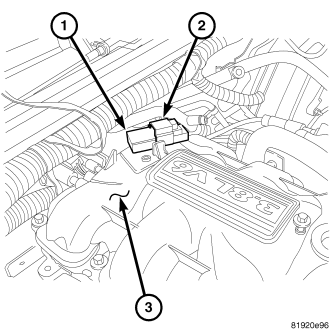
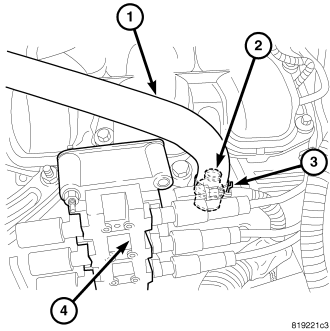
5.
Install the MAP sensor (1), and torque fasteners to 1.7 Nm (15 in. lbs.).
6.
Connect the MAP sensor electrical connector (2).
CAUTION:
The special screws used for attaching the EGR tube to the manifold must be installed slowly using hand tools only. This requirement is to prevent the melting of material
that causes stripped threads. If threads become stripped, an oversize repair screw is available.
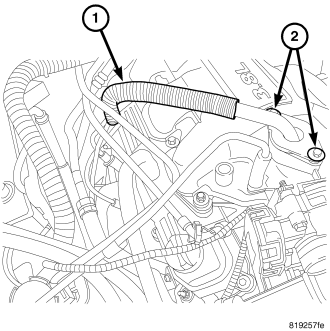
7.
Install the EGR tube (1).
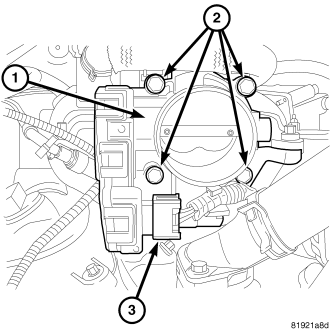
8.
Connect the throttle (ETC) (3) connector to throttle body
9.
Connect the EVAP hose to the throttle body.
10.
Connect the wiring connectors to the throttle position sensor (TPS) and idle air control (IAC) motor.
11.
Connect the PCV hose (1).
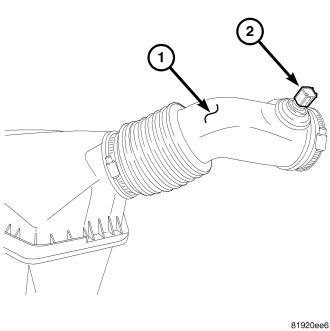
12.
Install air cleaner and air inlet hose assembly (1).
13.
Connect the inlet air temperature (IAT) sensor electrical connector (2).
14.
Connect battery negative cable.