INSTALLATION

1.
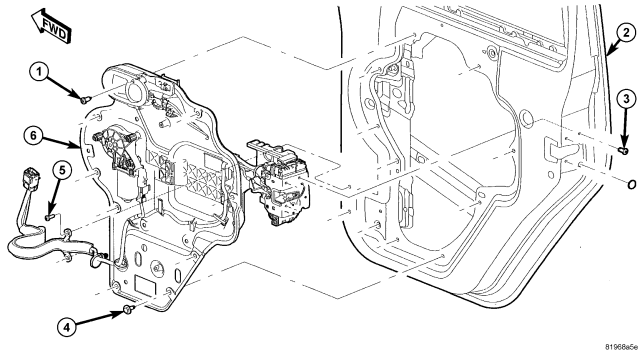
Place the latch assembly into the door opening and install the carrier plate (6) onto the door.
2.
Install the latch screws (3) and tighten to 8 Nm (71 in. lbs.) top screws first.
3.
Install the eight carrier plate screws (4) and tighten to 10 Nm (90 in. lbs.).
4.
Install the inside door handle screw (1) and tighten to 8.5 Nm (75 in. lbs.).
5.
Connect the exterior handle latch rods.
6.
Replace the foam sealer over the access hole.
7.
Install the wire harness onto the door and install the screws (5).
8.
Connect the wire harness electrical connector at the B-pillar.

NOTE:
Front door shown, rear door similar.
9.
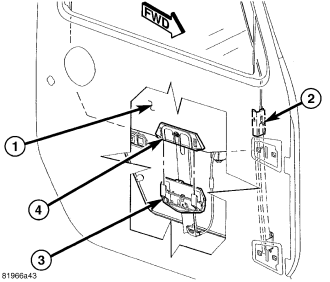
Slowly lower the glass (1) all the way down into the regulator lift plate (3) and seat the glass clip (4) fully until a snap sound is heard.
10.
Seal the glass disconnect holes with a suitable foam tape or equivalent.

NOTE:
Front door shown, rear door similar.
11.
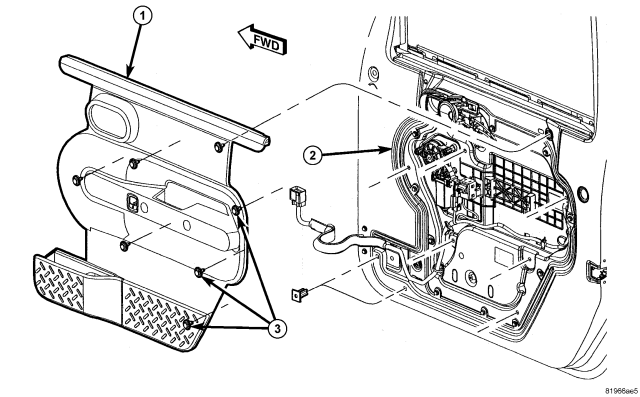
Install the door trim panel (1),
(Refer to 23 - BODY/DOORS - REAR/TRIM PANEL - INSTALLATION).

12.
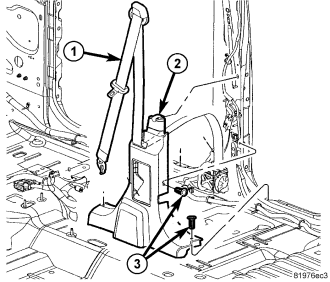
Install the lower B-pillar trim (2),
(Refer to 23 - BODY/INTERIOR/B-PILLAR TRIM - INSTALLATION).


