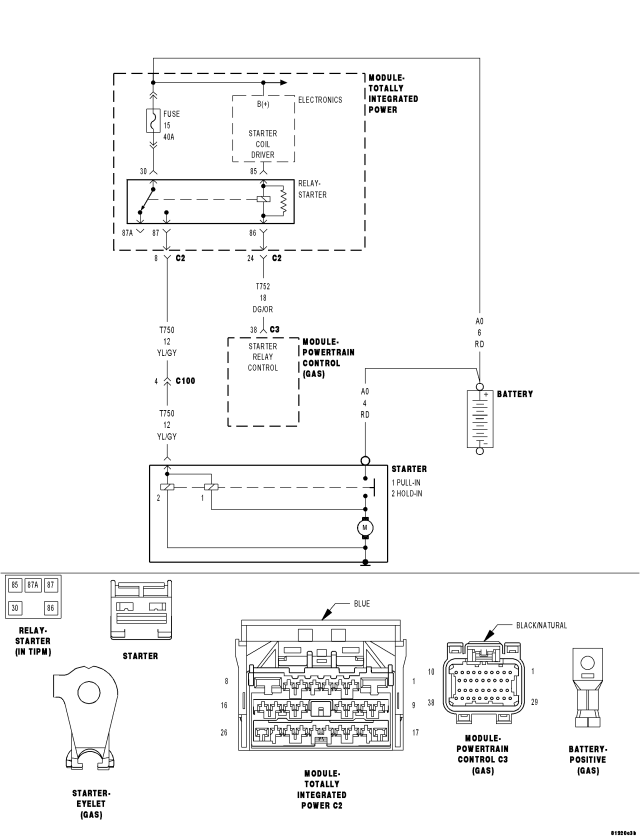
For a complete wiring diagram Refer to Section 8W.
|
Possible Causes
|
|
MECHANICAL CONDITION |
|
FUSED B+ CIRCUITS OPEN |
|
BATTERY CIRCUIT RESISTANCE TOO HIGH |
|
(T752) STARTER RELAY CONTROL CIRCUIT SHORTED TO GROUND |
|
(T752) STARTER RELAY CONTROL CIRCUIT OPEN |
|
(T750) STARTER RELAY OUTPUT CIRCUIT SHORTED TO GROUND |
|
(T750) STARTER RELAY OUTPUT CIRCUIT OPEN |
|
TRANSMISSION RANGE SENSOR |
|
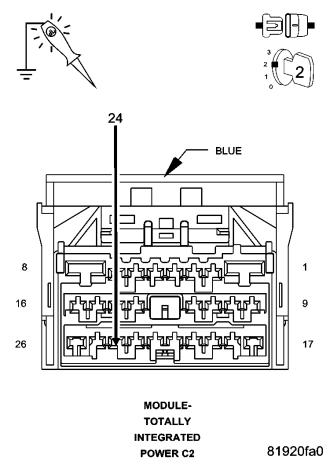
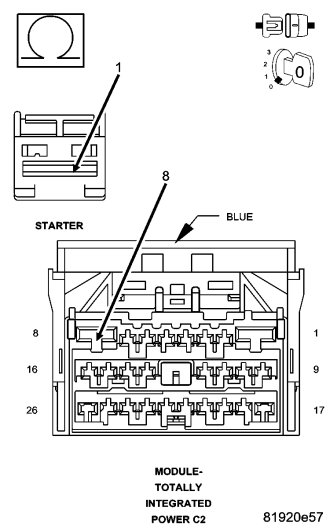
TIPM |
|
PCM |
|
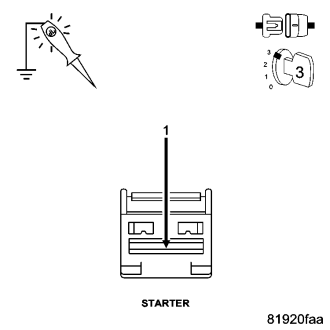
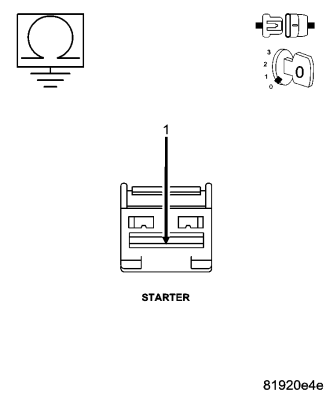
STARTER |
NOTE: Verify the battery is fully charged and capable of passing a load test before continuing.
WARNING: Make sure the battery is disconnected, then wait two minutes before proceeding. Failure to do so may result in personal injury or possible death.
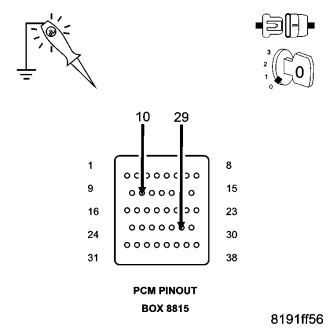
CAUTION: Do not probe the PCM harness connectors. Probing the PCM harness connectors will damage the PCM terminals resulting in poor terminal to pin connection. Install Miller Special Tool #8815 to perform diagnosis.
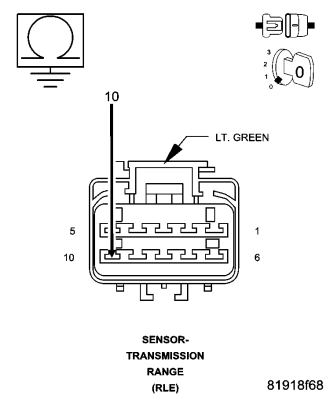
NOTE: The circuit is grounded in Park and Neutral and open in the other positions.
CAUTION: The Parking Brake must be on and the Transmission must be in park for a vehicle equipped with an automatic transmission.
WARNING: When the engine is operating, do not stand in direct line with the fan. Do not put your hands near the pulleys, belts, or fan. Do not wear loose clothing. Failure to follow these instructions can result in personal injury or death.
NOTE: The Stater Solenoid harness connector must remain disconnected at this time.
WARNING: When the engine is operating, do not stand in direct line with the fan. Do not put your hands near the pulleys, belts, or fan. Do not wear loose clothing. Failure to follow these instructions can result in personal injury or death.
NOTE: Before continuing, check the TIPM harness connector terminals for corrosion, damage, or terminal push out. Repair as necessary.