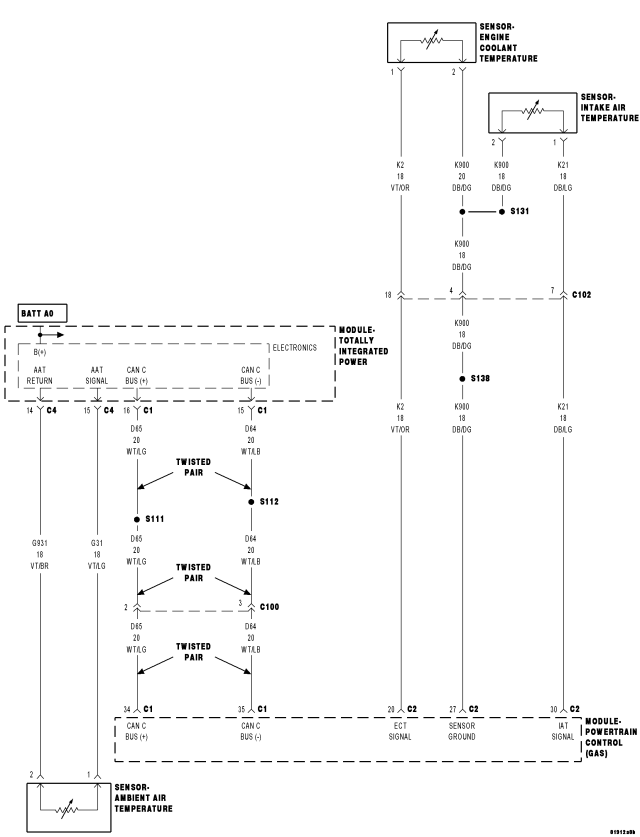
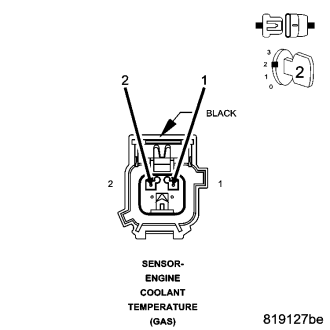
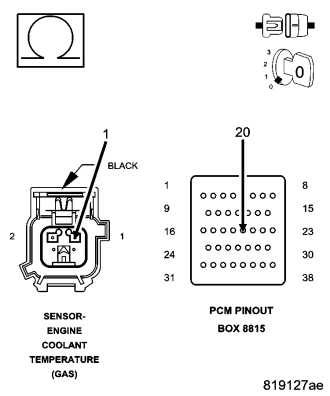
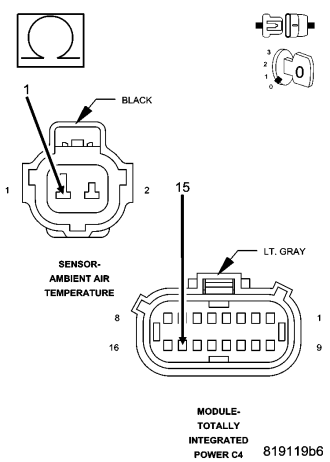
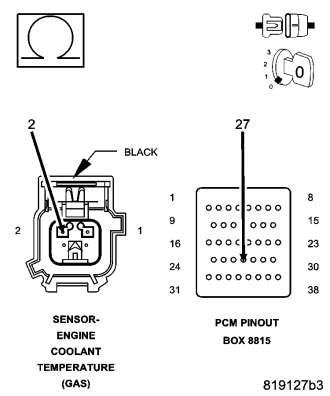
For a complete wiring diagram Refer to Section 8W.
The PCM predicts what the engine coolant temperature should be, based on the engine coolant temperature at start-up, ambient temperature and how the vehicle is subsequently driven. The predicted engine coolant temperature is compared to the Engine Coolant Temperature Sensor reading. The error between the two is calculated and integrated with respect to time. When the Thermostat diagnostic runs, the integrated error is compared to a calibrated threshold and pass/fail is determined. Separate pass and fail thresholds are used in order to improve accuracy of the diagnostic.
Engine running.
This diagnostic will fail when the model temperature reaches 91 degrees C (196 degrees F) before the ECT. reaches 80 degrees C (176 degrees F. This monitor only runs after a cold start condition ECT, ACT, AMB are all within 10 degrees C (50 degrees F. of one another. Two Trip Fault. Three good trips to turn off the MIL.
|
Possible Causes
|
|
LOW COOLANT LEVEL |
|
THERMOSTAT OPERATION |
|
SIGNAL CIRCUIT SHORTED TO BATTERY VOLTAGE |
|
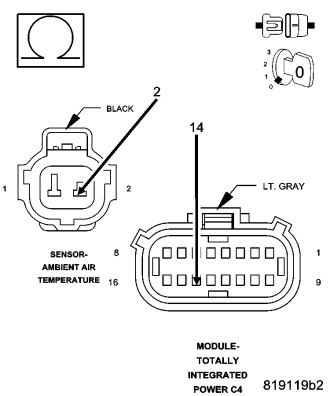
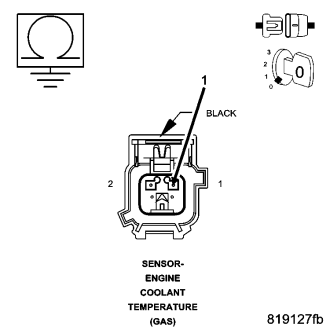
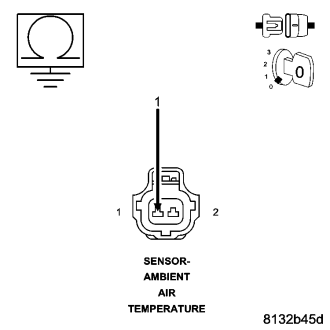
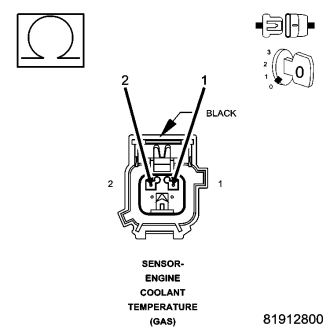
TEMPERATURE SENSOR |
|
SIGNAL CIRCUIT OPEN |
|
SENSOR GROUND CIRCUIT OPEN |
|
SIGNAL CIRCUIT SHORTED TO GROUND |
|
SIGNAL CIRCUIT SHORTED TO THE (K900), (G931) SENSOR GROUND CIRCUIT |
|
OTHER POSSIBLE CAUSES |
|
PCM |
Always perform the Pre-Diagnostic Troubleshooting procedure before proceeding. (Refer to 9 - ENGINE - DIAGNOSIS AND TESTING).
NOTE: If any ECT, AAT, CMP or CKP sensor DTCs have set along with P0128, diagnose them before continuing.
NOTE: Make sure that the Pinion Factor has been programmed correctly into the PCM.
NOTE: Diagnose any CAN - C Communication DTCs before continuing.
NOTE: It may be necessary to drive the vehicle to meet the conditions to set this DTC, try to repeat the conditions in which the fault originally set by reviewing the Freeze Frame data.
NOTE: If an Engine Coolant Temperature (ECT) DTC is set along with this code, diagnose the ECT DTC first.
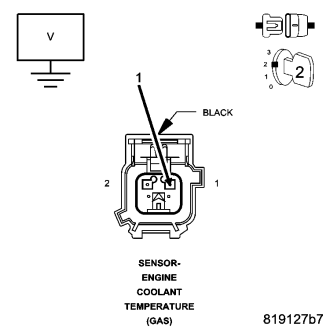
NOTE: Inspect the ECT terminals and related PCM terminals. Make sure the terminals are free from corrosion and damage.
NOTE: The best way to diagnose this DTC is to allow the vehicle to sit overnight outside in order to have a totally cold soaked engine.
NOTE: Extremely cold outside ambient temperatures may have caused this DTC to set.
WARNING: Never open the cooling system when the engine is hot. The system is under pressure. Failure to follow these instructions can result in personal injury including extreme burns, scalding, or death. Allow the engine to cool before opening the cooling system.
NOTE: This test works best if performed on a cold engine (cold soak).
NOTE: If engine coolant temperature is above 82 degrees C (180 degrees F), allow the engine to cool until 65 degrees C (150 degrees F) is reached.
NOTE: As the engine warms up to operating temperature, the actual coolant temperature (thermometer reading) and the scan tool, ECT Temperature value should stay relatively close to each other.
WARNING: Make sure the engine cooling system is cool before removing the pressure cap or any hose. The cooling system is pressurized when hot. Failure to follow these instructions can result in personal injury including extreme burns, scalding, or death.
WARNING: When the engine is operating, do not stand in direct line with the fan. Do not put your hands near the pulleys, belts, or fan. Do not wear loose clothing. Failure to follow these instructions can result in personal injury or death.
CAUTION: Do not probe the PCM harness connectors. Probing the PCM harness connectors will damage the PCM terminals resulting in poor terminal to pin connection. Install Miller Special Tool #8815 to perform diagnosis.
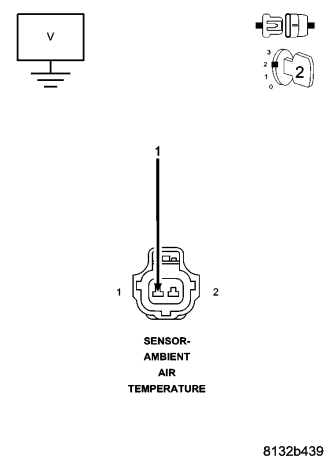
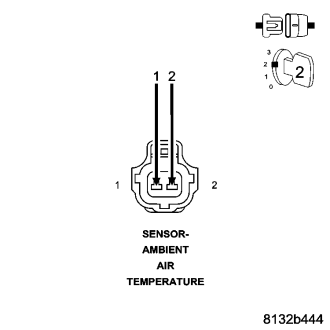
NOTE: Visually inspect both the component and the PCM connectors. Look for damage, partially broken wires and backed out or corroded terminals
NOTE: Disconnect the jumper wire before continuing.
CAUTION: Do not probe the PCM harness connectors. Probing the PCM harness connectors will damage the PCM terminals resulting in poor terminal to pin connection. Install Miller Special Tool #8815 to perform diagnosis.
NOTE: Before continuing, check the PCM harness connector terminals for corrosion, damage, or terminal push out. Repair as necessary.