INSTALLATION
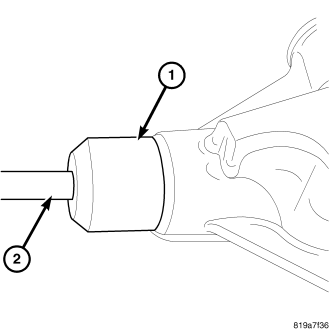
1.
Apply a light coating of gear lubricant on the lip of pinion seal. Install seal with Installer 8681 (1) and Handle C-4171 (2).
2.
Install flange on the pinion shaft with the reference marks aligned.
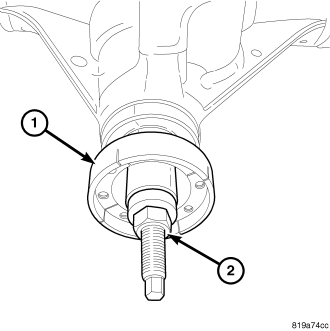
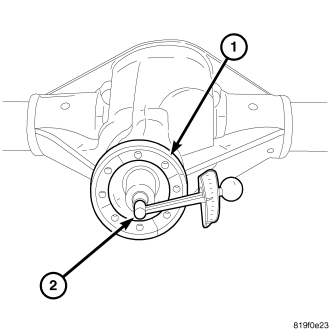
3.
Install flange (1) Installer C-3718 (2) on pinion shaft.
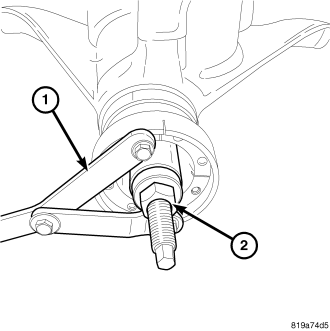
4.
Hold pinion flange with Spanner Wrench 6958 (1) and tighten Installer C-3718 nut (2). Tighten nut to remove all end play.
5.
Install pinion washer and a new nut on the pinion gear.
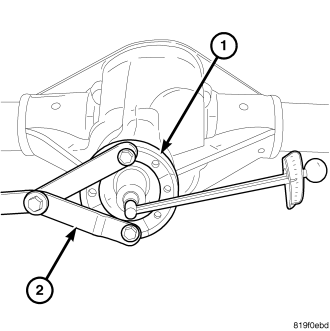
6.
Hold pinion flange (1) with Spanner Wrench 6958 (2) and tighten pinion nut to 271 Nm (200 ft. lbs.).
7.
Measure pinion torque to rotate (1) inch pound torque wrench (2). Pinion torque to rotate is recorded reading plus 0.56 Nm (5 in. lbs.).
8.
If pinion rotating torque is low. Hold pinion flange with Spanner Wrench 6958 and tighten pinion nut in 6.8 Nm (5 ft. lbs.) increments until pinion torque to rotating is achieved.
CAUTION:
If maximum tightening torque of 475 Nm (350 ft. lbs.) is reached before torque to rotate is achieved, the collapsible spacer may have been damaged. Never loosen
pinion gear nut to decrease pinion gear bearing rotating torque and never exceed specified preload torque. Failure to follow these instruction may result in damage.
9.
Install propeller shaft.
10.
Install brake components.