HydraCAD™ for Revit – Import from the Latest Toolbox

Before the dialog opens:
The tool will ensure that you have the latest posted Toolbox downloaded, saved in the version of Revit you are currently using, and saved in the current units you are working in. If you do not have an internet connection, it will prompt you to select a local copy of the Toolbox to use from your harddrive.
Main Dialog (4 Sections)
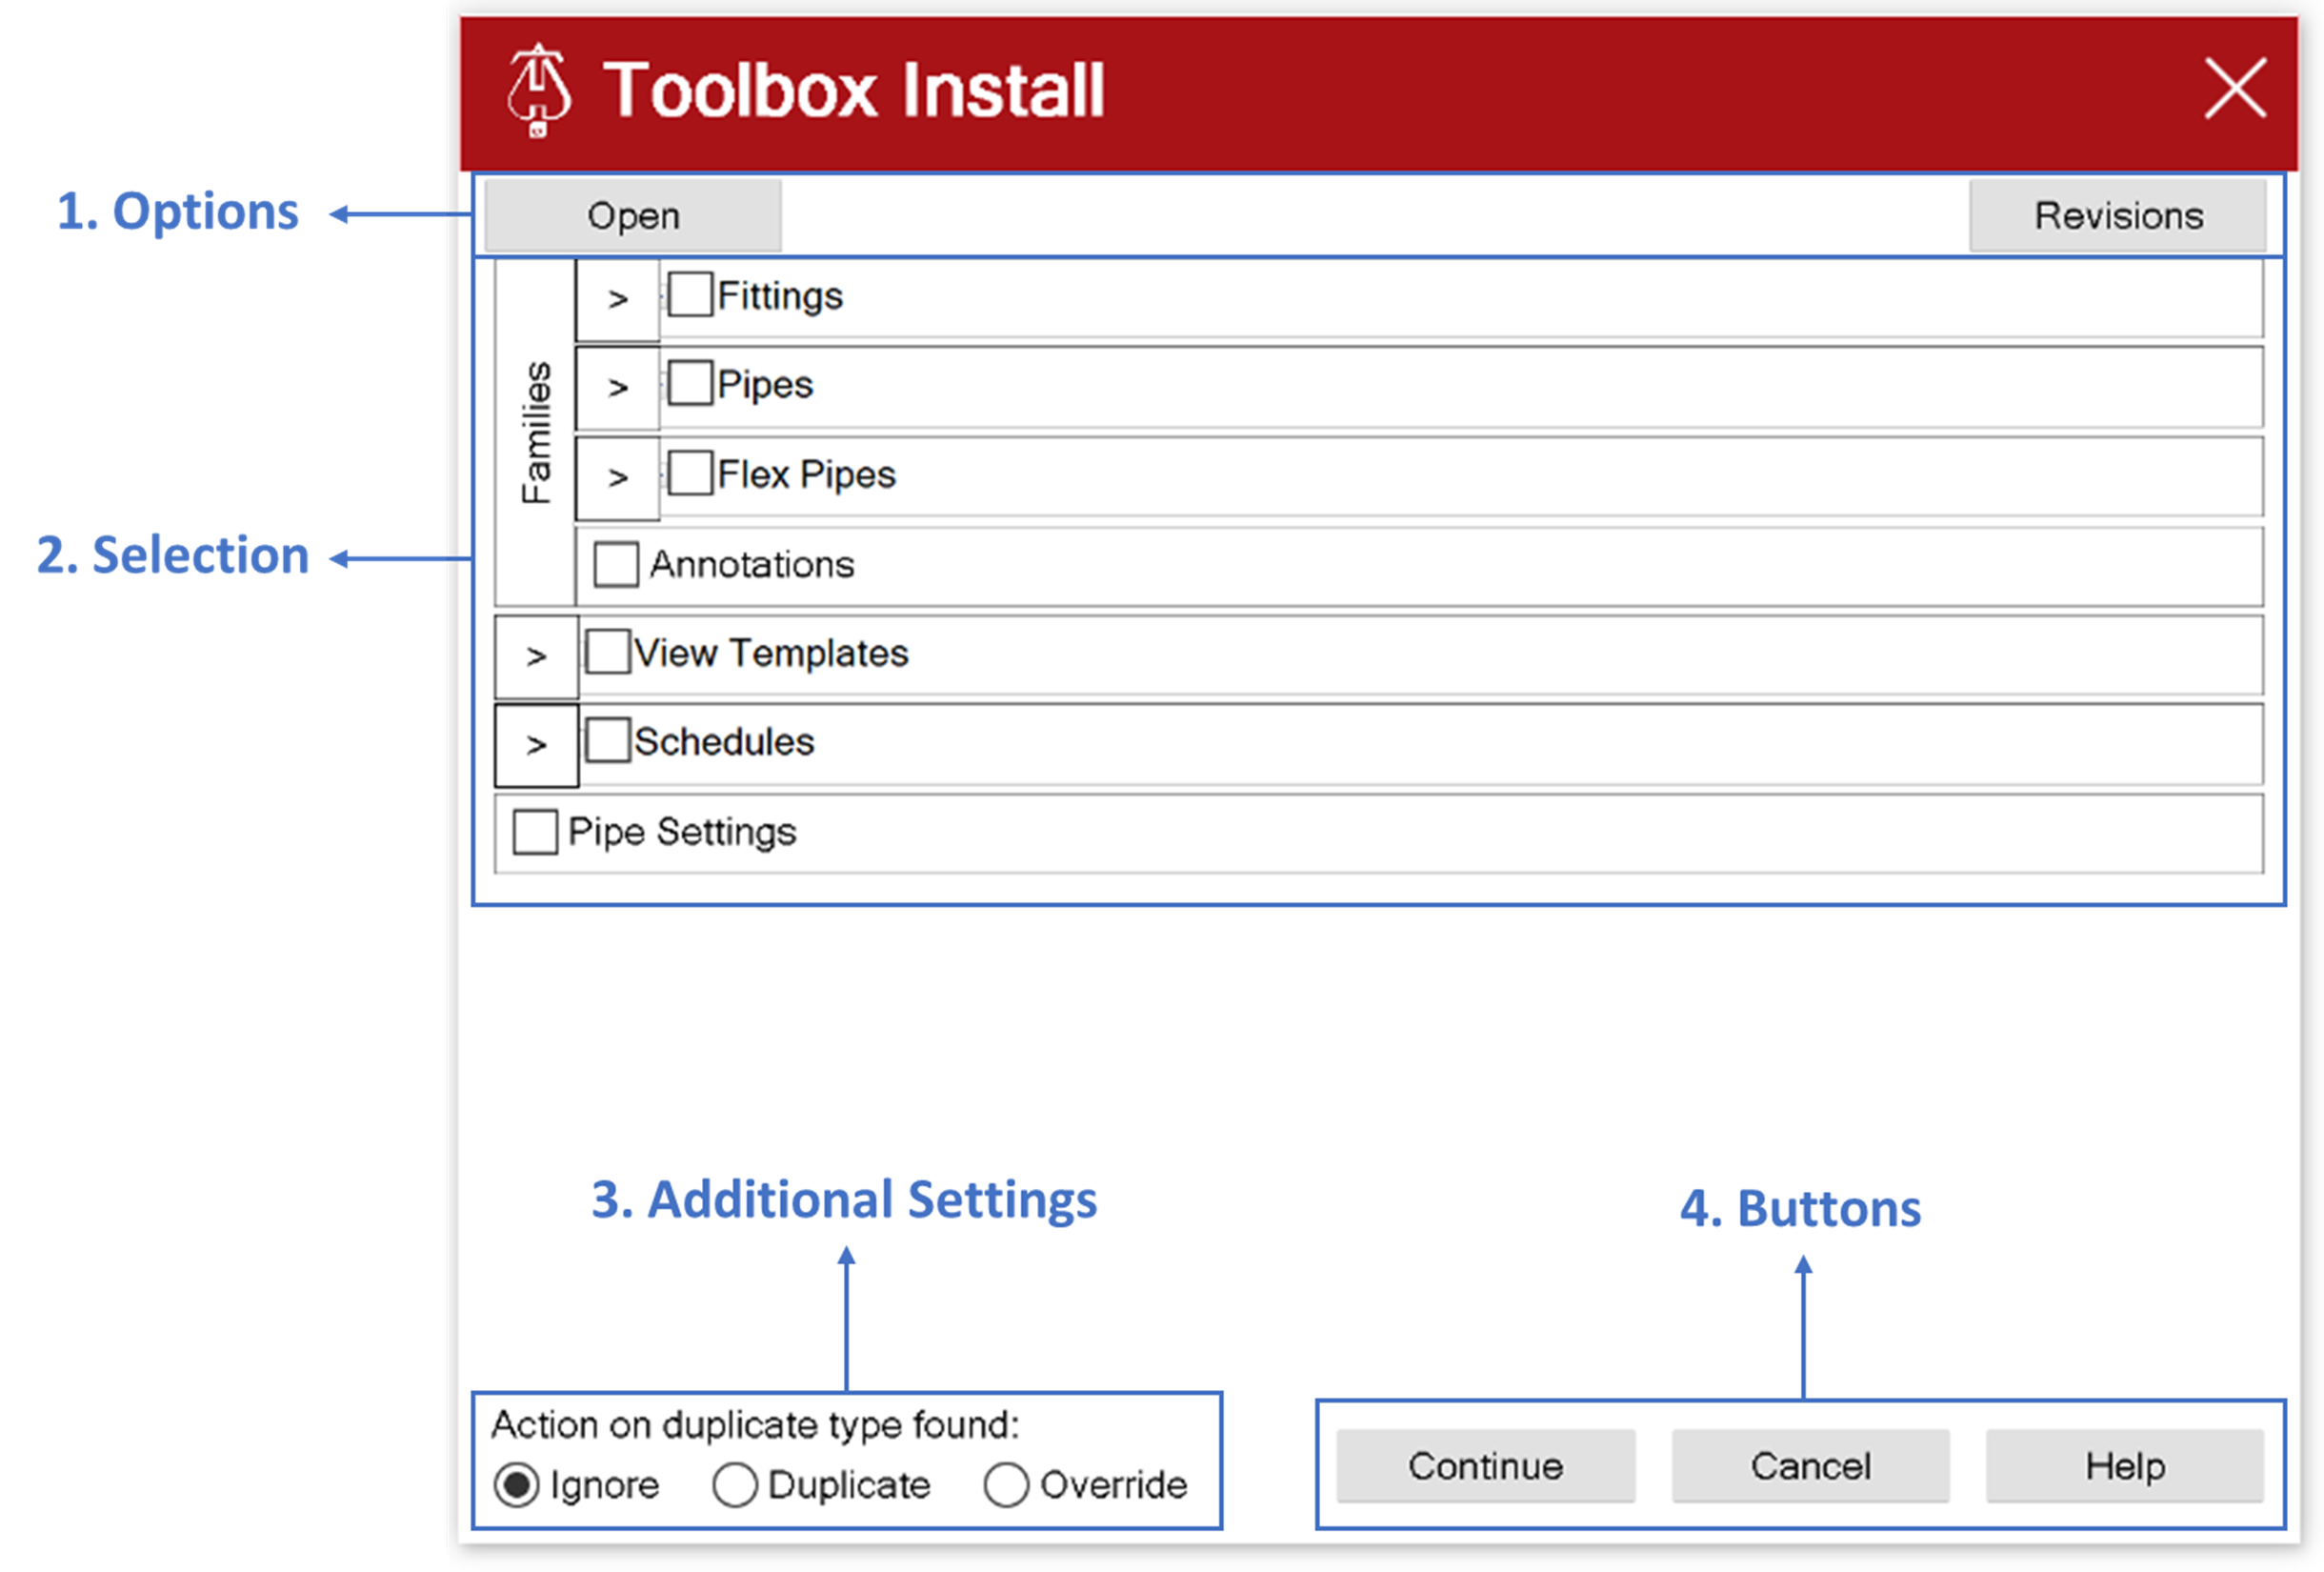
1. Options
· Open:
o When selected, Revit will open the current Toolbox being used by the tool
o The file name of the Toolbox being used by the tool may be displayed next to the Open button
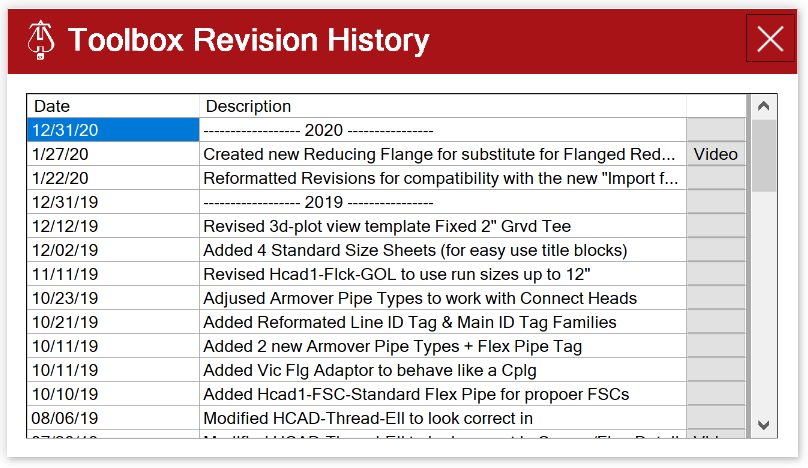
· Revisions:
o When selected, another dialog box (see below) will be displayed showing the date and description of each revision. For some revisions there will be a button called “Video” which provides a link to a video to provide additional guidance or help with using the new tools in the Toolbox.
2. Selection
This area of the dialog allows you to select anywhere from one individual item to everything in the Toolbox to bring into your current project. It includes the ability to bring over Family Objects (Pipe Fittings, Pipe Types, Flex Pipe Types, and/or Annotations) and/or Project Standards (View Templates, Schedules, and/or Pipe Settings)
Example of making a selection:
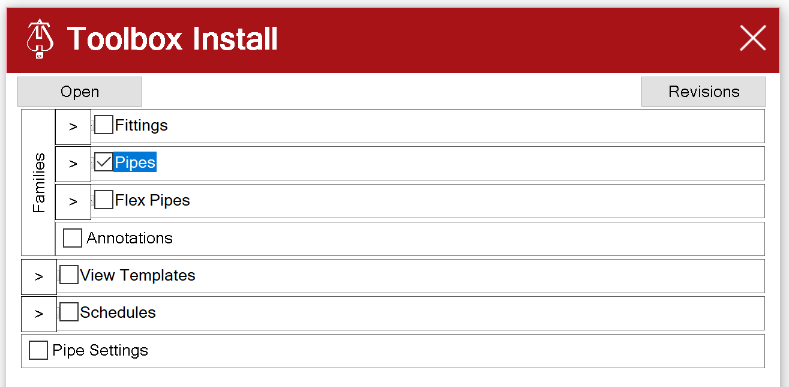
· Example 1: Bring in all Pipe Types
o Simply select the checkbox next to “Pipes”
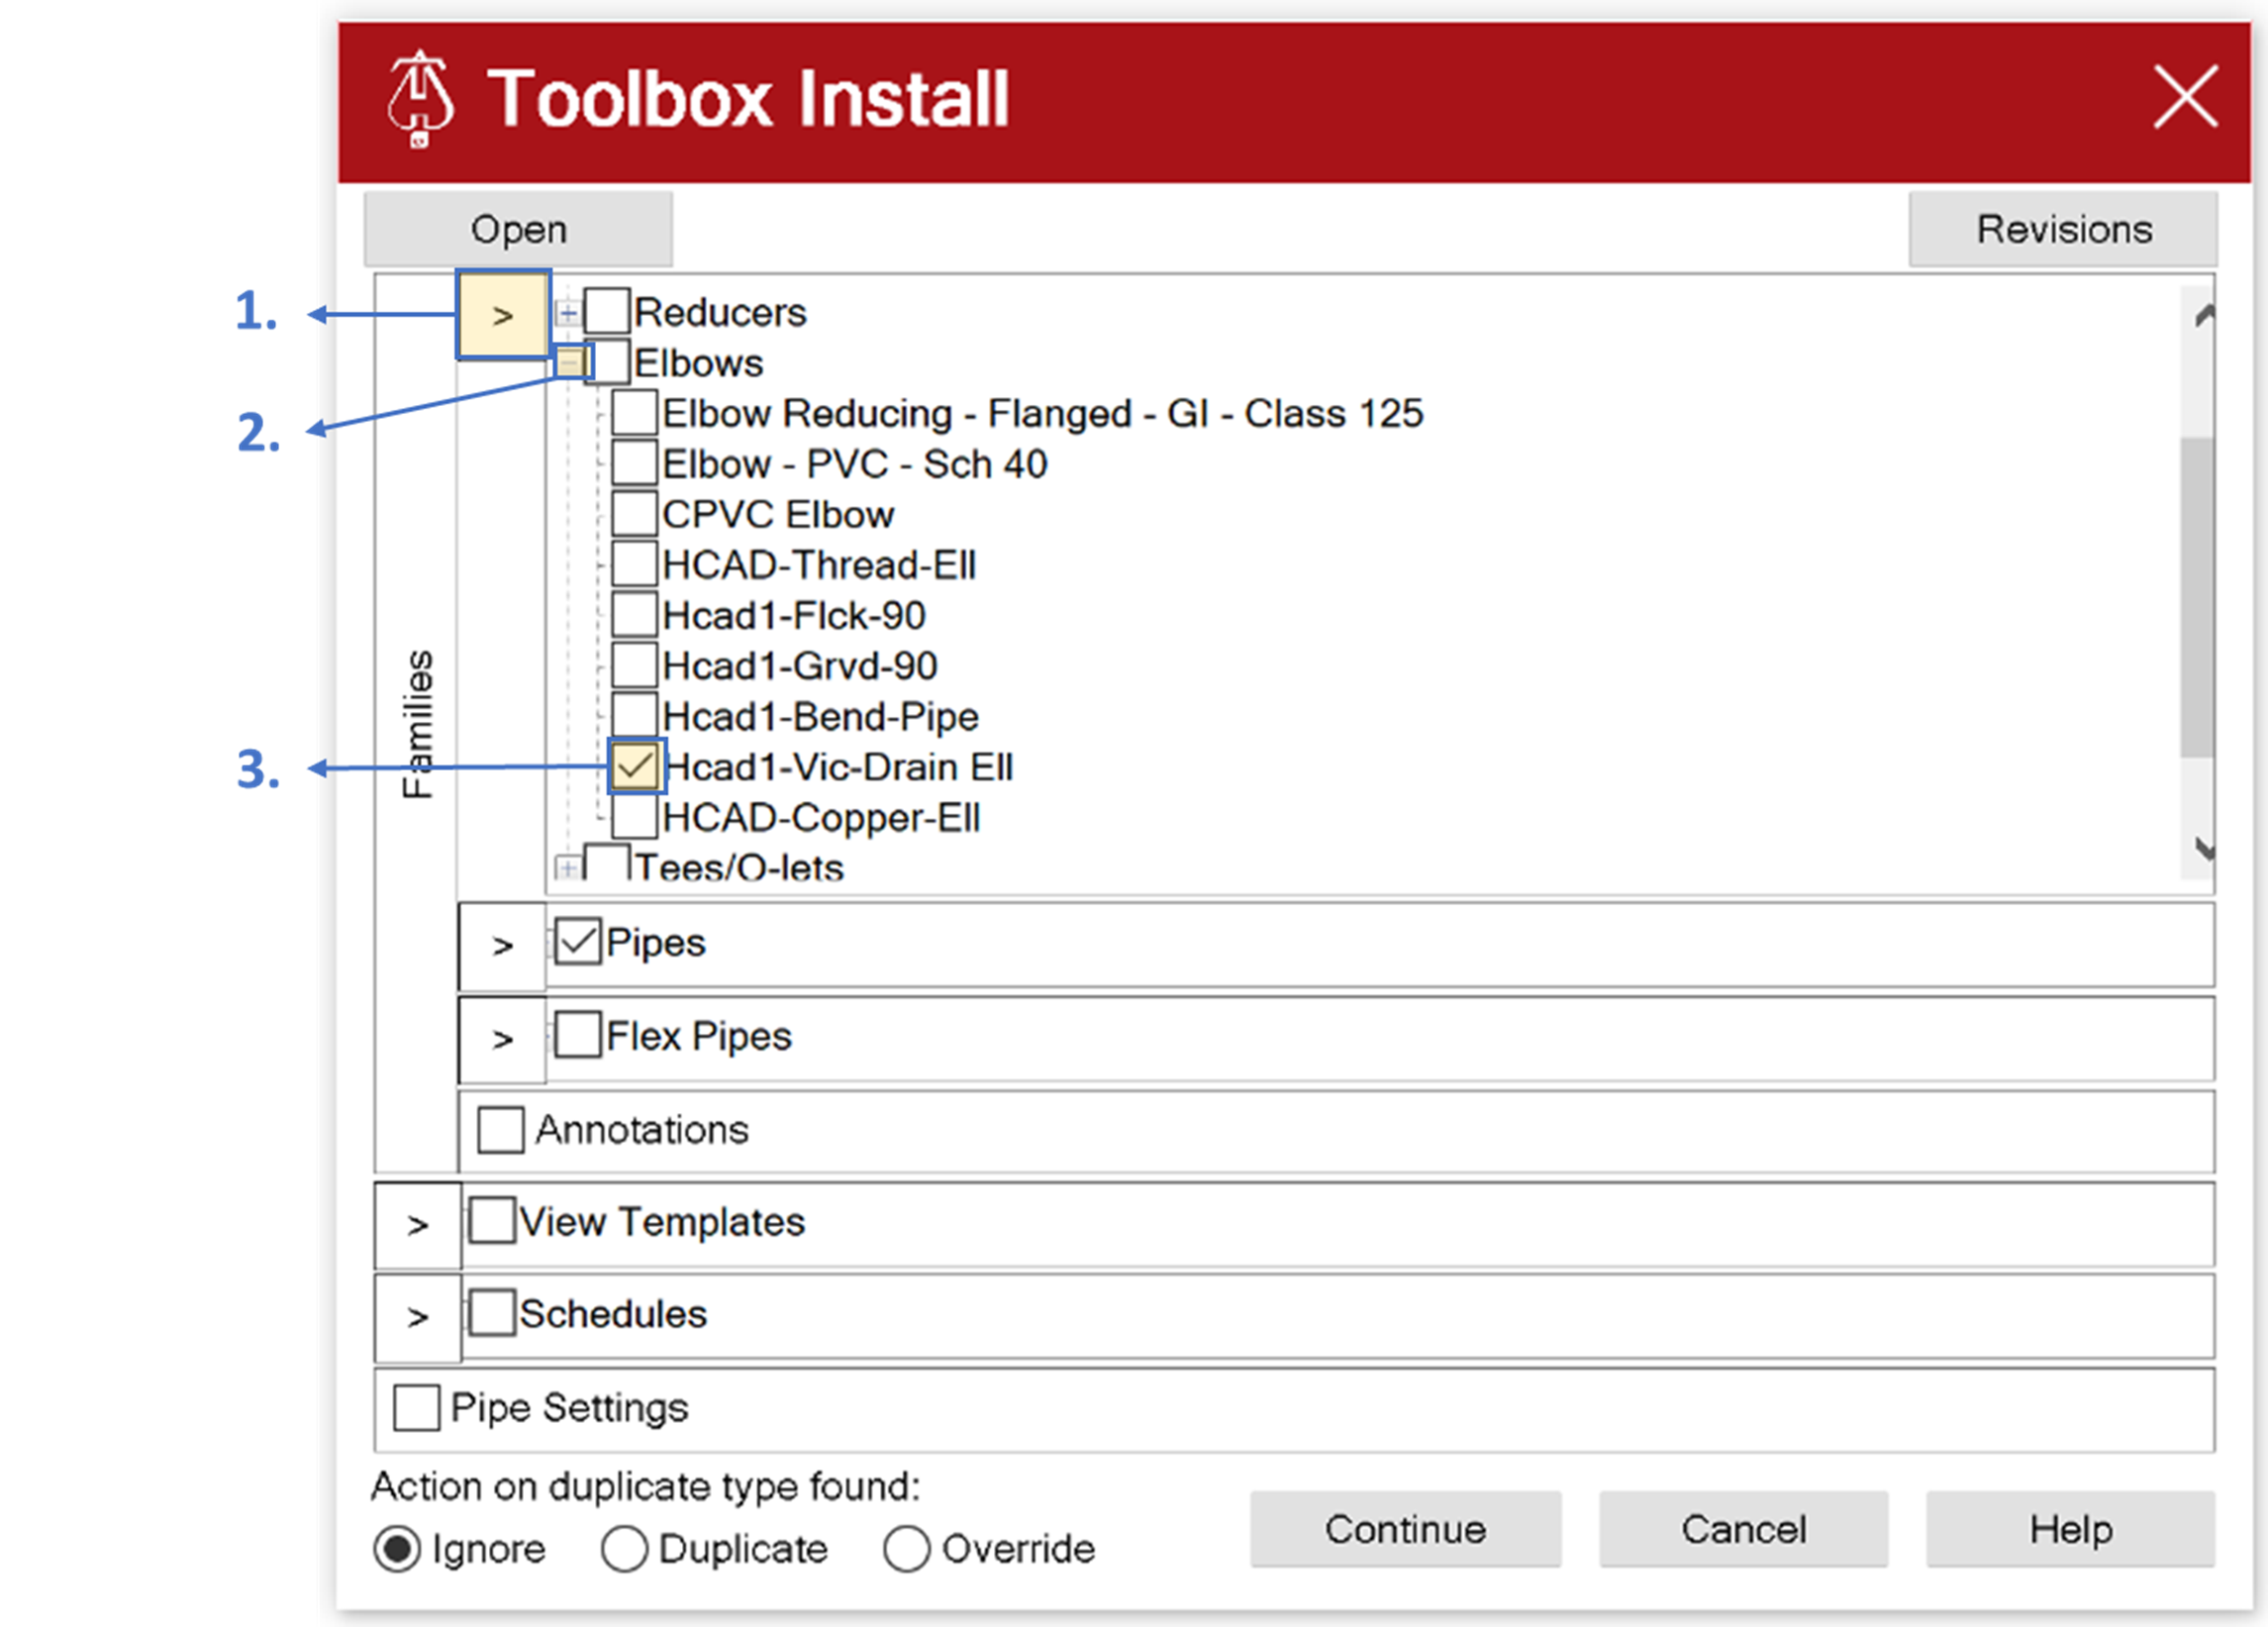
· Example 2: Selecting a specific Fitting (Drain Elbow)
o Step 1: select the arrow to the left of “Fittings”
o Step 2: select the plus sign to the left of “Elbows”
o Step 3: select the checkbox to the left of “Hcad1-Vic-Drain-Ell”
3. Additional Settings
· Ignore: When selected, if an object in the Toolbox has the same name as something in the current project, then that object will not be imported from the Toolbox
· Duplicate: When selected, if an object in the Toolbox has the same name as something in the current project, then a copy of the object will be made, so that there is the original object from the current project, and a new copy of the object from the Toolbox. If there are objects of that type already modeled in the project they will remain the same and need to be changed manually, if you would like them to be the new copy from the Toolbox.
· Override: When selected, if an object in the Toolbox has the same name as something in the current project, then the objects in the current project will be replaced by the objects from the Toolbox. If there are objects of that type already modeled in the project they will automatically be updated to use the Toolbox definition of those objects.
4. Buttons
· Continue: when this button is pushed all checked operations will be executed
· Cancel: when this button is selected the command will cancel and the user will be returned to Revit
· Help: when this button is selected this help document will be displayed in the default web browser