Getting Started with Deep Security for AWS Marketplace
This guide will show you how to get started protecting your Amazon EC2 cloud instances with Deep Security for AWS marketplace.
- Prepare a database.
- Launch a Deep Security for AWS Marketplace instance.
- Modify your AWS Security Group to open required ports on your instances.
- Create a dedicated AWS policy and user account for Deep Security to access your cloud account.
- Import your AWS instances to Deep Security.
- Configure Deep Security to use Agent-initiated communication.
- Deploy Deep Security Agents to your AWS instances.
You can find more detailed version of this information in the
Deep Security 9.5 SP1 Install Guide for Cloud and AWS.
1. Prepare a database
You must prepare a databse before launching the AWS Marketplace version of Deep Security. You can use your own database or you can use the Amazon RDS
Management Console to create a database instance. You can use a Microsoft SQL
RDS or an Oracle RDS. Refer to the Amazon RDS Documentation at
http://aws.amazon.com/documentation/rds/
for instructions.
If you choose to use your own database, Deep Security supports Microsoft SQL Server 2012 or 2008, or Oracle Database 11g or 10g.
Prepare the database before launching Deep Security
You must deploy the database software, create a database instance for Deep Security and create
a user account for Deep Security before you install Deep Security Manager.
2. Launch a Deep Security for AWS Marketplace instance Launch a Deep Security for AWS Marketplace instance
Select an AMI
On the AWS Marketplace, there are two separate Deep Security Manager AMIs, each providing a
different licensing option:
- BYOL: Bring-Your-Own-License (BYOL) is for customers who have already
obtained a license to use Deep Security 9.5 SP1 from another source. If you are using this type
of license, you will need to enter the license string/activation code in the Deep Security
Manager console after it is installed.
- PPU: Pay-Per-Use (PPU) enables customers to pay based on the size of the
AWS instance they are running. With PPU, each EC2 instance type has an associated seat count
limit (the seat count is the number of Deep Security Agents that you can run). You can change
the size of your instance at any time. You can also run more than one instance to increase your
seat count limit. When you install Deep Security Manager on an additional instance, on the
Database tab, select "This Deep Security installation will act as an additional Manager node in
an already-deployed Deep Security installation". This option specifies that each node will use
the same database. Here are the seat count limits for each type of EC2 instance supported for
Deep Security Manager:
- M3 Large (m3.large): Up to 25 Agents
- M3 XL (m3.xlarge): Up to 50 Agents
- M3 2XL (m3.2xlarge): Up to 100 Agents
- C3 4XL (c3.4xlarge): Up to 200 Agents
As you launch or shut down Deep Security Manager nodes, the seat-count usage for the hour is
re-calculated. To check your seat count limit after installing Deep Security Manager, open the
Deep Security Manager console and go to Administration > Licenses.
Deploy your Deep Security Manager Instance
- Go to the Deep Security Manager pre-installer page (https://<IP>:8080),
enter the instance ID, and click Sign In. The Deep Security AMI Configuration page
appears, with a series of tabs.
- License Agreement: On the first tab, review the license agreement. if you agree to the
terms, select I accept the agreement and click Next.
- Database: Select the type of database that you have configured for use
with Deep Security and fill in the required configuration parameters. The installation process
will check for database connectivity and display an error if there is a problem. If you
selected Microsoft SQL Server, you can also edit the SQL Server Advanced Options. Click
Next.
- Address and Ports: Enter the hostname, URL, or IP address of the machine
where Deep Security Manager is being installed. The Manager Address must be either a resolvable
hostname, a fully qualified domain name, or an IP address. If DNS is not available in your
environment, or if some computers are unable to use DNS, a fixed IP address should be used
instead of a hostname. Optionally, change the default communication ports: The "Manager Port"
is the port on which the Manager's browser-based UI is accessible through HTTPS. The
"Heartbeat Port" is the port on which the Manager listens for communication from the Agents.
Click Next.
If your instance has a public IP and DNS entry, it is recommended that you use the public DNS
entry for the Manager Address (default). Using the IP address may result in loss of
connectivity if the IP changes.
- Credentials: Enter a username and password that you will use to log in to
the Deep Security Manager console. You should use a strong password that includes upper and
lower-case letters, non-alphanumeric characters, and numbers. Click Next.
- Confirm Settings: Review the installation settings to ensure they are
correct and then click Install.
- The Deep Security Status page will indicate that Deep Security Manager is being
installed.
- When the installation is complete, the Deep Security Manager console will be displayed. You
can log in with the username and password that you specified during the Deep Security Manager
installation process. Note the URL used to access the Deep Security Manager console.
Select an AMI
On the AWS Marketplace, there are two separate Deep Security Manager AMIs, each providing a
different licensing option:
- BYOL: Bring-Your-Own-License (BYOL) is for customers who have already
obtained a license to use Deep Security 9.5 SP1 from another source. If you are using this type
of license, you will need to enter the license string/activation code in the Deep Security
Manager console after it is installed.
- PPU: Pay-Per-Use (PPU) enables customers to pay based on the size of the
AWS instance they are running. With PPU, each EC2 instance type has an associated seat count
limit (the seat count is the number of Deep Security Agents that you can run). You can change
the size of your instance at any time. You can also run more than one instance to increase your
seat count limit. When you install Deep Security Manager on an additional instance, on the
Database tab, select "This Deep Security installation will act as an additional Manager node in
an already-deployed Deep Security installation". This option specifies that each node will use
the same database. Here are the seat count limits for each type of EC2 instance supported for
Deep Security Manager:
- M3 Large (m3.large): Up to 25 Agents
- M3 XL (m3.xlarge): Up to 50 Agents
- M3 2XL (m3.2xlarge): Up to 100 Agents
- C3 4XL (c3.4xlarge): Up to 200 Agents
As you launch or shut down Deep Security Manager nodes, the seat-count usage for the hour is
re-calculated. To check your seat count limit after installing Deep Security Manager, open the
Deep Security Manager console and go to Administration > Licenses.
Deploy your Deep Security Manager Instance
- Go to the Deep Security Manager pre-installer page (https://<IP>:8080),
enter the instance ID, and click Sign In. The Deep Security AMI Configuration page
appears, with a series of tabs.
- License Agreement: On the first tab, review the license agreement. if you agree to the
terms, select I accept the agreement and click Next.
- Database: Select the type of database that you have configured for use
with Deep Security and fill in the required configuration parameters. The installation process
will check for database connectivity and display an error if there is a problem. If you
selected Microsoft SQL Server, you can also edit the SQL Server Advanced Options. Click
Next.
- Address and Ports: Enter the hostname, URL, or IP address of the machine
where Deep Security Manager is being installed. The Manager Address must be either a resolvable
hostname, a fully qualified domain name, or an IP address. If DNS is not available in your
environment, or if some computers are unable to use DNS, a fixed IP address should be used
instead of a hostname. Optionally, change the default communication ports: The "Manager Port"
is the port on which the Manager's browser-based UI is accessible through HTTPS. The
"Heartbeat Port" is the port on which the Manager listens for communication from the Agents.
Click Next.
If your instance has a public IP and DNS entry, use the public DNS
entry for the Manager Address (default). Using the IP address may result in loss of
connectivity if the IP changes.
- Credentials: Enter a username and password that you will use to log in to
the Deep Security Manager console. You should use a strong password that includes upper and
lower-case letters, non-alphanumeric characters, and numbers. Click Next.
- Confirm Settings: Review the installation settings to ensure they are
correct and then click Install.
- The Deep Security Status page will indicate that Deep Security Manager is being
installed.
- When the installation is complete, the Deep Security Manager console will be displayed. You
can log in with the username and password that you specified during the Deep Security Manager
installation process. Note the URL used to access the Deep Security Manager console.
2. Modify your AWS Security Group to open required ports on your instances
- Log into your Amazon Web Services Console.
- Go to the Security Groups page on your EC2 Dashboard and either create a new Security Group to assign to the instances you want to protect with Deep Security or edit a Security Group that is already assigned to them to allow the following inbound traffic:
- 4118: To allow communication from the Deep Security Manager to the Deep Security Agents.
- 3389: (Windows only) RDP access to the instance for Agent deployment.
- 22: (Linux only) SSH access to the instance for Agent deployment.
3. Create a dedicated AWS policy and user account for Deep Security to access your cloud account
- Log in to your Amazon Web Services Console and go to Identity and Access Management (IAM).
- In the left navigation pane, click Policies.
If this is your first time on this page, you'll need to click Get Started.
- Select Create Policy.
- Select Create Your Own Policy.
- Give the policy a name and description, then copy the following JSON code into the Policy Document area:
{
    "Version": "2012-10-17",
    "Statement": [
        {
            "Sid": "cloudconnector",
            "Effect": "Allow",
            "Action": [
                "ec2:DescribeImages",
                "ec2:DescribeInstances",
                "ec2:DescribeTags"
                ],
            "Resource": [
                "*"
                ]
            }
        ]
}
- Click Create Policy. Your policy is now ready to use.
- Back in the Identity and Access Management page's navigation pane, click on Users.
- Click Create New Users to display the Create User page.
- Enter a username and select the Generate an access key for each User option.
- Click Download Credentials to download the generated User Security credentials (Access Key and Secret Key) and then close the dialog window.
- Back on the Users page, click on the User to display the User properties, then scroll to the Permissions section of the page.
- In the expanded Permissions section, click on Attach Policy at the bottom of the window to display the Attach Policy page.
- Select the Policy you just created and click Attach Policy to apply the policy to the new user account.
The Amazon Web Services account is now ready for access by a Deep Security Manager.
4. Import your AWS instances to Deep Security
- Sign in to your Deep Security Manager web console.
- Close the Welcome screen and click on the Computers tab to display the Computers page.
- On the Computers page, click New > Add Cloud Account to display the Add Cloud Provider Wizard.
- In the wizard, enter the following information and then click Next:
- Provider Type: Select Amazon.
- Provider Region: Select the region where your AWS instances are hosted. (If you have instances hosted in multiple regions, you'll have to add a Cloud Account for each region.)
- Name and Description: Name and description of the resources you are adding. These are only used for display purposes in the Deep Security Manager.
- Access Key Id and Secret Access Key: These are the credentials generated for the AWS user account you created specifically for Deep Security.

- Deep Security Manager will verify the connection to the AWS cloud account and display a summary of the import action. Click Finish.
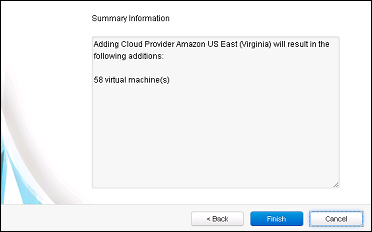
- When it's done importing your AWS instances the wizard will display the results of the action.
- Your AWS instances now appear in the Deep Security Manager under their own branch under Computers in the navigation panel.

5. Deploy Deep Security Agents to your AWS instances
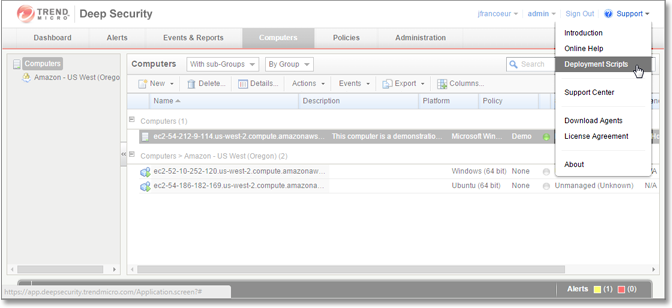
- Back in the Deep Security Manager main console, open the Deployment Script generator by selecting Deployment Scripts from the Support menu (in the upper-right corner of the Deep Security Manager console).
- In the Deployment Scripts modal window,
- select the Platform to which you are deploying the software
- select the Activate Agent Automatically option
- select a Policy based on the operating system to which you will be deploying the Agent(s)
Leave the other options at their default settings. As you make the selections, the Deployment Script Generator will generate a script (Powershell for Windows, bash for Linux), that you will run on your Deep Security instance. 
- Copy the script to your clipboard.
- For Windows platforms,
- RDP into to your Windows instance.
- Start Powershell.
- Paste the script from your clipboard into Powershell and run it.
For Linux platforms,
- SSH into your Linux instance.
- Run the copied bash script from a command line.
The script will download, install, and activate a Deep Security Agent on your AWS instance, and then apply a Deep Security protection policy.
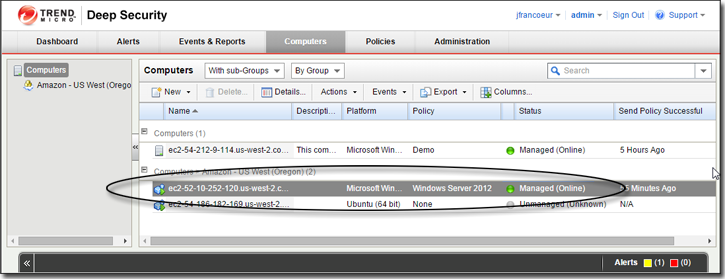
- Return to the Deep Security Manager console to verify that your AWS instance shows a Status of "Managed (online)" (or that some operation is underway) and a Policy is assigned.
You're done!
Your AWS instance is now protected by Trend Micro Deep Security.