Screen and Control Permissions
This customization adds fine-grained create, read, and update permissions to Sage screens and controls.
Contents
Installation
The customization is installed using Customization Manager. Check out the instructions for downloading Customization Manager and managing customizations in the documentation.
The customization is packaged as poplar_screenperms.
Configure Permissions
Permissions come in two flavours: screen and control. Screen permissions
stop the screen from opening when the user does not have read permission.
Control permissions support create, read, and update
permissions.
The instructions below are for built-in Sage screens. If you’re working with an Extender Screen, see the Extender Screens instructions.
Screen Permissions
Any permission that does not define a control is a screen permission.
The only meaningful flag is the read flag. If it is true the user can open
the screen. Otherwise, the screen will open, an error displayed, and
immediately closed.
To define a new screen permission that stops users from opening the O/E Order Entry screen:
Identify the screen ID. This can be done from the Desktop.

The screen ID of the O/E Order Entry screen is OE1100.
Open Extender –> Setup –> Custom Table Editor.
Load the
Permission Definitionstable.Define a new permission, setting:
Screen ID: OE1100
Default Read: True
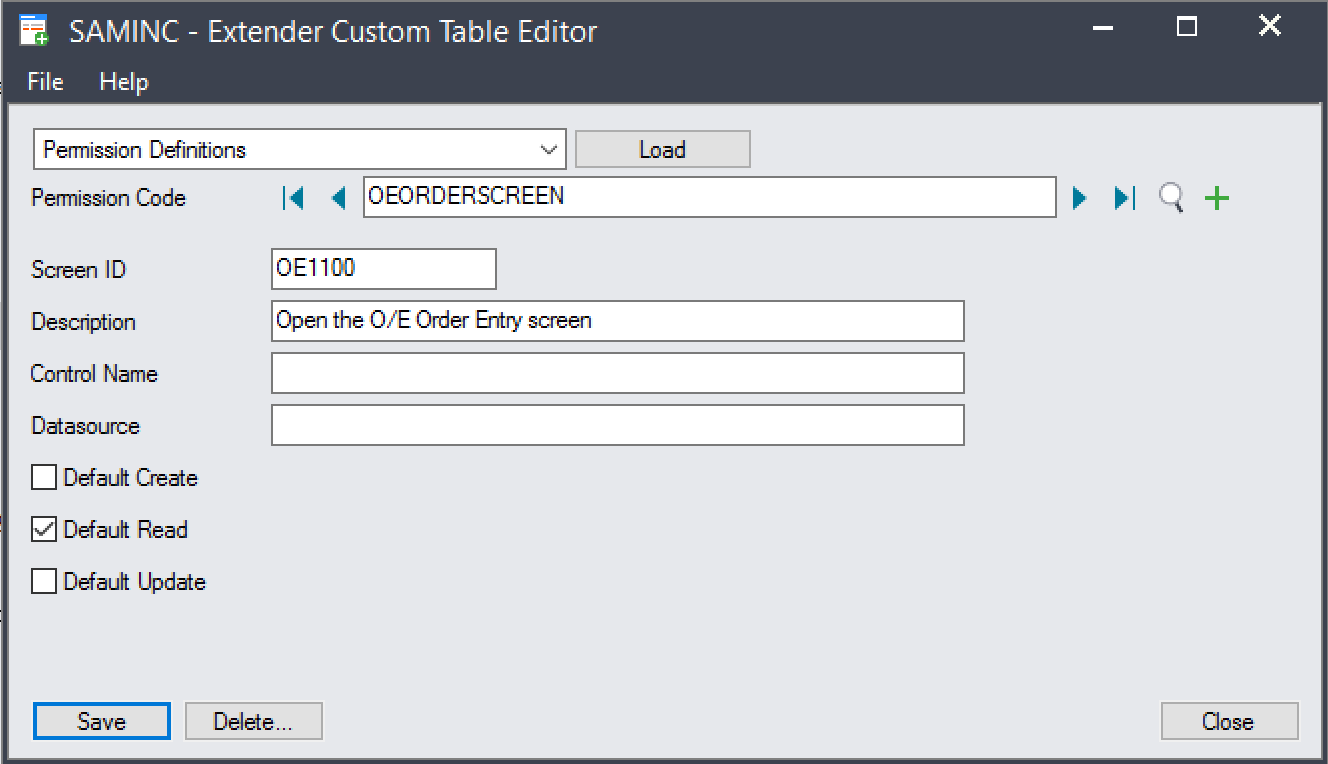
A permission to stop users from opening the OE1100 screen.
Add the permission.
Control Permissions
Control permissions determine whether a user can read, create, or update a field.
If a user can read a field, they can see it on screen. If they cannot read the field, it will not appear on screen.
If a user can create a field, they can change it until the document in the associated datastore is saved for the first time. Otherwise, the user cannot edit the field on documents that have not been inserted.
If a user can update a field, they can change it on documents that have previously been saved.
To define a new screen permission that stops users from seeing the PO Date field:
Identify the screen ID. This can be done from the Desktop. The screen ID for Purchase Order Entry is
PO1210.Identify the control ID:
Open %SAGEROOT%/runtime/AccpacInfo.exe
Open the PO section and select PO1210
Identify the header datastore that is used to determine if the document has been created. In this case, it is the P/O Header,
dsPOPORH.Identify the control for the PO Date field. This can be challenging, but the description often gives it away. In this case,
afePOPORH_PODate.
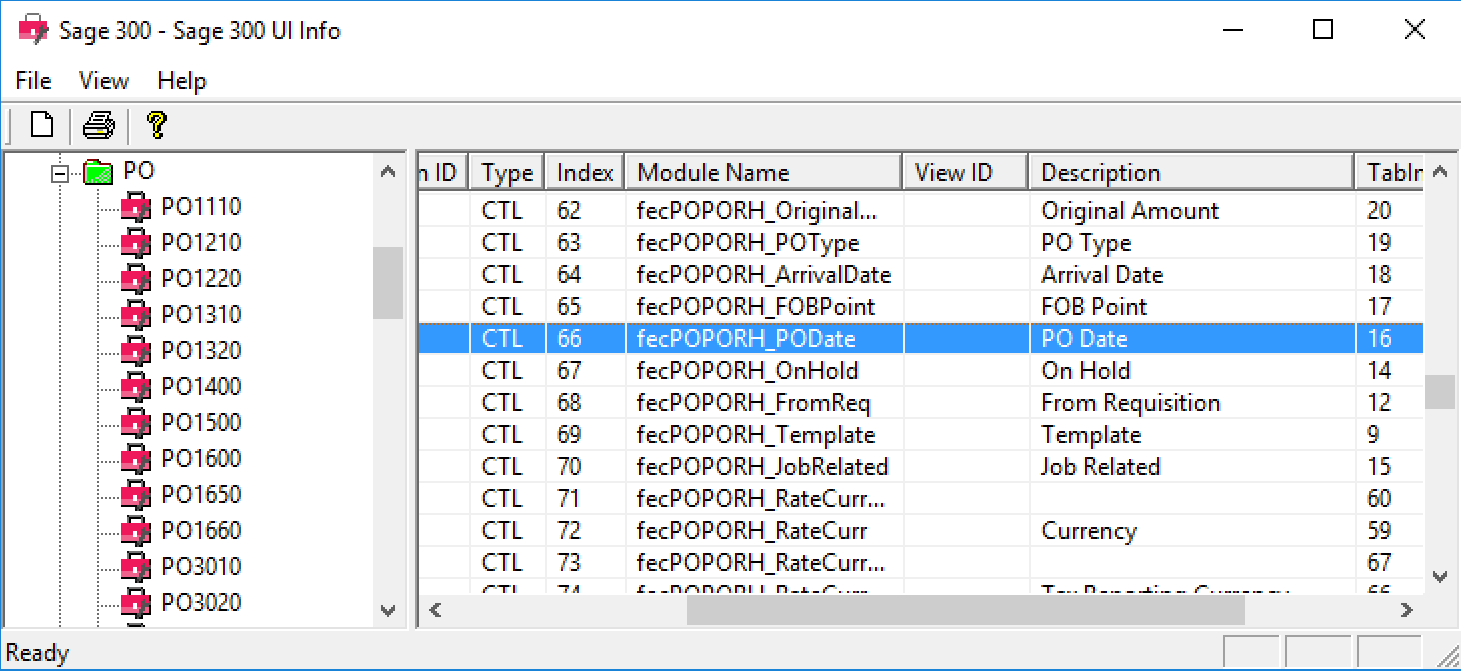
The PO Date field is highlighted and the datasource name can be found at the very beginning of the list.
Open Extender –> Setup –> Custom Table Editor.
Load the
Permission Definitionstable.Define a new permission, setting:
Screen ID: PO1210
Control: afePOPORH_PODate
Datastore: dsPOPORH
Default Read: True
Default Create: True
Default Update: True

A permission to restrict access to the PO Date field.
Add the permission.
Disabling Buttons
To disable an action, like deleting an order, create a permission for the button that triggers the action. Any user that cannot read the control will not be able to see or push it. This is an application of a Control Permission.
To define a new permission that stops users from Deleting an O/E Order:
Identify the screen ID. This can be done from the Desktop. The screen ID for O/E Order Entry is
OE1100.Identify the delete button control ID:
Open %SAGEROOT%/runtime/AccpacInfo.exe
Open the OE section and select OE1100
Identify the header datastore that is used to determine if the document has been created. In this case, it is the P/O Header,
adsOEORDH.Identify the control for the button. This can be challenging, but the description often gives it away. In this case,
APP_Delete_Button.
Open Extender –> Setup –> Custom Table Editor.
Load the
Permission Definitionstable.Define a new permission, setting:
Screen ID: OE1100
Control: APP_Delete_Button
Datastore: adsOEORDH
Default Read: True
Default Create: True
Default Update: True
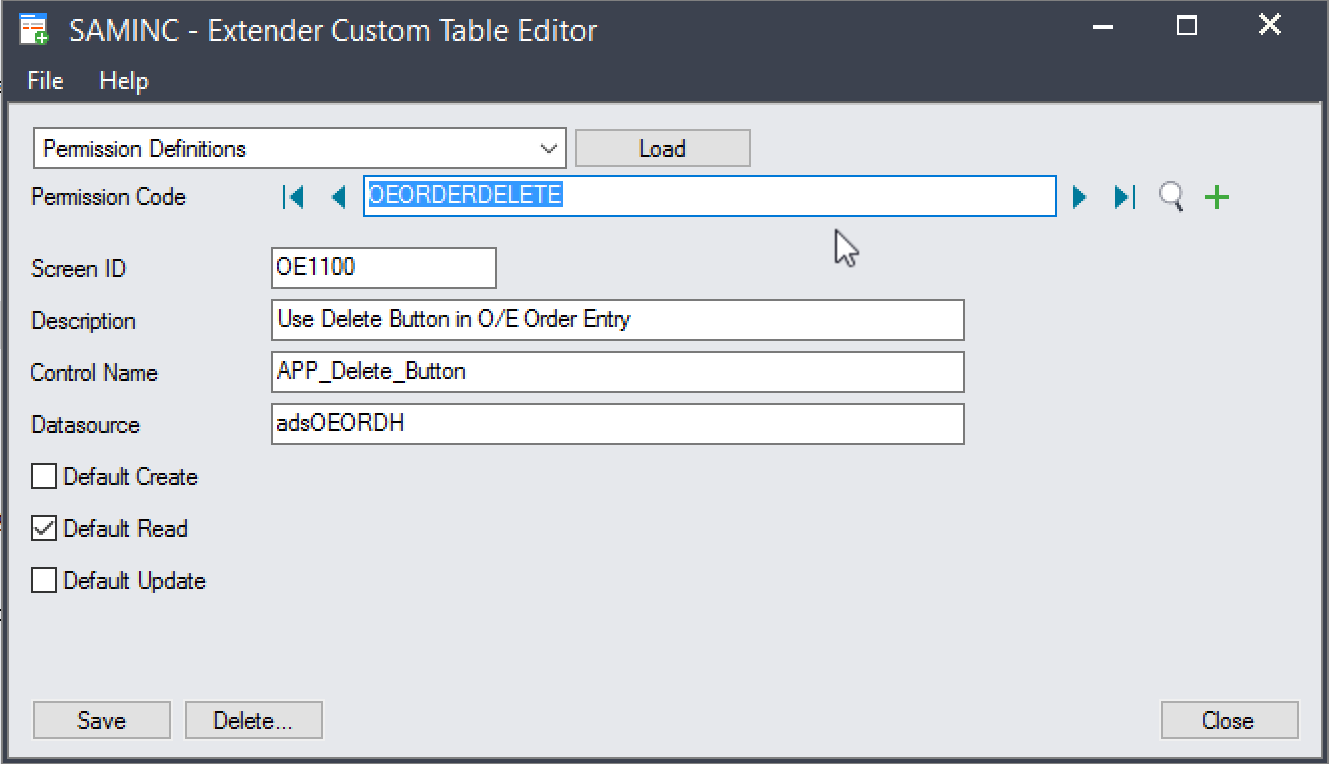
A permission to restrict access to the O/E Order Entry Delete button.
Add the permission.
Assigning Permissions
Once permissions have been created, use the Permissions Management UI to assign them to users.
Start the Permissions Management UI using the icon on the desktop.
If the icon doesn’t exist, open Extender –> Setup –> Scripts screen, highlight
PPSCPERM.PermissionsUIand click Run.
Navigate to the user to change permissions for. In this example, the user
CHRIS.By default all users are assigned the default actions from the permission.
To stop Chris from accessing the OE Order Entry screen, double click the Read column for the OEORDERSCREEN entry.
Note
All changes are saved immediately and take effect the next time the user opens the screen.
To allow Chris to input new POs with a PO Date, but not ot update the Date on any saved PO, set the Create column to
Yesand the Update column to No.

Chris can open O/E Order Entry but can’t use the Delete button and can only set the date on new POs, not existing ones.