Dynamic Units of Measure
The Dynamic Units of Measure customization allows an Item’s units of measure to be temporarily adjusted using optional fields on the Item.
This can be used to accommodate items that are in the process of being re-packed into standard I/C Units of measure by providing the information required to operators to choose the correct order quantities based on what is packed on the shelves.
Installation
The poplar_dynuom customization is installed using Customization Manager.
To install the customization using Customization Manager:
Visit Customization Manager documentation and download the most recent version.
In Sage 300, log in as admin and navigate to Extender –> Setup –> Modules.
Click the Import button and select the file downloaded in step 1 (
EXPIP.poplar.vi)Setup your API key by opening Extender –> Setup –> Custom Table Editor and loading the
Customization Manager Configtable.Input your API key, Add the record.
Restart the Sage Desktop.
Open Extender –> Setup –> Customization Manager.
The first time Customization Manager loads, it will attempt to upgrade core Python libraries. You may be prompted twice and the process can take up to two minutes, during which the desktop appears unresponsive.
Once the environment is ready, the Customization Manager window will appear.
Highlight the
poplar_dynuomcustomization and click Install.Once the customization is successfully installed, close Customization Manager.
Restart the Sage Desktop a final time to register the OCX changes to the screens.
Done.
Environment Setup
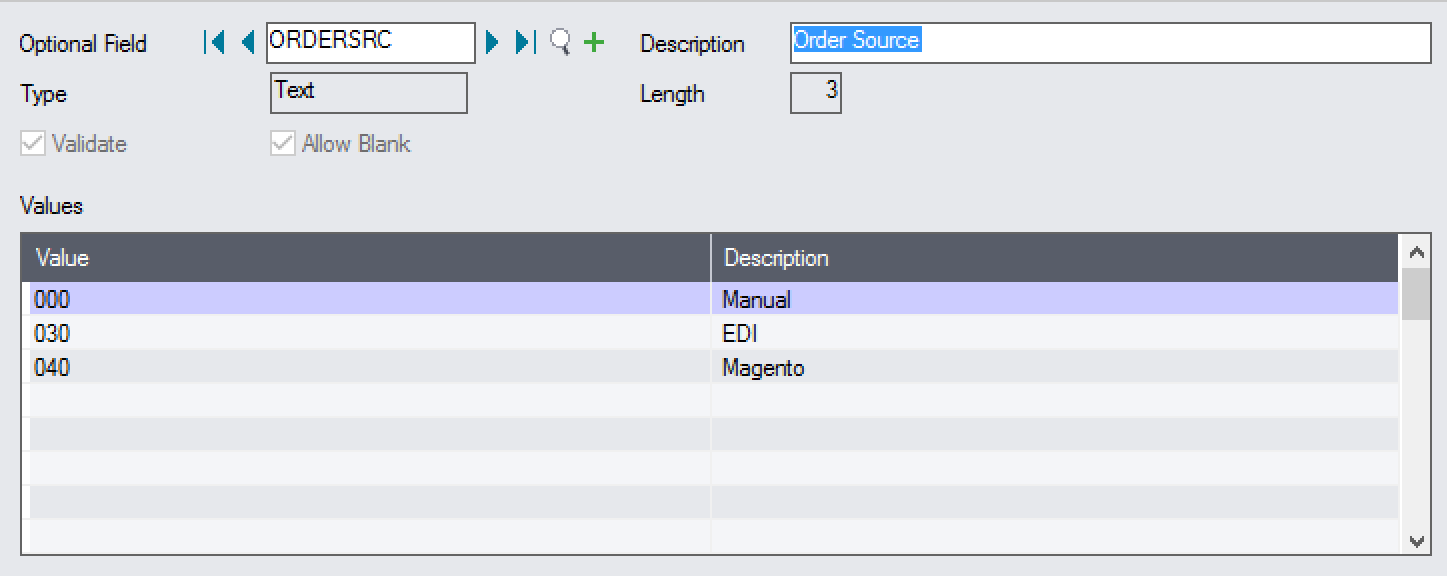
In some environments, there may exist orders that do not require increment
verification. To support this, the customization checks for the presence of
the ORDERSRC Optional Field on the Order Header.
The customization will only perform the dynamic UOM calculations if the
Optional field is set to 000.
Configuration
The customization relies on the I/C units and optional field configuration.
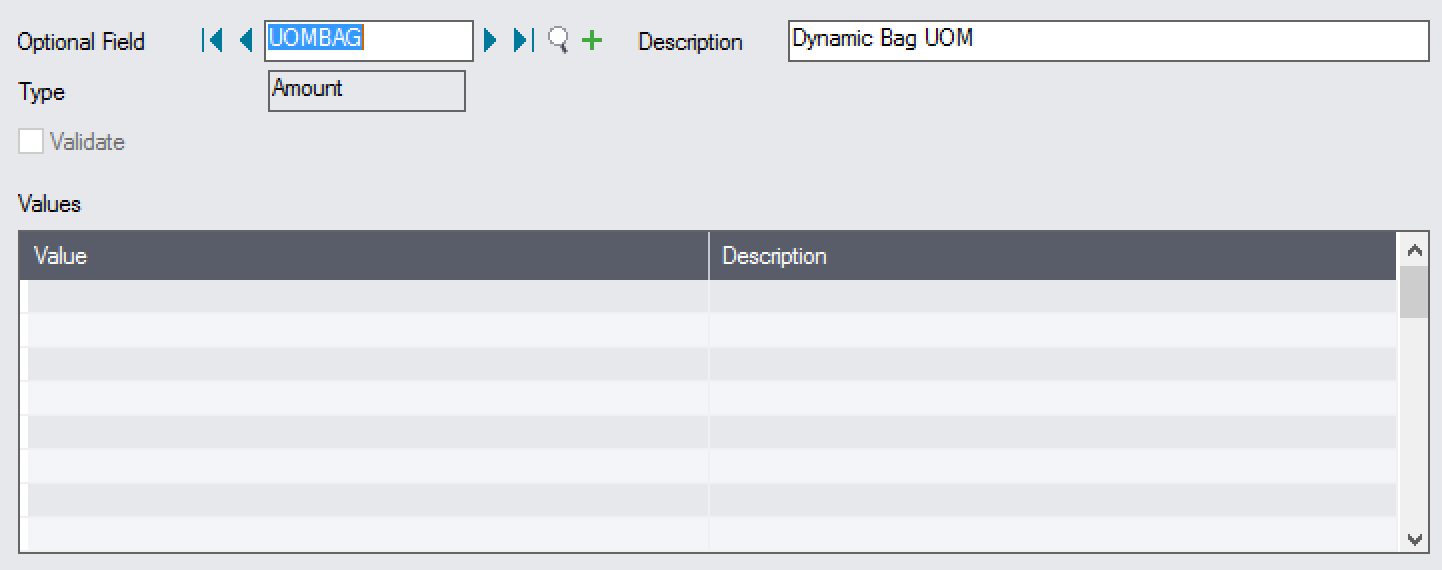
To start, define the optional fields that will be used to override the default I/C Units of measure.
For example, to override the Bag Unit of Measure with the value in
UOMBAG optional field. Create the UOMBAG optional field with
type value, not required, and not auto-inserted.
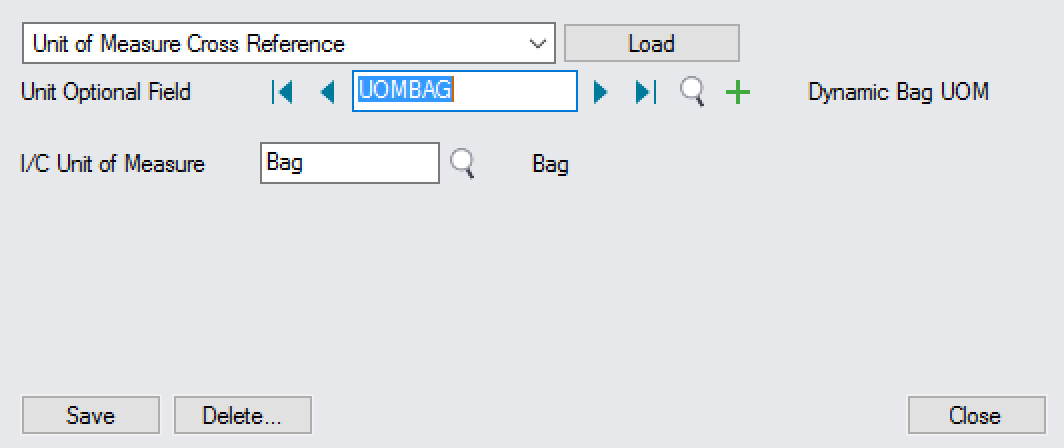
All dynamic UOM optional fields map to exactly one I/C Unit of Measure, the unit they override when generating the dynamic table. Map the optional field to its corresponding I/C Unit.
With this configuration in place, any Item with the UOMBAG optional field
value set will have the Bag UOM overwritten in the dynamic table. To
alter the Bag UOM for A11030 from 10 to 20, create a new UOMBAG field on
A11030 with a value of 20.
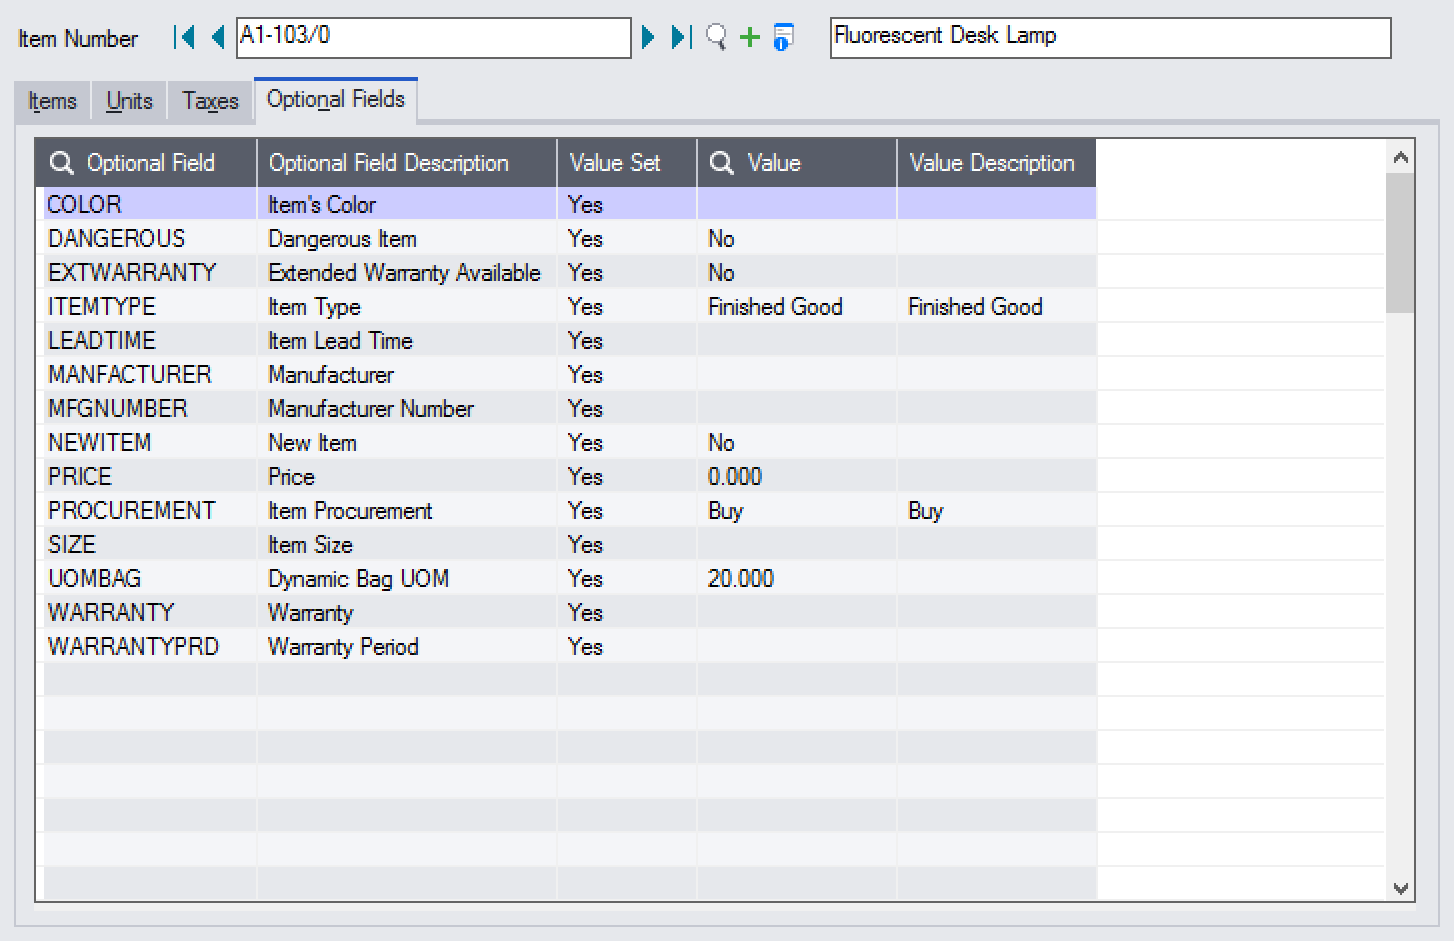
The configuration is now complete for the A11030 item.
Usage
The customization takes effect immediately. When entering orders in the O/E Order Entry grid, the dynamic UOM table will be displayed in an I/M Note, along with recommendations on the next valid increment.

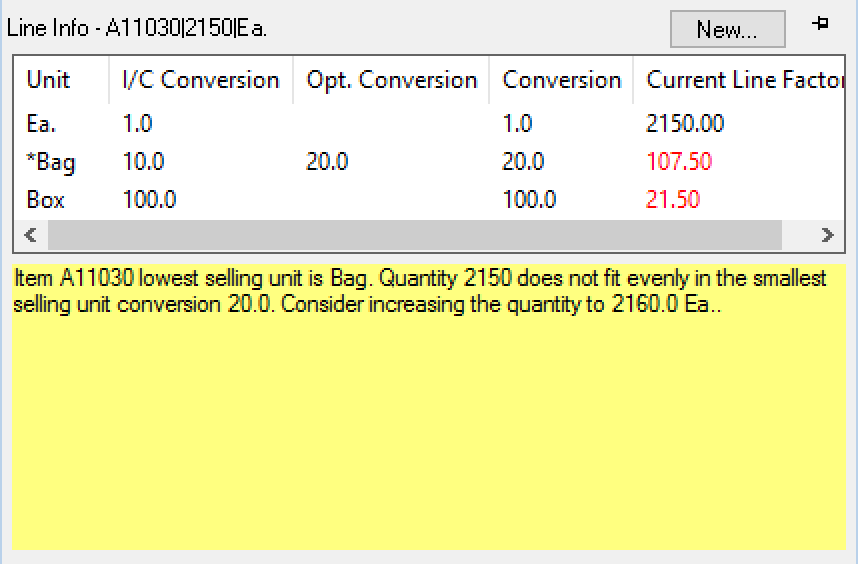
Interpreting the Dynamic Table
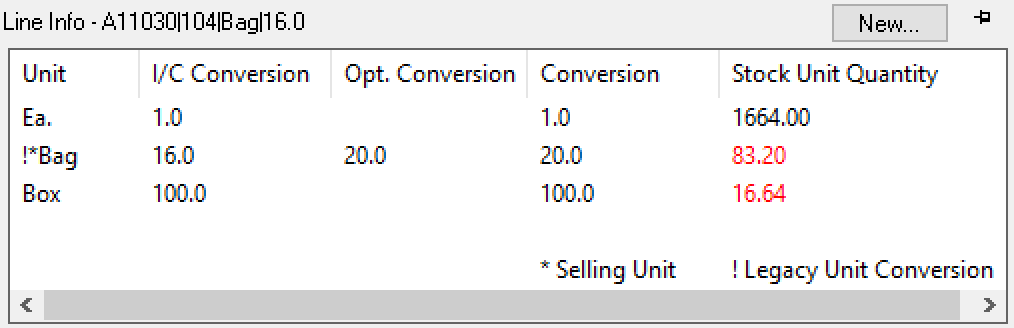
The Dynamic Table contains the following columns:
Unit: I/C Unit of Measure assigned to the Item
I/C Conversion: Item I/C Unit Conversion
Optional Field Conversion: Conversion from Optional Field
Conversion: Derived conversion from I/C and Optional Field configuration.
Stocking Unit Quantity: the Quantity Ordered in Stocking Units divided by the Conversion.
There are two symbols that may be prepended to a unit in the table:
*: the selling unit
!: legacy unit conversion, the
UNITCONVvalue of the current line doesn’t match the conversion currently defined for the Item.
In the table below, Bag is in the most complex possible state:
the detail line
UNITCONVis 16.0, a legacy value that differs from the current Item Unit Conversion of 10.0, indicated by an!before the unit;as the smallest unit greater than 1, it is also the selling unit, indicated by an
*before the unit;the default I/C Item Unit Conversion of 10.0 for
Bagis overridden by the value 20.0 from an optional field, as indicated by the values in the Opt. Conversion and Conversion columns.
Debugging
Debugging can be enabled for the customization if troubleshooting needs to be done. The enable debug:
Create an empty file at
%SHAREDDATA%\COMPANY\<org>\ppdynuom.debug.Close and re-open the A/R Receipts Screen.
Additional information will be displayed in message boxes and will be saved to
the file %SHAREDDATA%\COMPANY\<org>\ppdynuom.log.
To disable debugging, delete the ppdynuom.debug file and re-open the
screen.