Detail Optional Fields
This customization adds optional fields to Sage detail objects that do not have them out of the box.
The customization currently supports the Bank Entry Detail view and Bank Entry (BK2300) screen.
Installation
The poplar_doptf customization is installed using Customization Manager.
To install the customization using Customization Manager:
Visit Customization Manager documentation and download the most recent version.
In Sage 300, log in as admin and navigate to Extender –> Setup –> Modules.
Click the Import button and select the file downloaded in step 1 (
EXPIP.poplar.vi)Setup your API key by opening Extender –> Setup –> Custom Table Editor and loading the
Customization Manager Configtable.Input your API key, Add the record.
Restart the Sage Desktop.
Open Extender –> Setup –> Customization Manager.
The first time Customization Manager loads, it will attempt to upgrade core Python libraries. You may be prompted twice and the process can take up to two minutes, during which the desktop appears unresponsive.
Once the environment is ready, the Customization Manager window will appear.
Highlight the
poplar_doptfcustomization and click Install.Once the customization is successfully installed, close Customization Manager.
Restart the Sage Desktop a final time to register the OCX changes to the screens.
Done.
Configuration
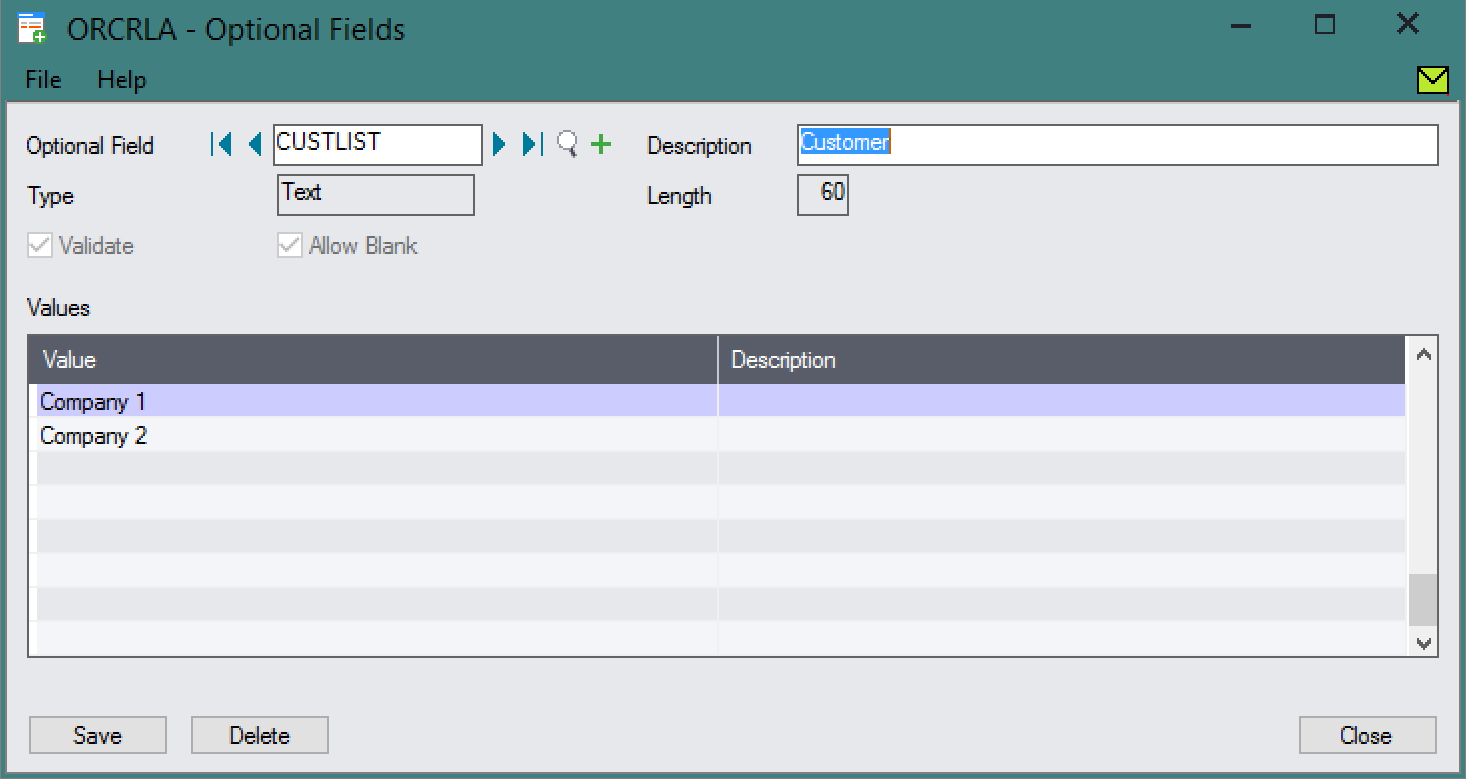
The customization relies on the optional field configuration on Common Services. To start, define the optional field you want to add to the detail view. If validation is enabled for the field, it will be enforced.
The optional field will automatically be displayed in the associated grid. The optional field description will be used as the column header.
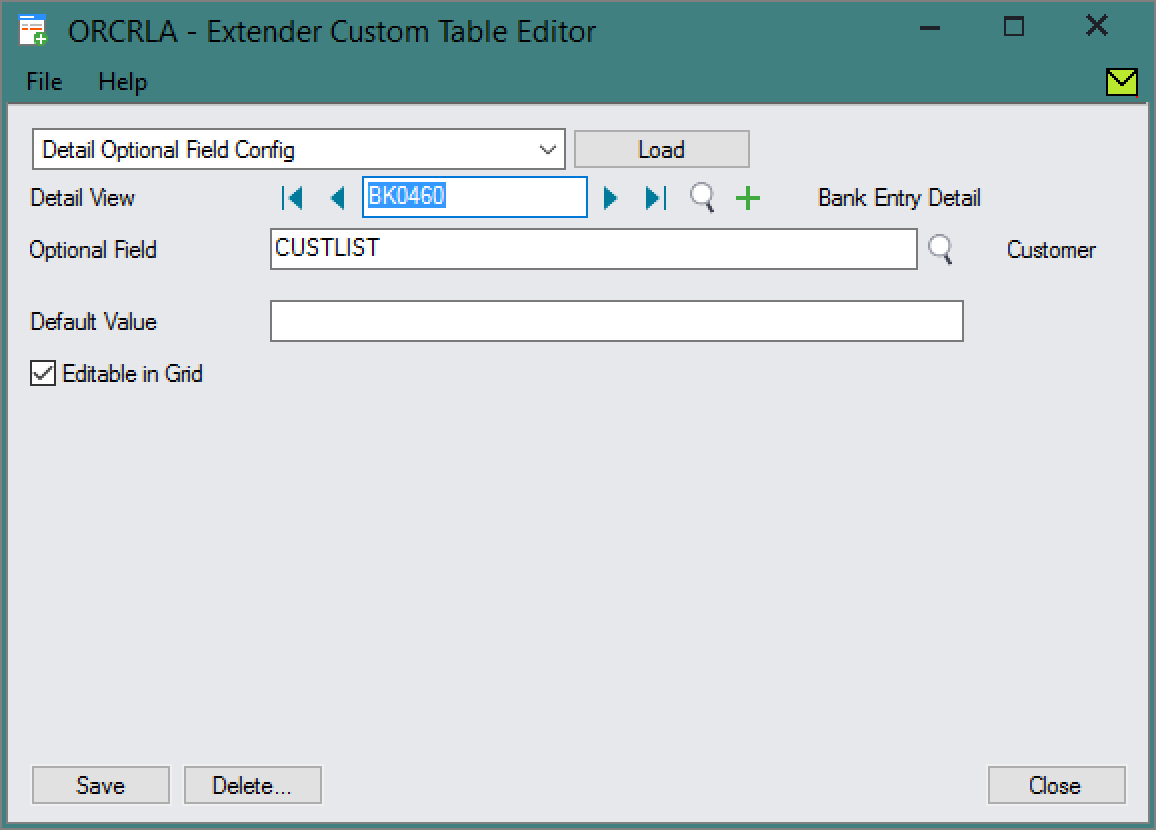
Once the optional field is defined, it must be assigned to the detail view.
Open the Custom Table Editor and select the Detail View Optional Field Config table.
Select from a supported detail view, the optional field desired, set a default value if desired, and select whether the field should be editable in the associated grid.
Save the detail view optional field configuration.
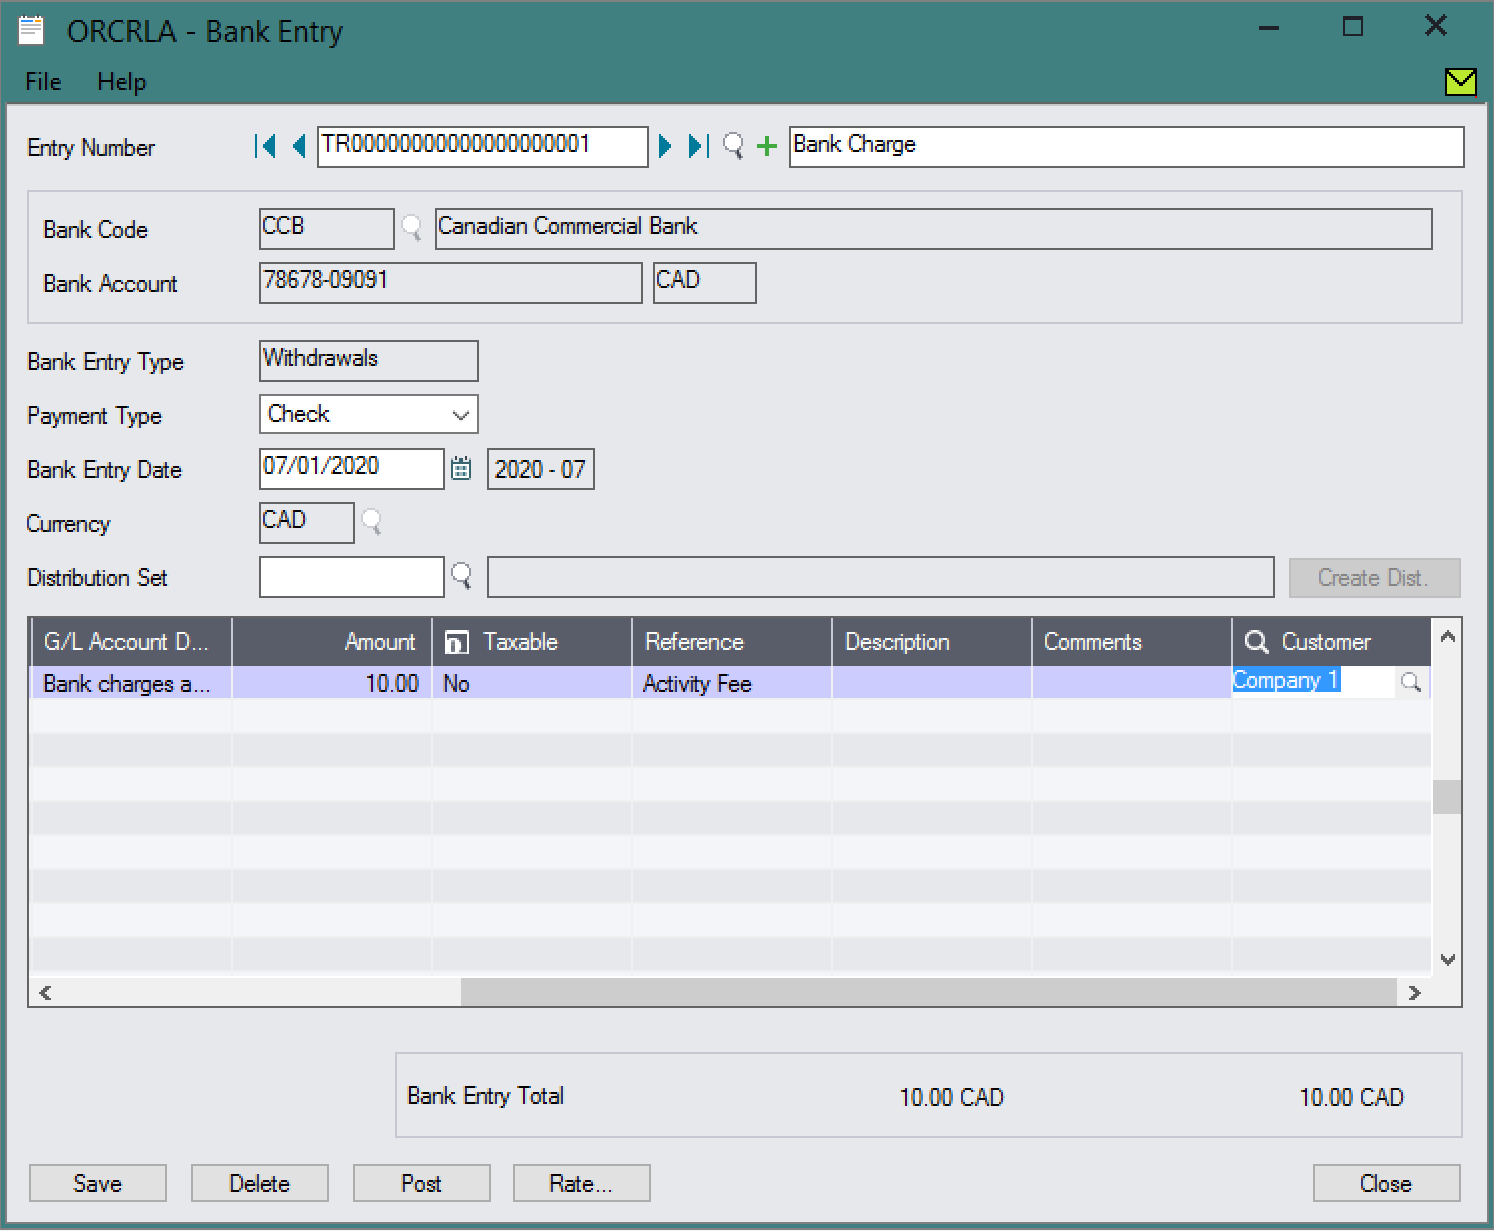
Usage
For eacho optional field defined, a new column will automatically be added to the associated grid.
Debugging
Debugging can be enabled for the customization if troubleshooting needs to be done. The enable debug:
Create an empty file at
%SHAREDDATA%\COMPANY\<org>\ppdoptf.debug.Close and re-open the A/R Receipts Screen.
Additional information will be displayed in message boxes and will be saved to
the file %SHAREDDATA%\COMPANY\<org>\ppdoptf.log.
To disable debugging, delete the ppdoptf.debug file and re-open the
screen.