Customer and Promotion for A/R Receipt Adjustments
This customization adds two columns, Customer and Promotion, to the A/R Receipts Adjustments pop-up window.
The values are stored in a custom table and automatically propagated to the G/L Detail Optional Fields.
Environment Setup
The customization depends on the presence of two optional fields:
CUSTLISTType: Text
Length: 60
Allow Null: Yes
Auto Insert: Yes
Required: No
Validated: Yes
PROMOLISTType: Text
Length: 60
Allow Null: Yes
Auto Insert: Yes
Required: No
Validated: Yes
The validation list for each optional field is used to validate the data input into the A/R Receipt Adjustments grid.
These optional fields must also be setup as a Transaction Detail Optional Field for the G/L Accounts that are used in A/R Receipt Adjustments.
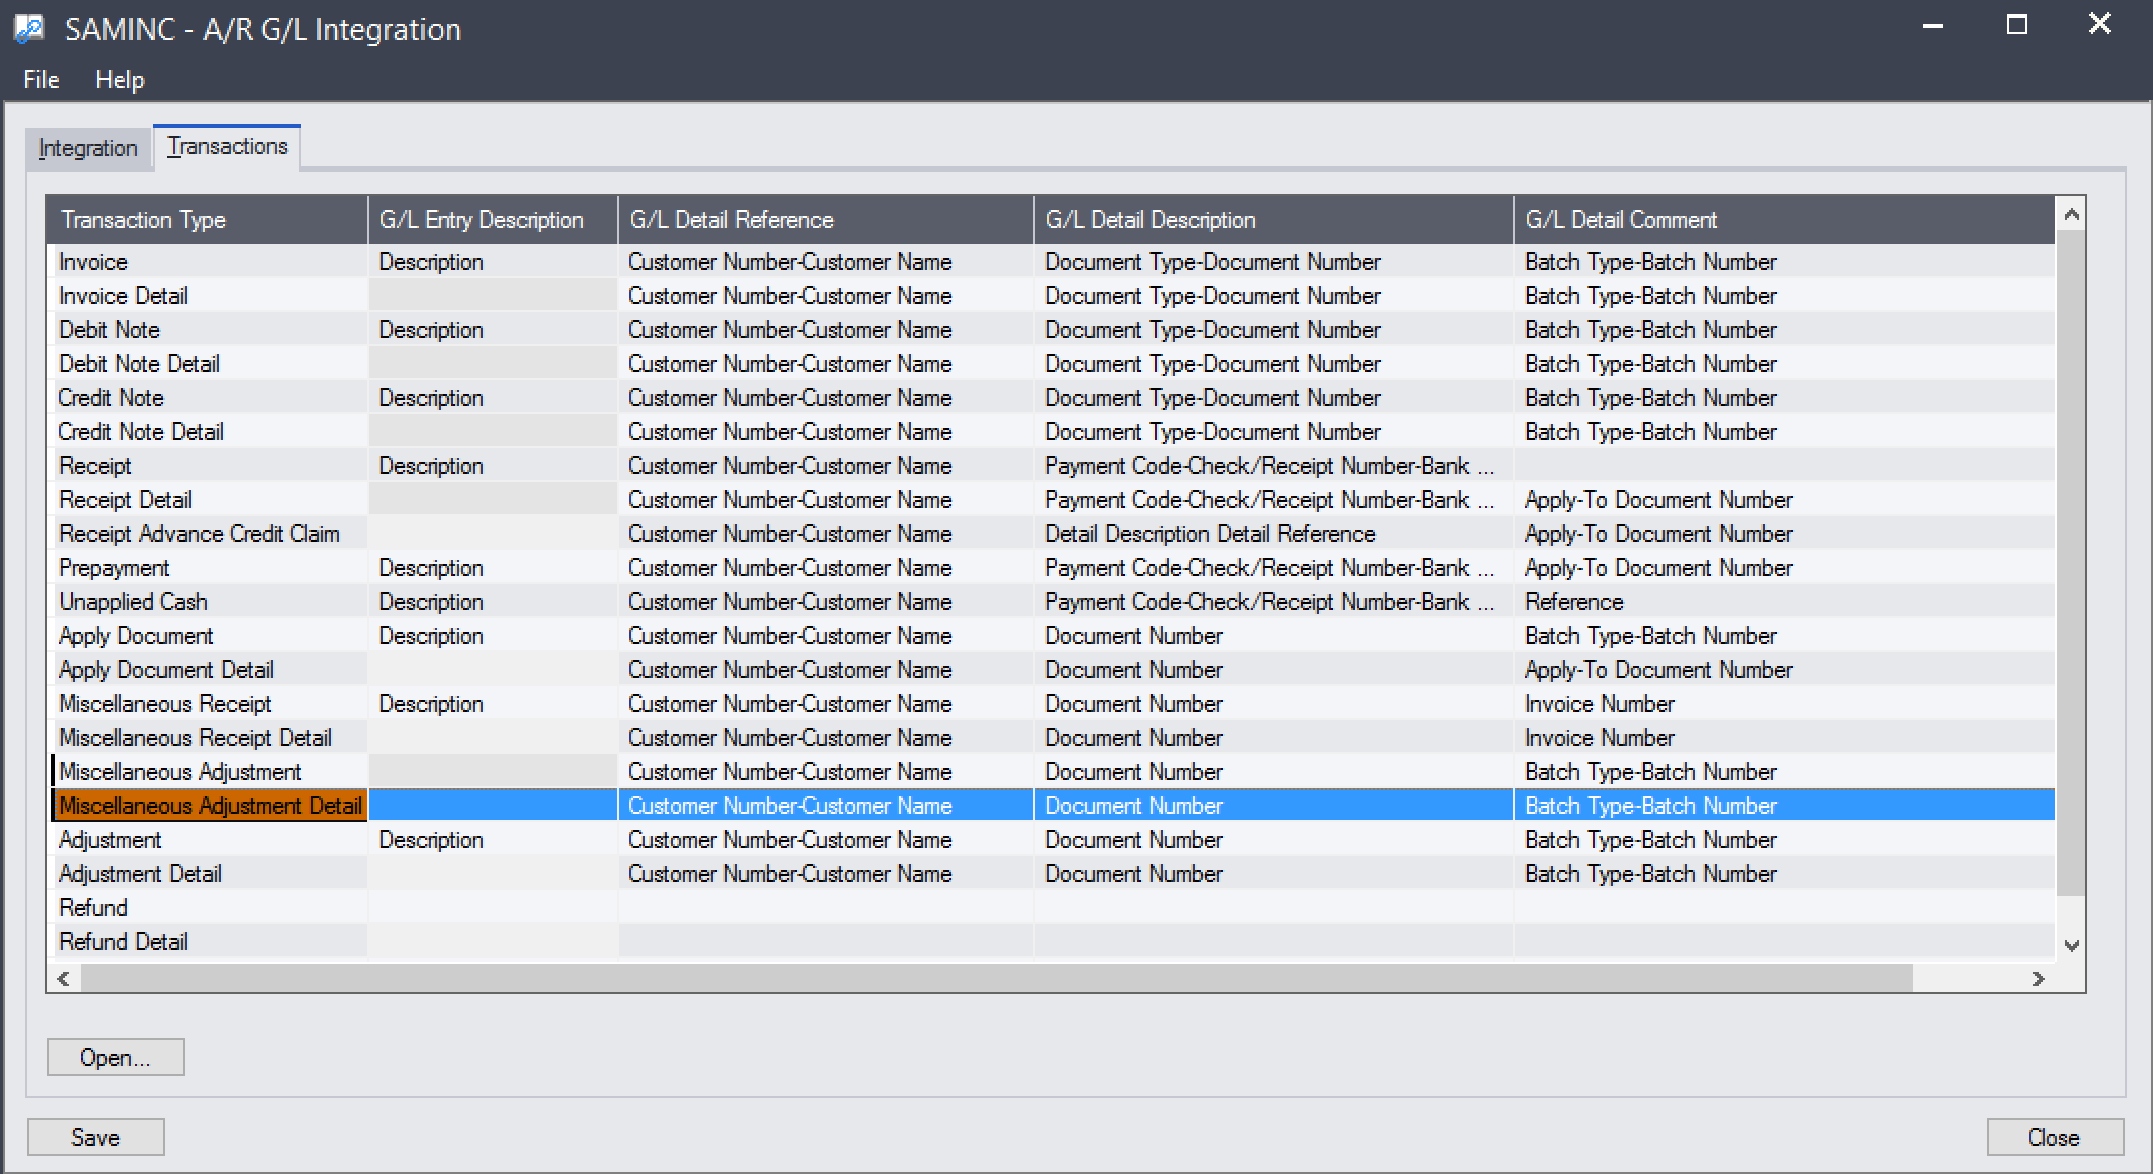
In addition, the customization depends on the Payment Code of the A/R Receipt
Adjustment being written to the G/L Detail Comment field. This requires that
in Accounts Receivable –> A/R Setup –> G/L Integration, on the
Transactions tab, the
Miscellaneous Adjustment Detail – G/L Detail Comment be set to
Batch Type-Batch Number
Custom Table
The customization deploys a custom table that is used to store the Customer and Promotion data. This table should not be manipulated by hand, it is used to account for the data internally.
Installation
This customization uses extra python libraries to perform line matching and some database operations (such as parsing drill down links in place). In order to use these libraries, the customization is delivered using Customization Manager.
To install the customization using Customization Manager:
Visit Customization Manager documentation and download the most recent version.
In Sage 300, log in as admin and navigate to Extender –> Setup –> Modules.
Click the Import button and select the file downloaded in step 1 (
EXPIP.poplar.vi)Setup your API key by opening Extender –> Setup –> Custom Table Editor and loading the
Customization Manager Configtable.Input your API key, Add the record.
Restart the Sage Desktop.
Open Extender –> Setup –> Customization Manager.
The first time Customization Manager loads, it will attempt to upgrade core Python libraries. You may be prompted twice and the process can take up to two minutes, during which the desktop appears unresponsive.
Once the environment is ready, the Customization Manager window will appear.
Highlight the
poplar_adjprocustomization and click Install.Once the customization is successfully installed, close Customization Manager.
Restart the Sage Desktop a final time to register the OCX changes to the AR3100 screen.
Done.
Configuration and Usage
This customization does not have any significant configuration. Only the validation lists for the CUSTLIST and PROMOLIST optional fields are user manageable. This is done using Common Services –> Optional Fields screen.
The position of the Customer and Promotion columns in the grid can be changed by dragging and dropping the columns like any other.
Debugging
Debugging can be enabled for the customization if troubleshooting needs to be done. The enable debug:
Create an empty file at
%SHAREDDATA%\COMPANY\<org>\ppadjpro.debug.Close and re-open the A/R Receipts Screen.
Additional information will be displayed in message boxes and will be saved to
the file %SHAREDDATA%\COMPANY\<org>\ppadjpro.log.
To disable debugging, delete the ppadjpro.debug file and re-open the
screen.