Lesson Two: Creating Scripts
The behavior of objects within your Unity game is controlled by scripts. Scripts are programs written in C# of JavaScript. We are going to use the C# language for our scripts, and the MonoDevelop IDE is a powerful tool for writing C# code. This IDE is included with your installation of the Unity framework, and you are going to learn how to use it today.
Verify MonoDevelop Installation
MonoDevelop is installed by default when you install Unity. It works on both Windows and Mac OS computers. If you want to make sure that MonoDevelop is configured correctly, you can open Unity and then choose the "Edit" menu at the top of the screen. On the next menu, select "Preferences" and then click on "External Tools". Your "External Script Editor" should be listed as "MonoDevelop".
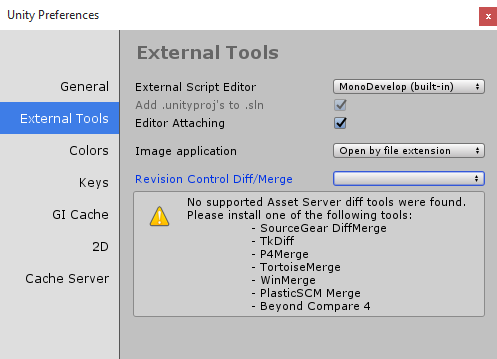
This configuration will launch the MonoDevelop IDE automatically whenever you edit a script file in Unity. The specific details shown on this screen may change, depending on the other software you have installed on your computer. If you see warnings regarding "diff tools" as shown above, then those warnings can be ignored.
Creating Script Assets
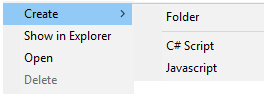 A script is a kind of asset. Every script you create will appear in your Assets list. You can always create new script assets by right-clicking in your Assets area and selecting "Create" and then "C# Script".
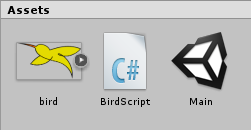
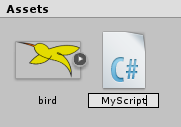 Give your script a name such as "MyScript" and press "Enter". You should see a new script icon appear in your Assets list. Once you have created a script asset, you can assign it to a GameObject.
Assigning Scripts to GameObjects
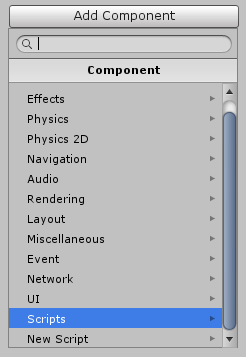 There are many different kinds of components that you can attach to a GameObject. Your script asset can be linked to a GameObject with a script component. To add a script component, first select the target object (such as a sprite) in the Hierarchy panel. Then find the Inspector window and click on "Add Component" and then choose "Scripts" or "New Script" from the list of components. Be sure to scroll down the list to see both options.
If you choose "Scripts", then you will be allowed to choose an existing script from your Assets area. You can select "New Script" if you'd like to create a new script as an Asset and assign it to this component in a single step. In the example below, we've chosen to create a new script and given it the name "SpriteScript".
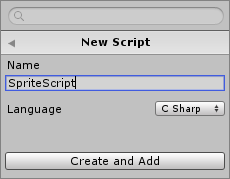
That's a pretty generic name, and you'll eventually want to use more meaningful names for each script. Be sure that "C Sharp" is the configured language. When finished, click on "Create and Add" and your new script will be created as an Asset and attached to a new script component on the target sprite.
Relationship of Scripts to GameObjects
 In many simple cases, one sprite object will have one script, and that script will not be used by any other sprite. However, you can flexibly assign the same script to more than one object. If you write a cool "ChaseHero" movement algorithm, for example, you might assign that script to different kinds of "bad guy" sprites that are present in your scene.
Similarly, one sprite can use multiple scripts. So a "bad guy" sprite might use a "ChaseHero" movement script and a "DieWhenShot" script to support different behaviors that work together. A "hero" sprite might also use the same "DieWhenShot" script plus a unique "VictoryDance" script for a sweet ending.
Simply add multiple script components and select each of the scripts from your Assets list. As you gain more experience writing scripts, you will see opportunities to write re-usable scripts that can be applied to different sprites.
Script Asset Folder
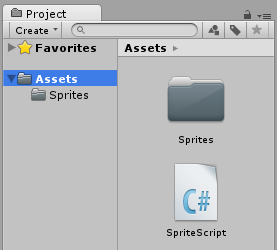 Remember that you'll be adding many kinds of Assets to your project over time, and we recommend you create a separate folder inside your Assets list for each type of resource. Your initial script might be created in the top of the Assets list as shown to the right.
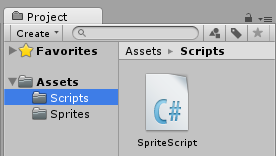
To create a sub-folder for your scripts, right-click on the Assets folder in the Project panel and then choose "Create" from the pop-up menu. On the next menu, choose the "Folder" option. This will create a new folder under the Assets. Name this folder "Scripts".
Now you can put an existing script into the "Scripts" folder by clicking on the script in the Project panel and dragging it into the new folder. In the future, you can just add new scripts directly to the "Scripts" folder.
Opening Scripts in MonoDevelop
Now let's learn how to open a script file for editing in the MonoDevelop IDE. To do this, just double-click on the script in your Project panel. This will automatically launch MonoDevelop and display your script code on the screen.

 You should keep in mind that MonoDevelop is a separate application from Unity. This means that it may take a few extra seconds to load the program and display your script file. Be patient! Look for the MonoDevelop Logo on your task bar if it doesn't automatically appear on your screen.
The MonoDevelop window is separated into different panels, just like the main Unity program. In the picture above we have labeled each panel with the numbers 1 – 4 for easy reference, though those numbers do not show up in the actual application.
- The first panel (#1) on the left side is the "Solution" panel. If you don’t see this panel, you can select the the "View -> Solution" menu option to show or hide the panel in the IDE. The Solution panel will show you all the scripts in your Assets folders. You can double-click any script in the Solution panel to open an editing tab for that script in the main editing area (#2).
- The second panel (#2) allows you to edit your scripts and write code. The panel can hold multiple tabs, one for each script you open. Switching between scripts is as easy as clicking on different tabs. When you first create a new script in Unity, some code will be already written for you. We will discuss this code in depth in the next lesson.
- The third section (#3) of MonoDevelop contains the menu bar and toolbar. You are probably familiar with these types of menus and tool-bars, since many computer applications have them. These buttons and menu options are used to control every part of the MonoDevelop program. You can open and save new scripts, run programs, show or hide panels, close the software and perform other jobs.
- The last section (#4) will display errors, warnings or messages about your code. If you have written code that contains one or more problems, a description of the issue will be shown in this panel.
 If your code can be built successfully, the error list will be empty. The Errors tab may be hidden by default, but you can enable it by selecting "View -> Pads -> Errors" from the menu. You can the click the small "Dock" icon to make it part of the bottom tab list.
When you are done creating or editing the code, you can close the MonoDevelop window. You can also keep the IDE open in the background while you go back to the main Unity IDE. Unity will make every effort to keep your script files in MonoDevelop synced with Unity. This means any changes to a script in one application will be shown in the other. But if you add or re-arrange scripts in the Unity IDE and the MonoDevelop Solution panel does not automatically update, press the "F5" key to refresh the Solution view.
Changing Script Names
The name of the script shown in your Unity Assets list will match the name of the script file stored in your Assets folder. Your actual C# script filename will have a ".cs" extension, such as "SpriteScript.cs". You can see this full filename in the MonoDevelop Solution panel as well as the editing tab in the middle of the IDE.
It is possible to change the script filename on disk, or rename the file by changing the name in the Assets area of the Unity IDE. If you do this, you will also need to make a matching change inside the script file itself! Find the line that starts with "public class" as shown below:
public class BirdScript : MonoBehaviour {
The word after "public class" must match the filename exactly. So if the filename is "BirdScript.cs", then you should see "BirdScript" after "public class". If you change the script filename to "BirdScript2" or "MyScript", then you would need to edit the script and change the class name to match "BirdScript2" or "MyScript". The name of the class inside the file does not have the ".cs" extension. Be sure to save your script changes by selecting "File -> Save" from the MonoDevelop menu or pressing the "CTRL+S" keys.
The C# language itself does not require this name change, so the MonoDevelop IDE will not show any compile errors. But the Unity IDE does require these names to match, and if they do not, you will be unable to attach the script to an object with a script component. The Unity IDE will show you the following warning message when you click on a script asset with mismatched file and class names:

If you see this warning, be sure to edit your script and make sure the class name and script filename match.
Work With Me: Your First Script
Let's create your very first C# script! To begin, re-open the existing Demo project you created in the last chapter. If you no longer have that project, simply create a new 2D project called "Demo" in your "/unity" directory.
Make sure your Demo project has at least one image Asset. If you need to add an image to a new project, you can find and download any other image you like from your personal collection or an online source. You can also use our favorite yellow bird; right-click on the image below and save the "bird.png" file to your project's "Assets" folder.
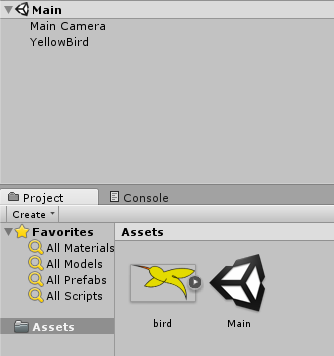
Once you have a game project with an image asset, make sure you have a Sprite object in the Hierarchy. If you are re-using an old Demo project, you probably have a Sprite already. But if not, drag the image from your Assets list to your Hierarchy panel to create a Sprite.
When you are ready to create a script, your Unity IDE should have a sprite in the Hierarchy (you choose the name) as well as an image asset in the Assets list.
Now, to create your first script, right-click in the Assets area and select "Create -> C# Script". Give your script a name of your choice. You should see the script appear in your Assets list. If your project has sub-folders for each type of asset, then create the script in your "Scripts" folder.
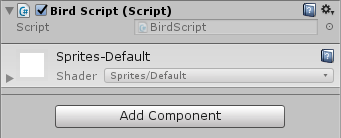
Finally, you need to attach the new script to your sprite object. Click on the sprite in the Hierarchy and view the Inspector panel to the right. Click "Add Component", select "Scripts" and then pick the script name that you have in your Assets list. When you are done, you should see a new script component in the Inspector panel with the name of your chosen script.
Your script won't do anything yet, but you'll learn to start writing code in the next lesson! Be sure to save your Demo project so you can re-use it again in a later activity.