Working in the DS-User main window
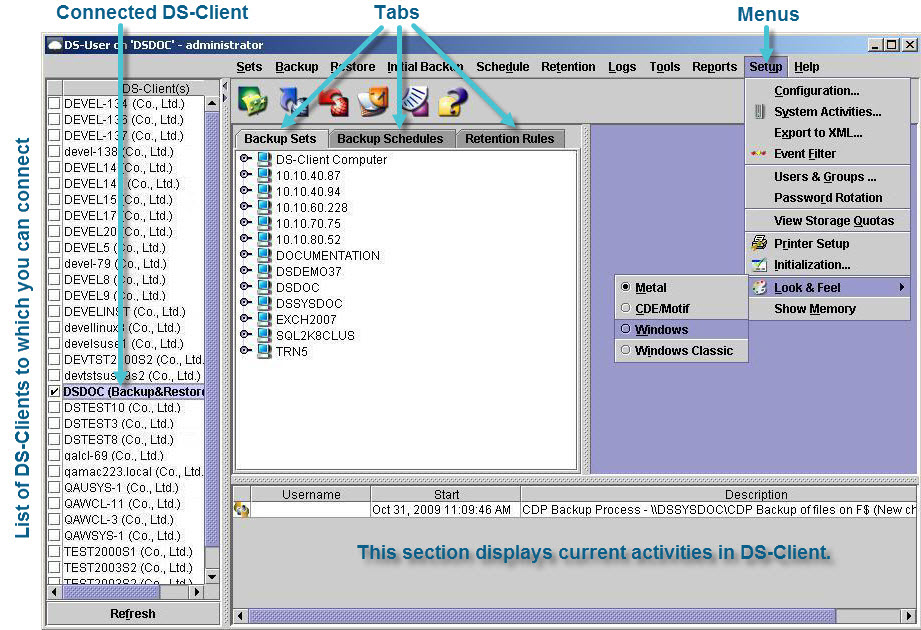
After you have successfully connected to a DS-Client, the DS-User main window appears. From the main window, you can access all the functions required to manage a DS-Client.
• Title bar – Displays the name of the DS‑Client to which you are connected.
• Menu bar – Allows you to perform various backup and restore tasks. Some items only appear if the corresponding tool is enabled.
• Toolbar icons – Provides quick access to the most commonly used features.
Table 2 Toolbar icons
Icon | Function |
|---|
| Creates a new backup. |
| Performs an on-demand backup. |
| Restores files. |
| Opens the Schedule Calendar. |
| Opens the Activity Log. |
| Opens the online Help |
• DS-Clients – Displays a list of the available DS‑Clients that you can connect to on the LAN. You can only connect to one DS‑Client at a time.
• Backup Set tab – Displays a tree view of all the backups defined on the selected DS-Client. You can browse to select the required backup and right-click to display the options menu. The color of a backup indicates its status.
• Black = Active
• Blue = Local-only
• Gray = Suspended
• Red = Requires Synchronization
• Backup Schedules tab – Displays a tree view of all the backup schedules defined on the selected DS‑Client. You can browse the tree to select the required schedule and right‑click to display the options menu. You can reassign schedules to backups using the drag‑and‑drop functionality.
• Retention Rules tab – Displays a tree view of all the retention rules defined on the selected DS‑Client. You can browse the tree to select the required retention rule and right‑click to open the options menu. You can reassign retention rules to backups using the drag‑and‑drop functionality.
• Monitor window – Displays the active processes running on the DS‑Client.