Active Directory Integration
Active Directory is the most common form of authentication in our industry today. It is ideal to leverage the same password, account enabling and disabling, and grouping features that are used in other parts of the enterprise.
Clarity User Types
Since one of Clarity Connect's fundamental purposes is collaboration with outside firms, it is not recommended to have all the users from all companies into a single AD server.
A typical setup consists of two types of users:
Active Directory users:
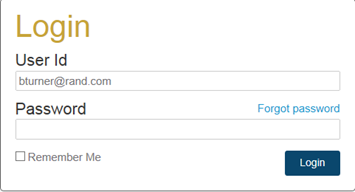
Users that work for the host company and are in the host company's AD server. Must be defined in Clarity in order to control their role and access to Project. Users will use their Active directory credentials as the User ID.
Regular users:
Users that sign in with a Clarity User ID and password combination. Account managed by a Clarity administrator and stored in the Clarity database. Users will use their e-mail address as the User ID.

Basic Active Directory Setup
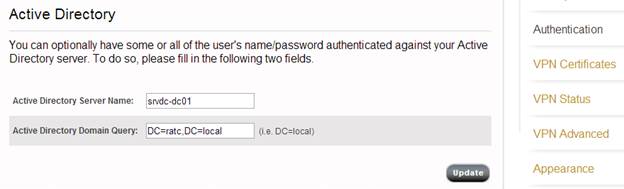
Manage your Active Directory setup by selecting Authentication in the Servers tab, and then entering the required Server Name and the Domain Query (i.e. dc=ratc,dc=local). If you are using an Active Directory Global Catalog, you can set the server name to "GC:" to query the Global Catalog (and leave the Domain Query blank).
Once the Active Directory server has been set up, you can edit an existing user or create a new user in the Users tab. If the checkbox for the Active Directory User is selected, it indicates that the person is able to authenticate using their active directory credentials and that the password is ignored. Only users that utilize their Active Directory credentials should be checked.
Note: When a user signs in with Active Directory credentials, Clarity looks up their Active Directory E-mail Address and matches it against a Clarity user with that same e-mail address. The process does not work if the user does not have an e-mail address configured in Active Directory, or if their address does not match that entered in Clarity.
Active Directory Synchronization
The basic setup enables you to define an Active Directory authentication for manually created users. This method is not the recommended when managing hundreds of internal users.
The Active Directory Synch Tool provided by Clarity can periodically query your Active Directory server and add or remove Clarity users as required. It can also change Clarity roles and Project access based on Active Directory groups. This tool is divided into the configuration application and the runtime application.

Directory Setup TabDirectory Setup Tab
The Directory Setup tab defines:
- The server and Base DN to connect to.
- The specific credentials used to query the server. (Depending on your security you may or may not be able to use an anonymous query to find users).
- The attribute mapping (When using non-standard attribute names for the four pieces of information required).
Clarity TabClarity Tab
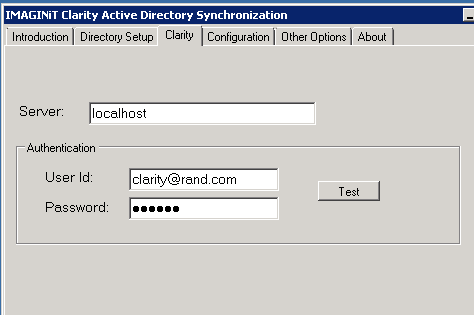
The Clarity tab provides the Clarity server name and the administrative credentials for querying and creating the users.
Configuration TabConfiguration Tab
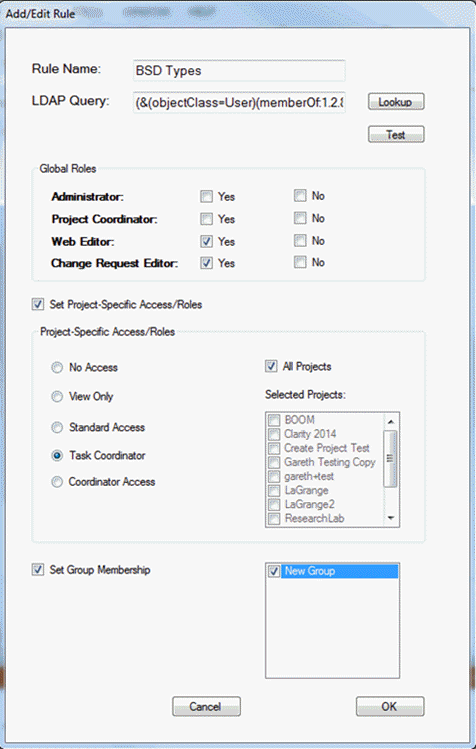
The Configuration tab defines one or more rules for how the result of Active Directory queries (typically looking up the members of a group) correspond to particular roles or permissions in the Clarity server.
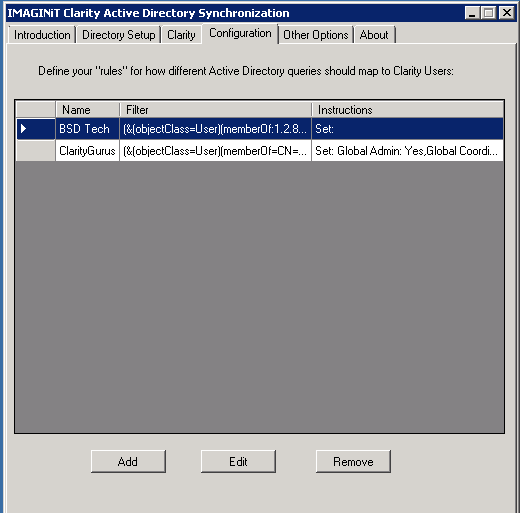
- To add a new rule, click Add.
- In the Add/Edit Rule dialog box that opens, enter a name for the rule and a correctly formatted LDAP query.
- (Optional) To use Active Directory groups, click Lookup and select from the available groups.
- Then, click Test to validate the query. A list of users from the Active Directory server opens.
For these users, you can then:
- Give them global administrative roles (force yes, force no).
- Give them global project coordinator roles (force yes, force no).
- Give them project-specific access or roles.
- Assign them to preexisting groups within Clarity.
Note:
Permissions are additive, so a user can exist in multiple rules.
- For example, if the first query (all users) gives them basic access, but the next query (BIM coordinators) gives him/her a project coordinator role on certain projects, the two sets of permissions will be added together.
An Active Directory user that does not appear in any queries (i.e. if they have been removed from the appropriate group), will be removed from Clarity. This can be done by selecting the Remove unqueried Active Directory users in Clarity checkbox in the Sync Options tab. This does NOT apply to non-Active Directory users.
Sync Options TabSync Options Tab
The Sync Options tab enables you to:
- Specify the required intervals the synchronization process needs to run at. During this process, it will compare the list of users in the Active Directory against the users in Clarity.
- Specify whether to remove Active Directory users that are unqueried by any of the rules.
- Assign users to Projects or groups as exceptions to the rule.
- Specify whether you want Clarity AD Synch to automatically remove users from Projects or groups if they are not in the query.

Mail Options TabMail Options Tab
Since the application runs as a service, without user interaction, it can be configured, using the Mail Options tab, to send e-mail informing the administrator about any changes made by the service.
Running the Synchronization
The Synchronization typically runs as a Windows Service. You can Start/Stop it in the Control Panel>Administrative Tools>Services snap-in).
Alternatively, to run the service manually, navigate to the C:\Program Files\IMAGINiT Technologies\Clarity Active Directory Synch folder and run the ClarityADSynchService.exe file. (Ensure that the service is not running when starting the executable.) The service shows a user interface that enables you to first Analyze and see the differences, and then Update and make the required changes.