Running Search and Restore Operations
When you run Search and Restore you:
| • | Perform a search for files and folders within the virtual machines which were already configured for File System Indexing. |
| • | Then select the files and folders from a specified retention set date. |
| • | Either download files and folders and restore them to the recovery site, or you restore the files or folders to their original location. |
Considerations:
| • | When running multiple Search operations, make sure to monitor the ZVM resources during these operations. |
Run a Search Operation
To run a search for files and folders:
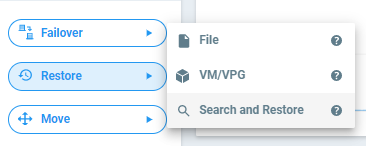
| 1. | In the Zerto User Interface select Restore > Search and Restore. |
The Search and Restore window is displayed.
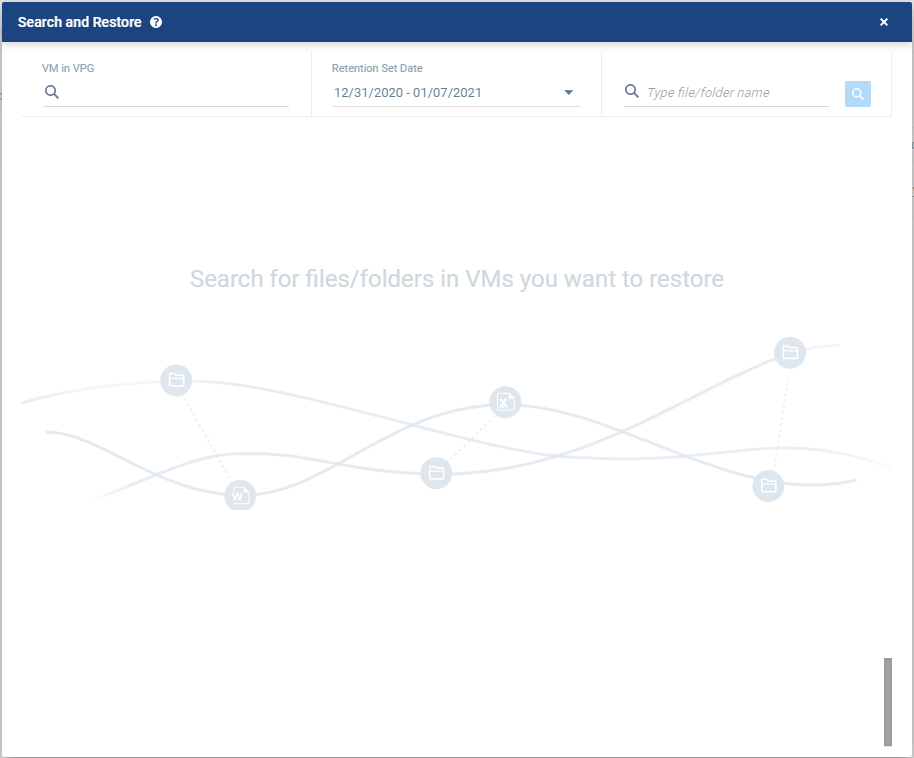
| 2. | Specify the following values, which are then applied to the Search: |
|
VM in VPG: |
Enter the name of the virtual machine, or select from the available list.
|
|||
|
Retention Set Date: |
Specify the date range of the search. The default range is the last 7 days. | |||
|
File/folder name: |
Enter the file or folder name, for which you will search. You can use the wildcard * at the end, middle, or the beginning of a word. |
| 3. | Click the Search icon |
The search results appear. The search is limited to 500 results at a time.
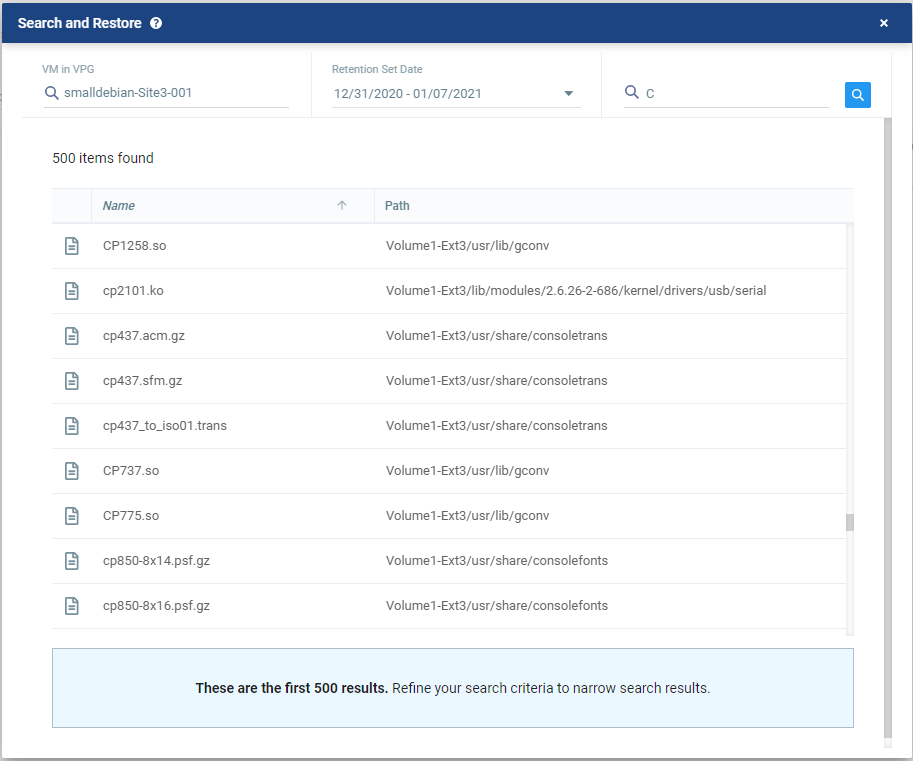
The search results specify the name of the file or folder, and the path.
| 4. | Select the file or folder from the displayed list. |
A window with a list of revisions for the selected file or folder appears, with the Retention Set Date or range you previously selected.
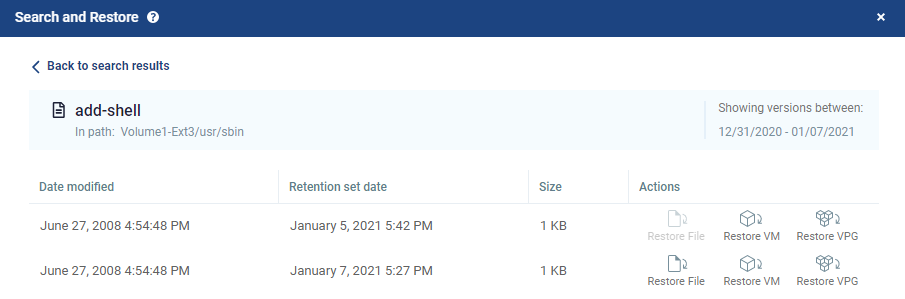
The versions which appear in this window are the available restore points of the retention sets. The revisions view specifies the following:
|
Date modified: |
The date in which the file or folder was modified. |
|
Retention set date: |
The date of the restore point. |
|
Size: |
The size of the file. The size of a folder is not displayed. |
|
Actions: |
Select either Restore File, Restore VM or Restore VPG. |
| 5. | To restore a VM or a VPG, choose a restore point and click either Restore VM or Restore VPG. Continue to Restoring a VM or VPG from Search. |
| 6. | To download a file or folder, choose a restore point, then click Restore File. Continue to Downloading Files and Folders from Search. |
Restoring a VM or VPG from Search
To restore a single VM or multiple VMs from a VPG:
| 1. | From the window which shows revisions of the selected file or folder, choose a restore point and click the Restore VM or Restore VPG icon. |
The Restore window appears on the VM Settings step.

If you clicked Restore VPG, the list of virtual machines that can be restored is displayed.
| 2. | Specify the following, which are then applied to all the virtual machines to be restored: |
| Restore on Host: | The IP address of the host where you want the VPG restored. |
| Restore on Datastore: | The datastore to use for the restored VPG files. |
| Power On: | Select this if you want the restored virtual machine/s to be powered on. |
- Or -
| • | Alternatively, you can use the recovery host and storage specified for each virtual machine in the VPG definition by clicking APPLY VPG CONFIGURATION. |
| 3. | To change the information in a field, click the field and update the information. |
| 4. | To change the host or datastore information for several virtual machines at the same time, select the virtual machines and click EDIT SELECTED. |
The Configure VM Settings window is displayed.

You can specify the following values, which are then applied to the virtual machine/s to be restored:
| Restore on Host: | The host where you want the virtual machine/s restored. |
| Restore on Datastore: | The datastore to use for the restored virtual machine/s. |
| Power On: | Select this if you want the restored virtual machine/s to be powered on. |
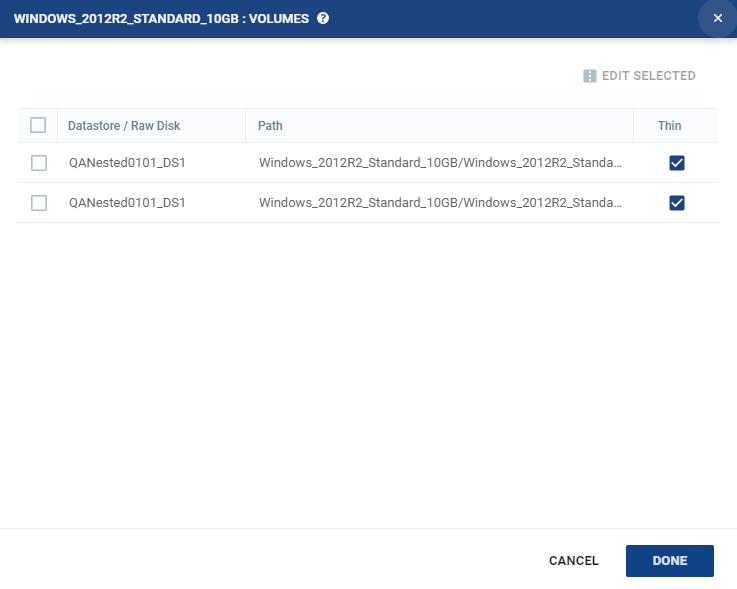
| 5. | To specify the volume information for each virtual machine, from the Actions column, click Volumes. |
The Volumes dialog is displayed:
| 6. | To edit information in a field, click the field and update the information. |
| 7. | To edit information for several datastores at the same time, select the datastores and click EDIT SELECTED. |
The Edit Selected Volumes dialog is displayed.
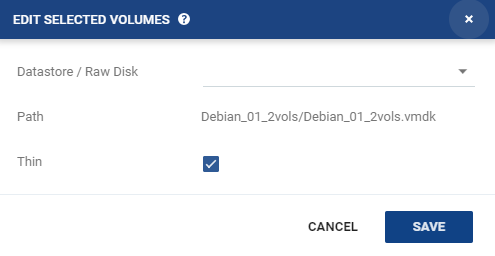
| • | If more than one datastore is selected, the path is not displayed. |
| 8. | Specify the datastore settings. |
| Datastore / Raw Disk: | The storage or RDM disk where the virtual machine files will be restored. |
| Thin: | Whether the virtual machine disks will be thin‑provisioned or not. |
| 9. | Click Save. |
| 10. | In the Volumes dialog, click Done. |
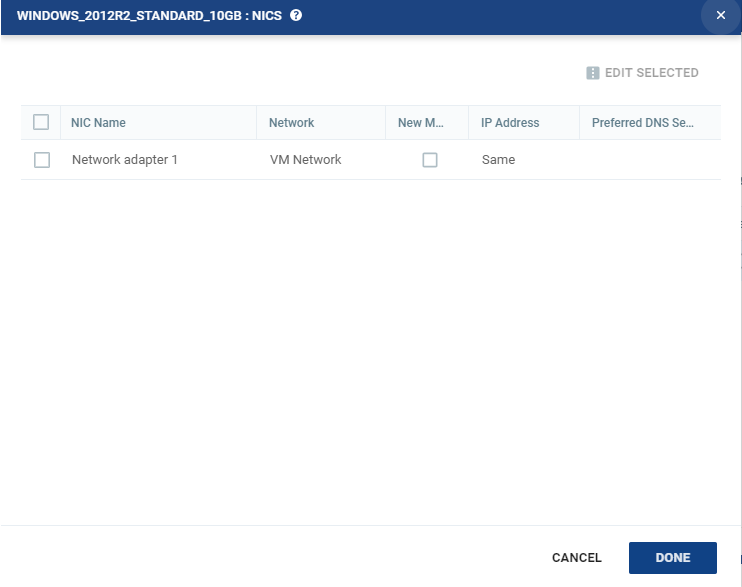
| 11. | To specify the NIC information for each virtual machine, from the Actions column, click NICs. |
The NICs window is displayed:
| 12. | To edit information in one field, click the field and update the information. |
| 13. | To edit information for several virtual NICs at the same time, select the NICs and click EDIT SELECTED. |
The Edit NIC dialog is displayed.
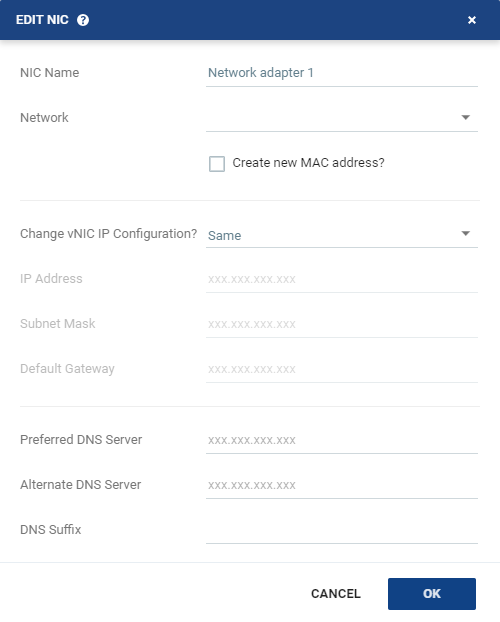
| 14. | Specify the NIC settings. |
|
NIC Name: |
The name of the selected NIC. | ||||||
|
Network: |
The network to use for the restored virtual machine. | ||||||
|
Create new MAC address: |
The Media Access Control address (MAC address) to use. The default is to use the same MAC address for the restored virtual machine that was used in the protected site. Select the checkbox to create a new MAC address on the restore site. |
||||||
|
Change vNIC IP Configuration: |
Whether or not to keep the default virtual NIC (vNIC) IP configuration. You can only change the vNIC IP after the restore has completed with VMware Tools installed.
|
||||||
|
IP Address: |
The IP for the restored virtual machine. This can be the same IP as the original protected virtual machine. | ||||||
|
Subnet Mask: |
The subnet mask for the network. The default value is 255.255.255.0. | ||||||
|
Default Gateway: |
The default mask for the network. | ||||||
|
Preferred DNS Server: |
The IP address of the primary DNS server. | ||||||
|
Alternate DNS Server: |
The IP address of the alternate DNS server. | ||||||
|
DNS Suffix: |
The DNS name excluding the host. |
| 15. | Click OK. |
| 16. | Click Done. |
| 17. | Click Next. |
| 18. | If this is the retention set which you want to restore, click RESTORE. |
The virtual machines are created from the Repository at the recovery site.
See also:
| • | Configuring File System Indexing |