Upgrading To More Than One Version Higher
Before upgrading to a new version, make sure that all VPGs are in Protecting state and not in a sync state, such as Delta Sync, or an error state, such as Needs Configuration.
If you need to upgrade more than one version higher, do one of the following:
1. Upgrade versions stepwise, one version at a time, as described above in Upgrading Multiple Sites Running Different Versions, until you reach the required version.
- or -
2. Use the Zerto Diagnostics utility’s export option to export the existing VPG definitions, then uninstall the old version of Zerto Virtual Replication. Install the new version, then use the Zerto Diagnostics utility’s import option to re-create the VPGs. Use the following procedure.
Upgrading Zerto Virtual Replication Using the Zerto Diagnostics Utility
To upgrade Zerto Virtual Replication using the Zerto Diagnostics utility:
1. Click Start > Programs > Zerto Virtual Replication > Zerto Diagnostics.
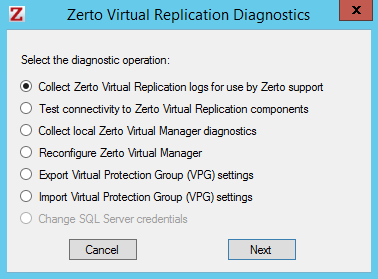
The Zerto Virtual Replication Diagnostics menu dialog is displayed.
2. Select the Export Virtual Protection Group (VPG) settings option and click Next.
Note: Zerto Virtual Replication regularly exports settings to the folder <Zerto_Installation_Folder>\Zerto Virtual Replication\ExportedSettings. You can use the last exported file. The default location of Zerto_Installation_Folder is C:\Program Files\Zerto.
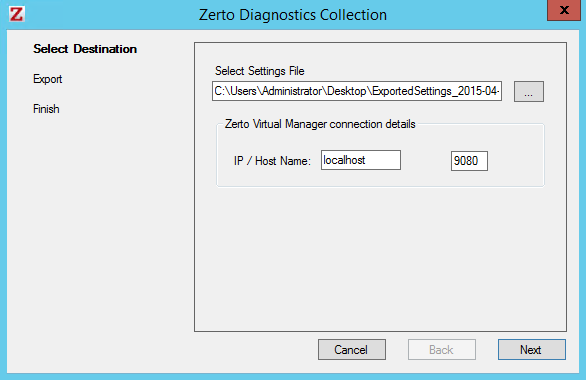
3. Select the destination for the file that will contain the exported settings and enter the Zerto Virtual Manager IP address and port for the protected site.
4. Click Next.
The list of exported VPGs is displayed.
5. Click Done.
6. In the Zerto User Interface delete the VPGs, and keep their target disks.
Note: If you did not export the settings, Zerto Virtual Replication regularly exports settings to the folder <Zerto_Installation_Folder>\Zerto Virtual Replication\ExportedSettings. You can use the last exported file as input to recreate the VPGs to this point in time. The default location of Zerto_Installation_Folder is C:\Program Files\Zerto.
7. Uninstall the existing Zerto Virtual Replication version.
8. Install the new Zerto Virtual Replication version, as described in the Zerto Virtual Replication Installation Guide.
9. Install the VRAs on the hosts in the site and pair the sites, as described in Zerto Virtual Replication Installation Guide.
Note: If the protected site and recovery site are the same for any of the VPGs that were exported, set Enable replication to Self in the Advanced Settings dialog, as described in Zerto Virtual Manager Administration Guide for the VMware vSphere Environment.
10. Click Start > Programs > Zerto Virtual Replication > Zerto Diagnostics.
The Zerto Virtual Replication Diagnostics menu dialog is displayed.
11. Select Import Virtual Protection Group (VPG) settings.
12. Click Next.
13. Select the file previously exported and enter the Zerto Virtual Manager IP address and port for the protected site.
14. Click Next.
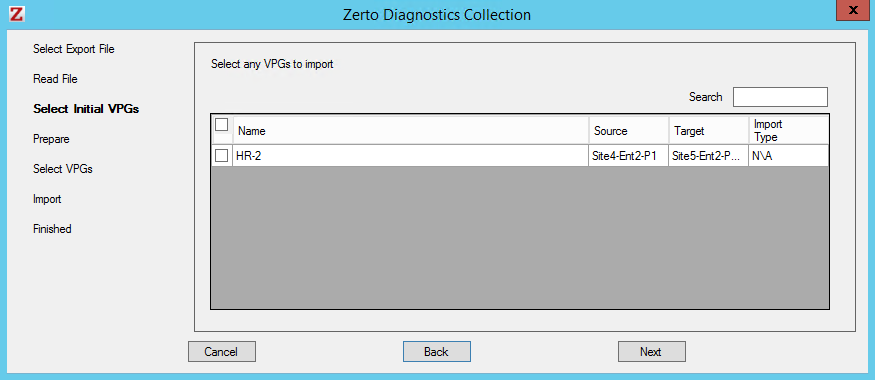
The list of exported VPGs is displayed.
15. Select the VPGs to import. You cannot import VPGs that have the same name as a VPG that is already defined in current installation. If a VPG in the import file has the same name as an existing VPG, it is disabled and is grayed-out.
16. Click Next.
The list of imported VPGs is displayed. If the VPG cannot not be imported, the reason is specified.
17. Click Done.