Starting and Stopping Failover Tests
You can test a single VPG or multiple VPGs to make sure that if an actual failover is needed, the failover will perform as expected.
Note: You can initiate the failover test from either the protected site or recovery site.
To test failover:
1. In the Zerto User Interface set the operation to TEST and click FAILOVER.
The Failover Test wizard is displayed.
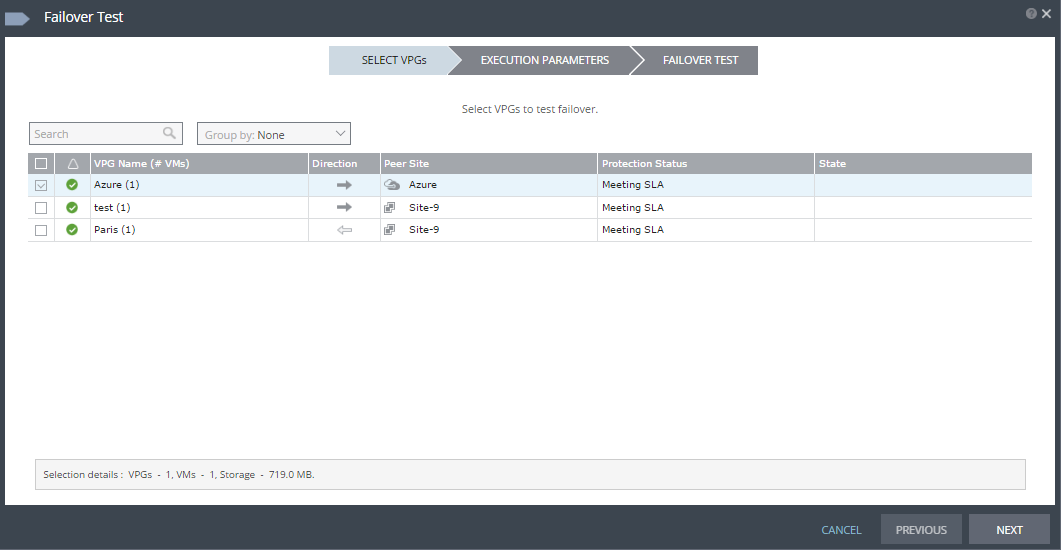
2. Select the VPGs to test. By default, all VPGs are listed.
At the bottom, the selection details show the amount of data and the total number of virtual machines selected.
The Direction arrow shows the direction of the process: from the protected site to the peer, recovery, site.
3. Click NEXT.
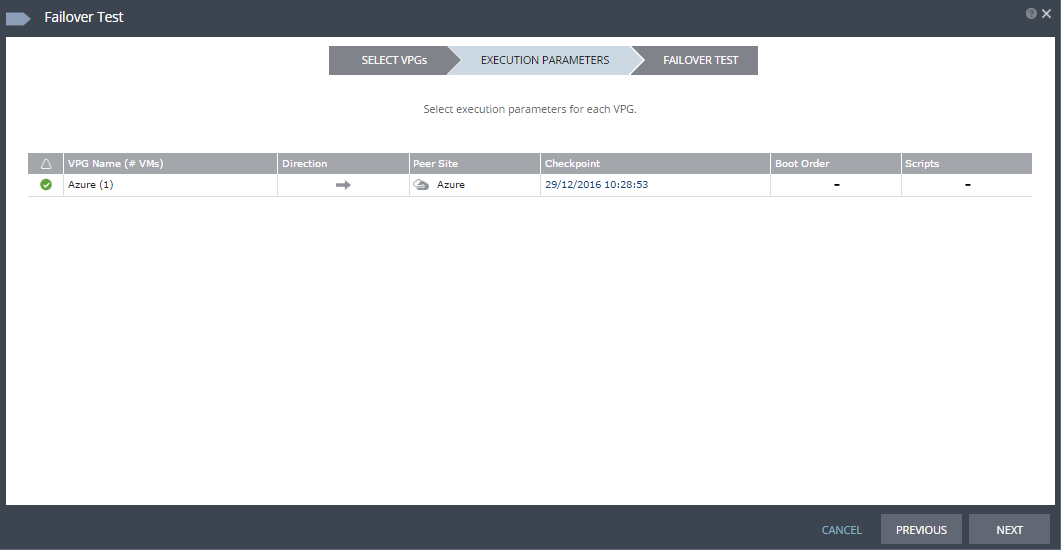
The EXECUTION PARAMETERS step is displayed.
You can select the checkpoint to use for the recovery and see if a boot order and scripts are defined for the VPG.
4. By default, the last checkpoint added to the journal is displayed. If you want to use this checkpoint, go to the next step If you want to change the checkpoint, click the checkpoint.
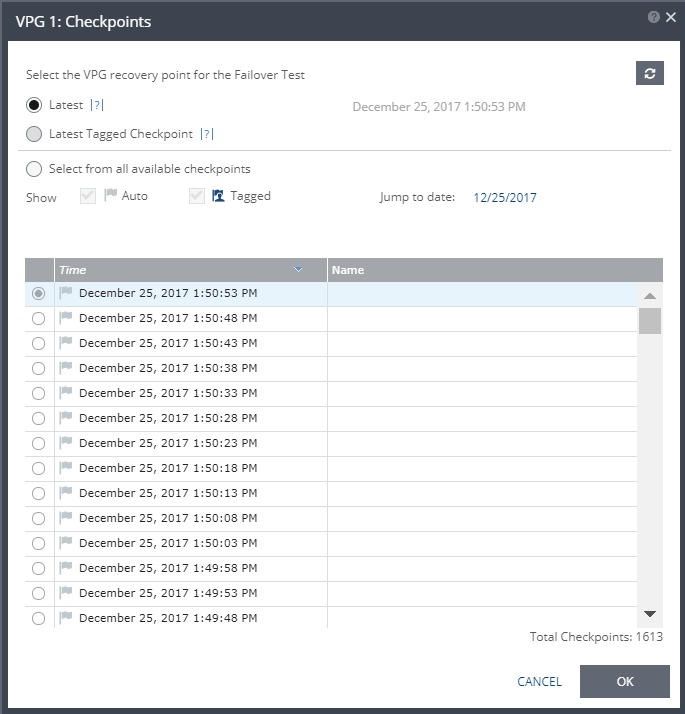
The {VPG-Name}: Checkpoints dialog is displayed.
5. Select the checkpoint to use. Click the refresh button to refresh the list. You can choose from one of the following checkpoints:
6. By default, the last checkpoint added to the journal is displayed in the Checkpoint column
■ To use this checkpoint, proceed to the next step.
■ To change the checkpoint, click the link that appears as the checkpoint.
A window appears, displaying a list of the VPGs’ checkpoints.
Latest: Recovery is to the latest checkpoint. This ensures that the data is crash-consistent for the recovery.
When selecting the latest checkpoint, the checkpoint used is the latest at this point.
If a checkpoint is added between this point and starting the failover, this later checkpoint is not used.
Latest Tagged Checkpoint: The recovery operation is to the latest checkpoint added in one of the following situations:
■ By a user.
■ When a failover test was previously performed on the VPG that includes the virtual machine.
■ When the virtual machine was added to an existing VPG after the added virtual machine was synchronized.
7. To use a checkpoint which is not the latest checkpoint, or the latest tagged checkpoint, choose Select from all available checkpoints. By default, this option displays all checkpoints in the system. You can choose to display only automatic, or tagged checkpoints, or any combination of these types.
8. Click OK.
9. Click NEXT.
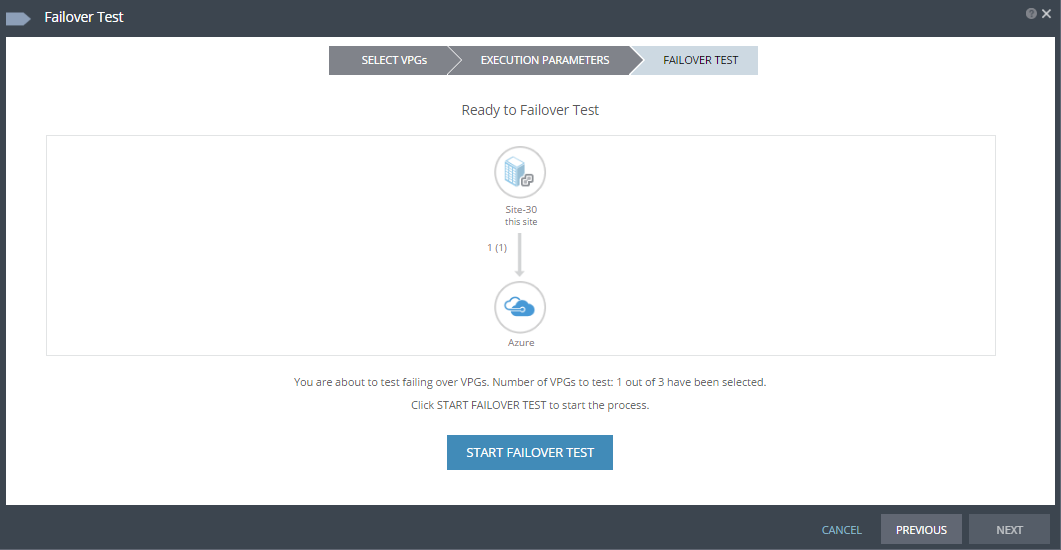
The FAILOVER TEST step is displayed. The topology will show the VPGs and the virtual machines that are about to be tested.
10. To start the test, click START FAILOVER TEST.
Note: If any of the VPGs have at least one VM configured with a static IP, but the static IP is in use on the recovery site, a warning message appears enabling you to choose whether to continue with a dynamic IP, or to cancel the failover process.
The test starts for the selected VPGs. The test begins with an initialization period during which the new virtual machines are created in Azure. Zerto creates a new resource group for the VPG, and places the newly created virtual machines and their NICs in this resource group.
The default instance size for new virtual machines is
Standard D1 v2. If Standard D1 v2 instance size does not meet your needs, you can change this value in the Policies tab of the Site Settings dialog. For more information, see
“Configuring Disaster Recovery Policies”, on page 137. You can also change the instance size of new virtual machines when you create or edit a VPG.
Note: By default, every Azure virtual machine is created with an additional temporary volume. This temporary volume is a local SSD disk. The size of the SSD disk depends on the instance size of the virtual machine.
Note: If you did not define a private IP for a virtual machine in the VPG definition, during recovery Azure sets the private IP from the defined subnet range.