Starting and Stopping Failover Tests
You can test a single VPG or multiple VPGs to make sure that if an actual failover is needed, the failover will perform as expected.
By default, test virtual machines are started with the same IPs as the protected machines in the protected site. This can create clashes so Zerto recommends ensuring that different IPs are assigned to the virtual machines when they start, by configuring virtual machine NIC properties in the VPG. For details, refer to
To create a virtual protection group (VPG):. If you have defined the new virtual machines so that they are assigned different IPs, the re-IP cannot be performed until the new machine is started. Zerto Virtual Replication changes the machine IPs and then reboots these machines with their new IPs.
Note: You can initiate the failover test from either the protected site or recovery site.
To test failover:
1. In the Zerto User Interface set the operation to TEST and click FAILOVER.
The Failover Test wizard is displayed.
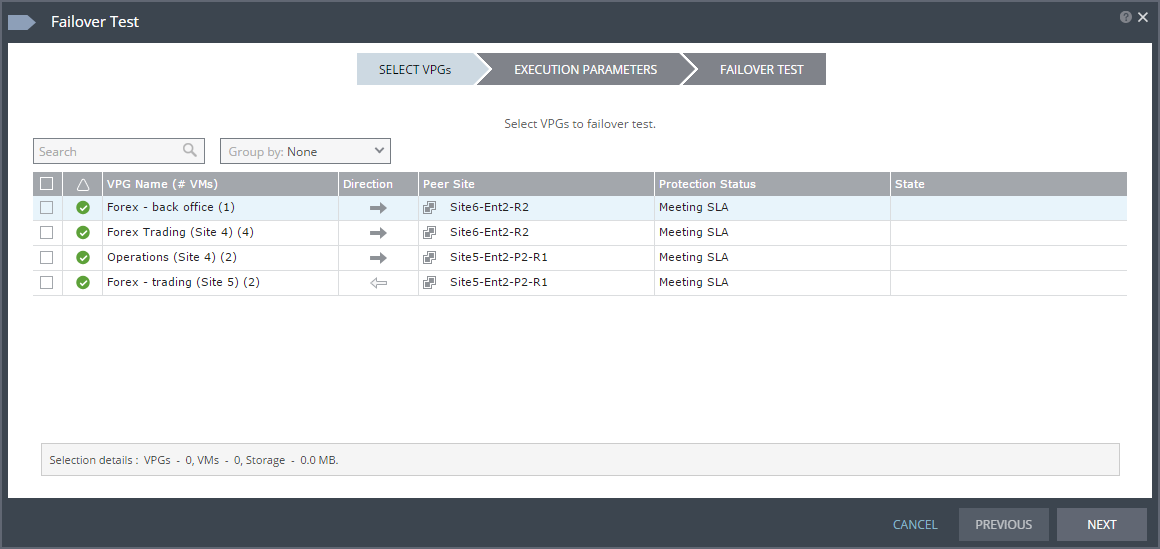
2. Select the VPGs to test. By default, all VPGs are listed.
At the bottom, the selection details show the amount of data and the total number of virtual machines selected.
The Direction arrow shows the direction of the process: from the protected site to the peer, recovery, site.
3. Click NEXT.
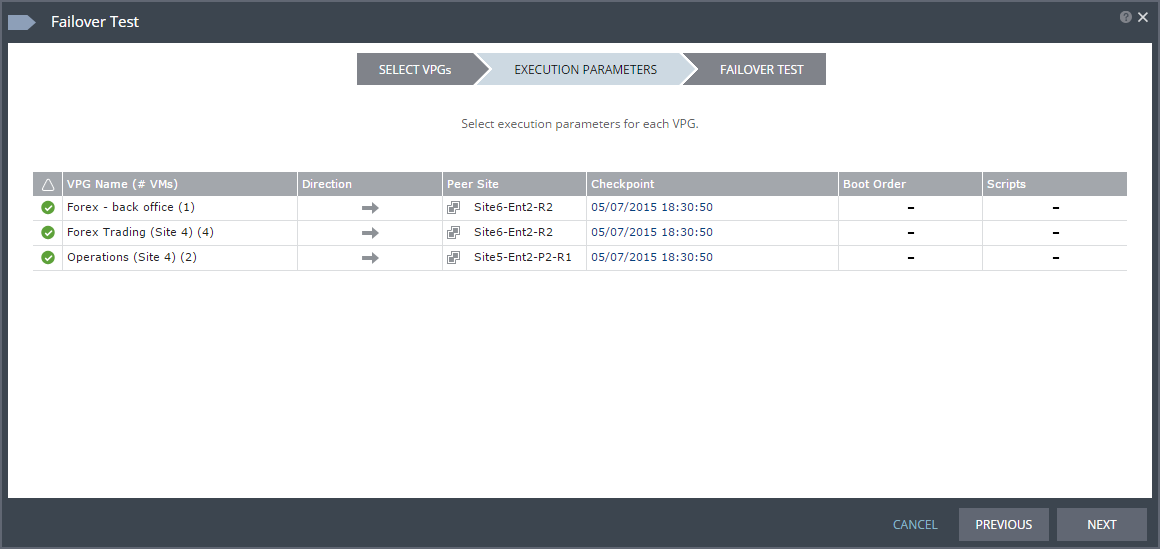
The EXECUTION PARAMETERS step is displayed.
You can select the checkpoint to use for the recovery and see if a boot order and scripts are defined for the VPG.
4. By default, the last checkpoint added to the journal is displayed. If you want to use this checkpoint, go to the next step. If you want to change the checkpoint, click the checkpoint.
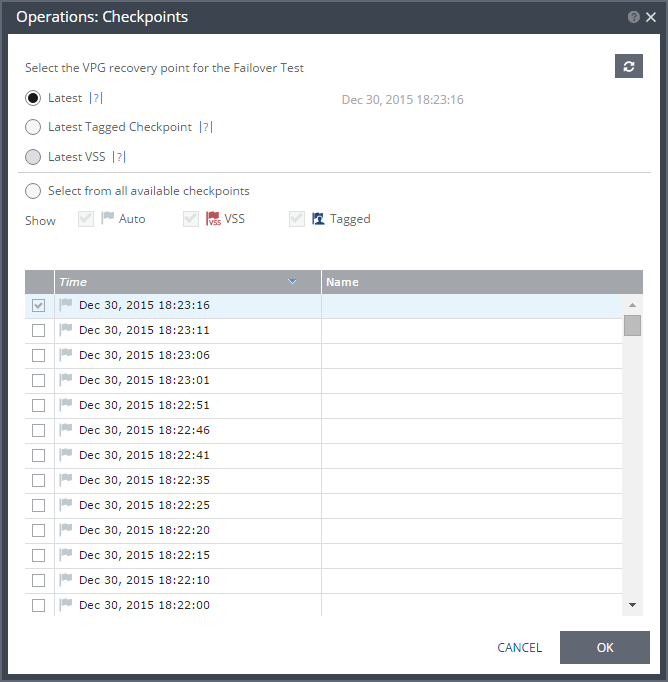
The {VPG-Name}: Checkpoints dialog is displayed.
5. Select the checkpoint to use. Click the refresh button to refresh the list. You can choose from one of the following checkpoints:
Latest – Recovery is to the latest checkpoint. This ensures that the data is crash-consistent for the recovery. When selecting the latest checkpoint, the checkpoint used is the latest at this point. If a checkpoint is added between this point and starting the failover, this later checkpoint is not used.
Latest Tagged Checkpoint – The recovery operation is to the latest checkpoint added in one of the following situations:
■ By a user.
■ When a failover test was previously performed on the VPG that includes the virtual machine.
■ When the virtual machine was added to an existing VPG after the added virtual machine was synchronized.
Latest VSS – When VSS is used, testing is to the latest VSS snapshot, ensuring that the data is both crash‑consistent and application consistent to this point. The frequency of VSS snapshots determines how much data can be recovered. For details about VSS checkpoints, see
Ensuring Transaction Consistency in Microsoft Windows Server Environments.
If you do not want to use the latest checkpoint, latest tagged checkpoint, or latest VSS checkpoint, choose Select from all available checkpoints. By default, this option displays all checkpoints in the system. You can choose to display only automatic, VSS, or tagged checkpoints, or any combination of these types.
6. Click OK.
7. Click NEXT.
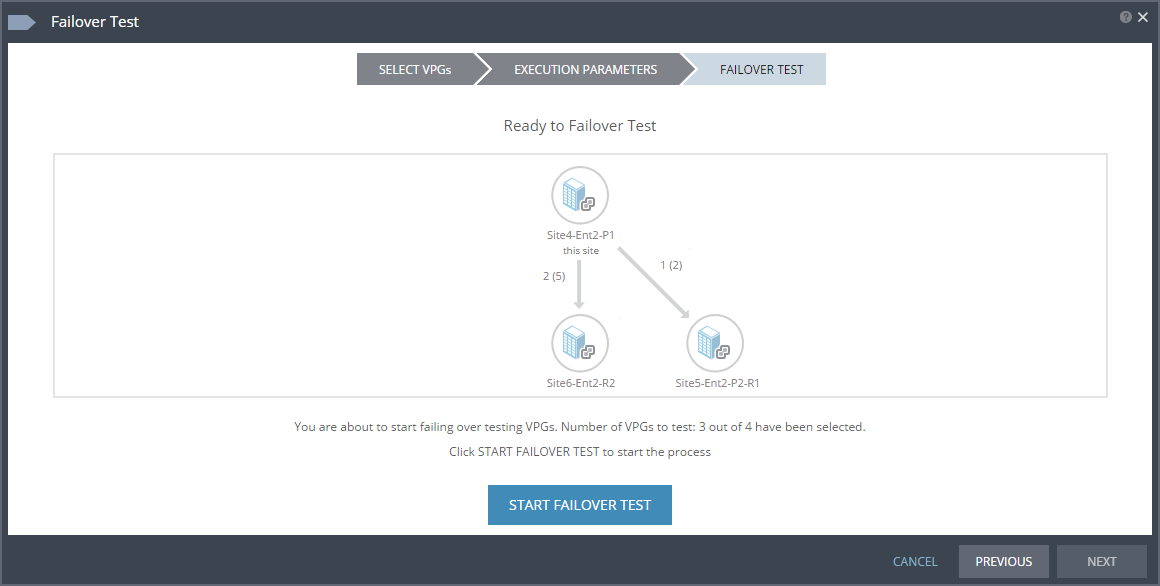
The FAILOVER TEST step is displayed. The topology shows the number of VPGs and virtual machines being tested to failover to each recovery site. In the following example, 2 VPGs will be failed over to Site6-Ent2-R2, and they contain 5 virtual machines; and 1 VPG will be failed over to Site5-Ent2-P2-R2 and it contains 2 virtual machines.
8. To start the test, click START FAILOVER TEST.
The test starts for the selected VPGs. The test begins with an initialization period during which the virtual machines are created in the recovery site.
After Starting a Test, What Happens?
During the initiation phase, the virtual machines in the virtual protection group are created at the recovery site with the suffix testing recovery.
Note: The following conversions are done to a protected virtual machine when it is recovered in Hyper-V:
■ A machine using BIOS is recovered in Hyper-V as a Generation 1 virtual machine.
■ A machine using EUFI is recovered in Hyper-V as a Generation 2 virtual machine.
■ A machine with a 32bit operating system is recovered in Hyper-V as a Generation 1 virtual machine.
■ A machine with a 64bit operating system is recovered in Hyper-V as either a Generation 1 or Generation 2 virtual machine, dependent on the operating system support in hyper-V.
■ The virtual machine NICs are recovered with Hyper-V network adapters except for protected Windows 2003 virtual machines which are recovered with Hyper-V legacy network adapters.
■ When VMware Tools is installed on the protected virtual machine running Windows Server 2012, Integration Services is installed on the recovered virtual machine automatically.
All testing is written to scratch volumes. The longer the test period the more scratch volumes are used, until the maximum size is reached, at which point no more testing can be done. The maximum size of all the scratch volumes is determined by the journal size hard limit and cannot be changed. The scratch volumes reside on the storage defined for the journal. Using these test scratch volumes makes cleaning up the test failover more efficient.
While a test is running:
■ The virtual machines in the VPGs continue to be protected throughout the test.
■ You cannot take a snapshot of a test machine, since the virtual machine volumes are still managed by the VRA and not by the virtual machine. Using a snapshot of a test machine will create a corrupted virtual machine.
■ You cannot move VPGs being tested.
■ You cannot delete, clone, migrate to another host or change the disk properties of any of the test virtual machines.
■ You cannot initiate a failover while a test is being initialized or closed.
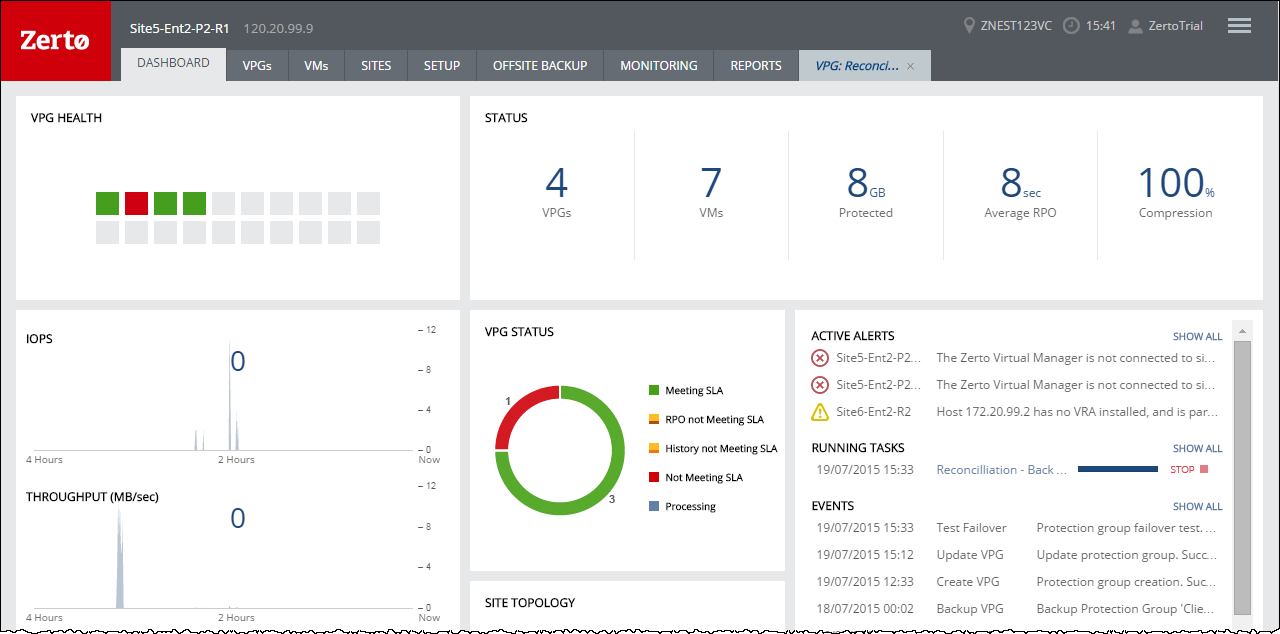
Monitor the status of a failover test by doing the following:
■ In the Zerto User Interface, click the VPGs tab. The Operation field in the GENERAL view displays Testing Failover when a failover test is being performed.
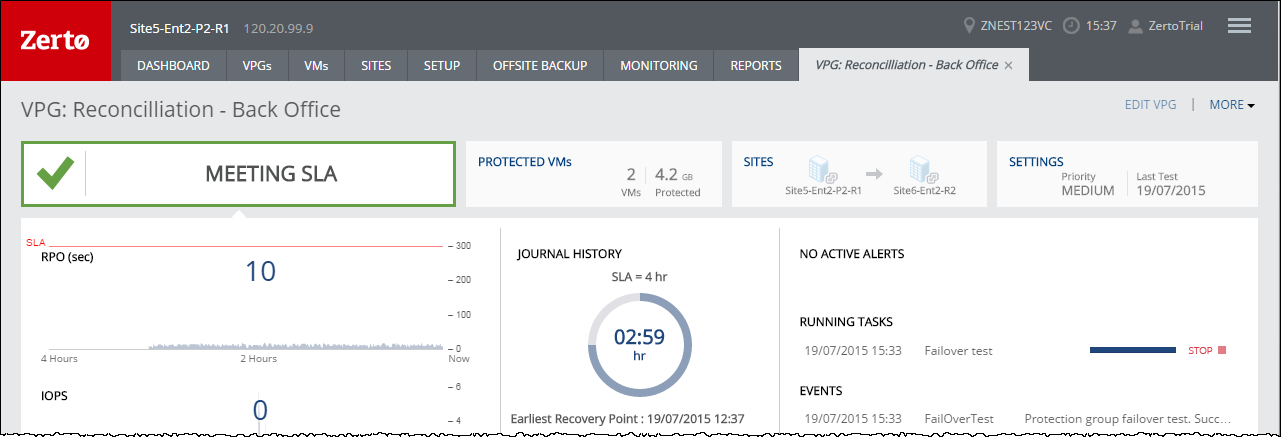
■ In the Zerto User Interface, click the VPGs tab, and then click the name of a VPG you are testing. A dynamic tab is created displaying the specific VPG details including the status of the failover test.
To stop a failover test:
1. Click the Stop icon, in either the Dashboard or the dynamic tab, to stop the test in the specific VPG tab.
You can also stop the test via the TASKS popup dialog in the status bar or under MONITORING > TASKS.
The Stop Test dialog is displayed.
2. In the Result field specify whether the test succeeded or failed.
3. Optionally, in the Notes field, add a description of the test. For example, specify where external files that describe the tests performed are saved. Notes are limited to 255 characters.
4. Click STOP.
After stopping a test, the virtual machines in the recovery site are powered off and removed, and the checkpoint that was used for the test has the following tag added to identify the test: Tested at startDateAndTimeOfTest.
This checkpoint can be used to identify the point-in-time to use to restore the virtual machines in the VPG during a failover.