We’ve tried countless paper aeroplane designs recommended by the
experts. For our money, this one’s the best – behold, the
n
14
How do you build the
perfect paper aeroplane?
Cleared for take-off
⁄
If you’re going to throw your plane in the aircraft, please
check first with the cabin crew and your fellow passengers, and use respectfully. Or you
could wait until you have more space for optimum conditions. Happy flying!
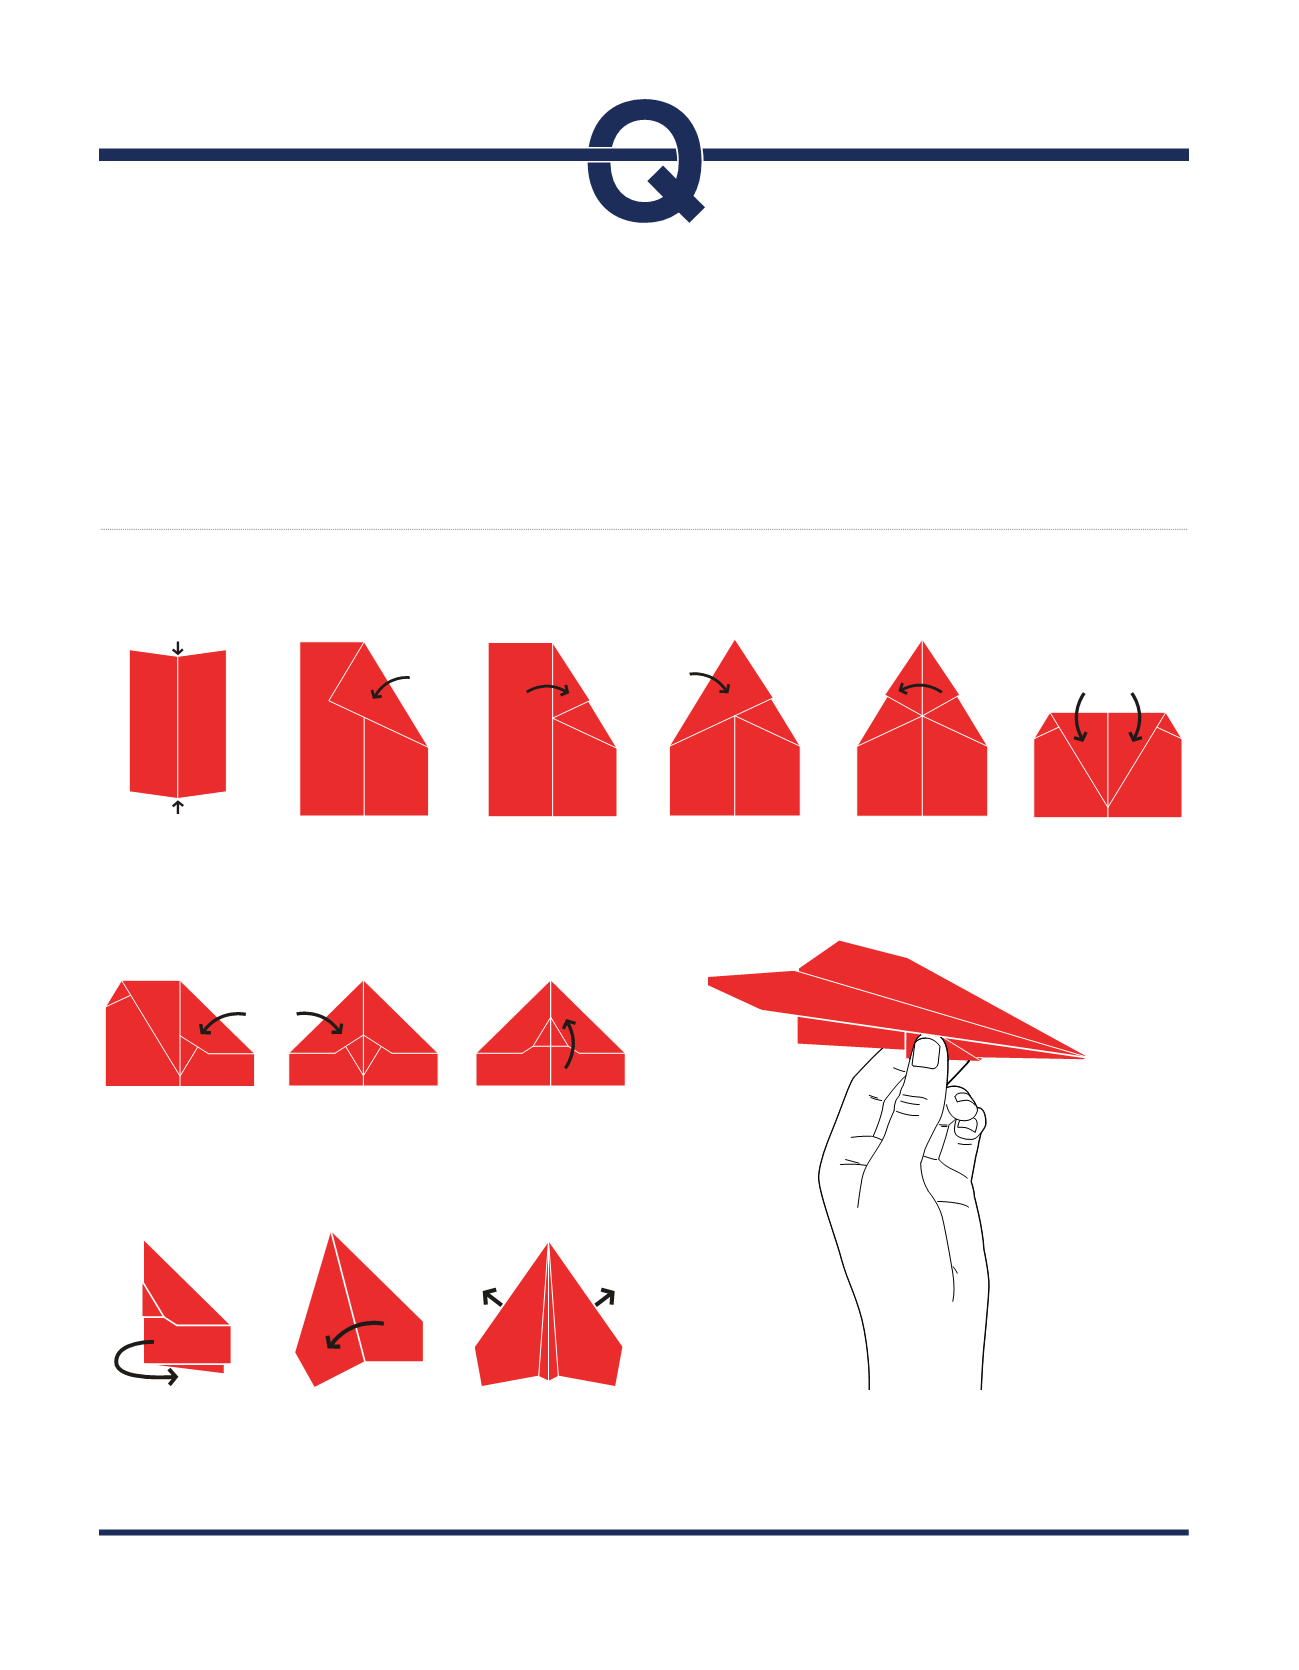
Step 6
⁄
Take the point
at the top and fold it
down to a point around
2.5cm from the bottom
of the paper.
Step 5
⁄
Fold back, as
per Step 3, creating this
pretty shape.
Step 4
⁄
Fold from the
top left corner so that the
paper runs flush with the
right edge of the plane.
Step 11
⁄
Fold the wings
down. Try to fold from
the nose of the plane so
that there’s around 3cm at
the back.
Step 8
⁄
Do the same on
the left side.
Step 2
⁄
Fold from the
top right corner along
Line 1 (with plain paper,
fold the corner to the
middle of the left half).
Step 12
⁄
If you want to
fly straight, check the
wings are level at 90
o
to
the body of the plane.
You’re ready to fly.
Step 9
⁄
Take the point
at the bottom and fold
it up towards the top of
the plane.
Step 3
⁄
Fold the paper
back on itself along the
centre line. The outside
should run flush with the
edge of the plane.
Step 10
⁄
Fold the plane
away from you from the
centre (against the original
centre fold) so that you
have this shape.
Step 7
⁄
From the right,
fold the paper so that it
runs flush with the centre
of the plane.
Step 1
⁄
Carefully tear
out the page on the right
(if there isn’t one, A4 will
do too) and fold it straight
down the middle vertically.
Step-by-step instructions
⁄
Build
the magnificent
n
14
I l l u s t r a t i o n s
⁄
T o b y L e i g h
0 3 4 \
n
n
A


