H2O in R Studio
Installation of H2O Package in R
These instructions assume you are using R Studio 2.14.0 or later.
STEP 1
The download package can be obtained by clicking on the button Download H2O at http://0xdata.com/downloadtable.
Unzip the downloaded H2O zip file.
STEP 2
Start an instance of H2O. For help with this see Getting Started from a Downloaded Zip File
Users should be aware that in order for H2O to successfully run through R, an instance of H2O must also simultaneously be running. If the instance of H2O is stopped, the R program will no longer run, and work done will be lost.
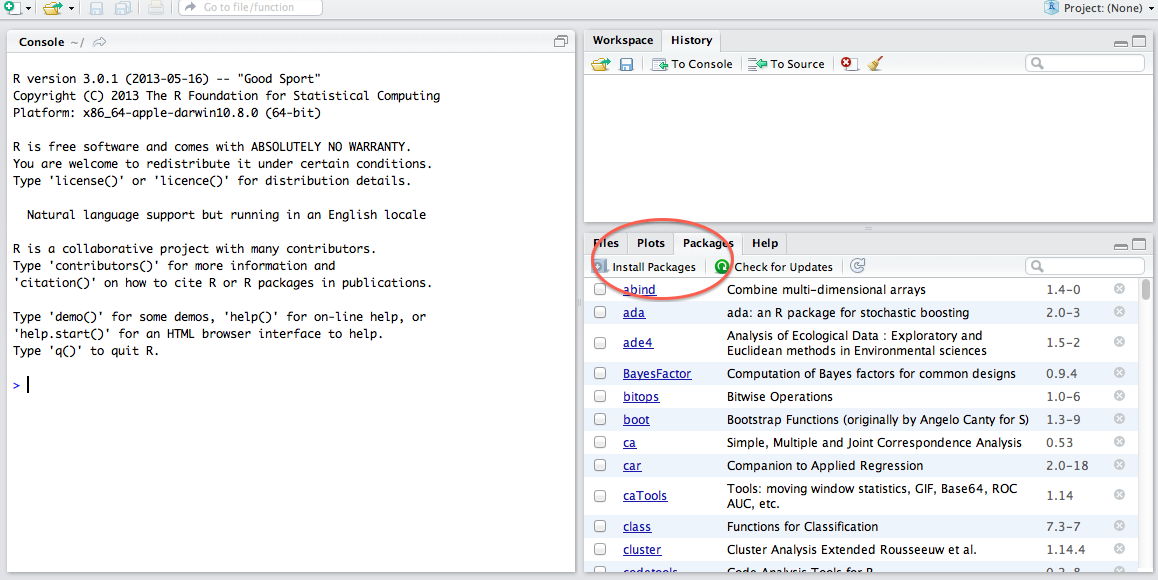
STEP 3: R Studio Users
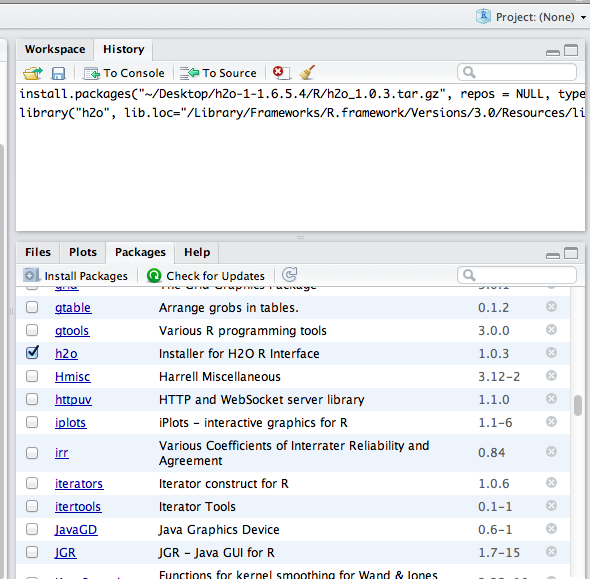
Install the H2O package, and the H2O client package simultaneously by clicking on install package
Walk through the installer helper to the H2O downloaded folder.
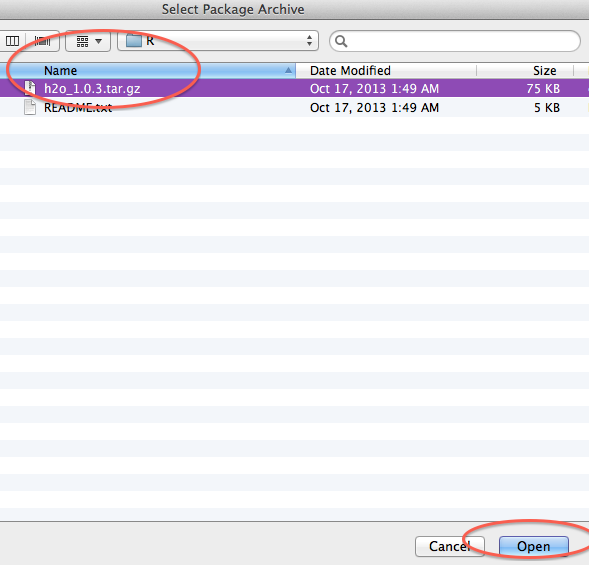
Once the correct path has been specified click “Install.” This will install the package in R.
Start the H2O package by clicking the check box next to the package name “h2o”.
STEP 4
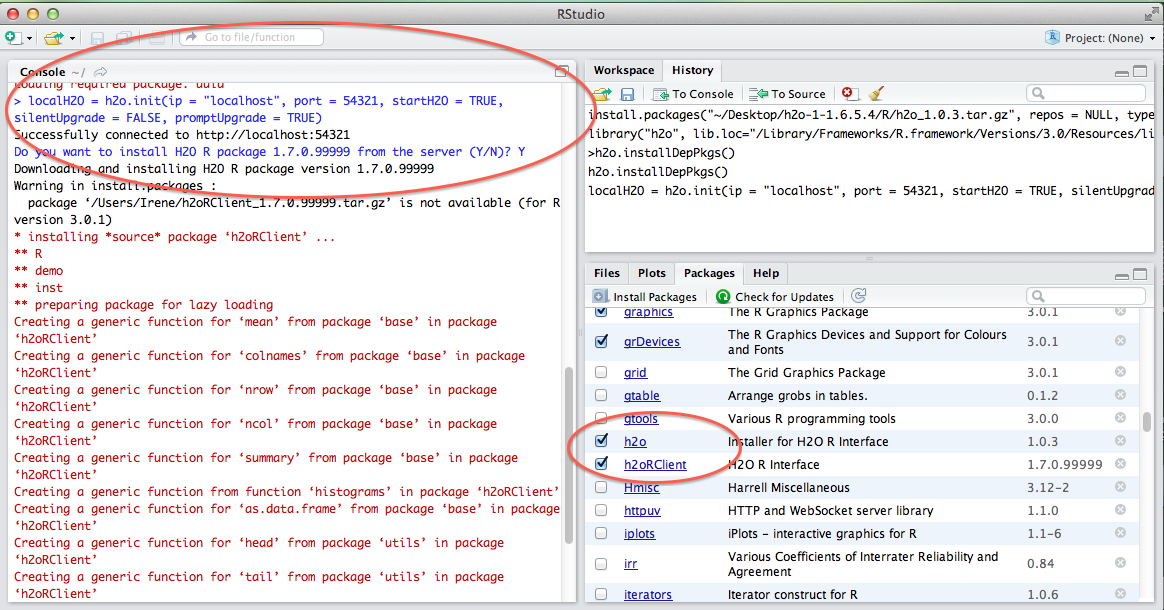
Get R Studio talking to your instance of H2O by typing in the call:
>localH2O = h2o.init(ip = "localhost", port = 54321, startH2O = TRUE, silentUpgrade = FALSE, promptUpgrade = TRUE)
Your IP and port may be different, depending on whether you are running H2O from your computer or a server. If you are running on a server, where it says IP enter the IP address of the server, and the appropriate port number. In the picture below the IP number is everything before the colon, and the port number is the 5 digit string after the colon.
Upgrading the H2O R Packages
Users may wish to manually upgrade their R packages. For instance, if you are running the bleeding edge developer build, it’s possible that the code has changed, but that the revision number has not, in which case manually upgrading ensures the most current version of not only the H2O code, but the corresponding R code as well.