v0.9.6
GeoWave Quickstart Guide: Jupyter Notebook
Assumptions
This document assumes you understand how to create and configure an EMR cluster for GeoWave. If you need more information on the steps involved in setting up a cluster to support GeoWave visit the Amazon Web Services EMR quickstart guide.
Recommended Hardware settings
If you wish to run both jupyter notebook demos you will need to increase the hardware specifications for your emr cluster slightly to support it.
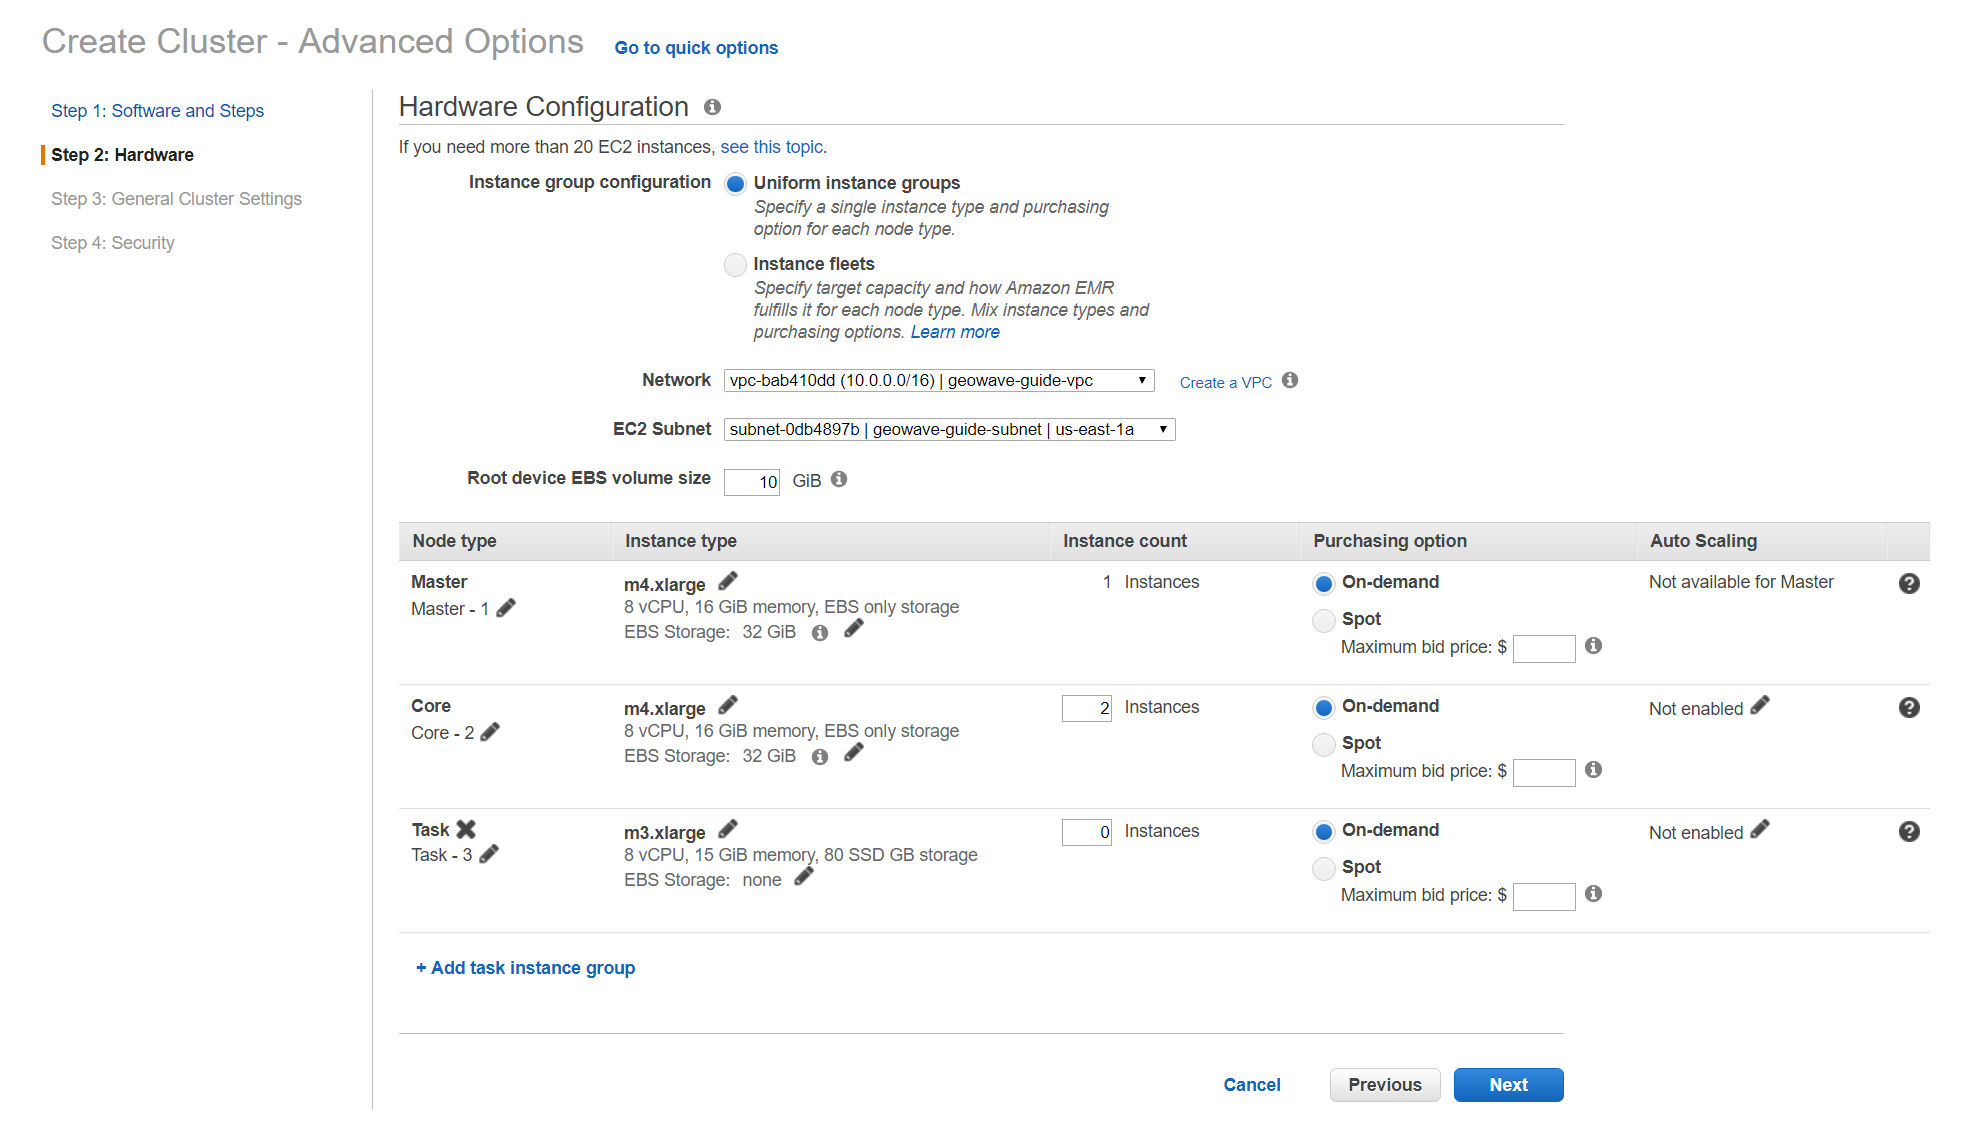
Below are the recommended hardware settings to change for the cluster:
-
Root device EBS volume size
-
Set this to at least 20gb
-
-
Master
-
Edit the Instance Type to be m4.2xlarge
-
Do not touch the EBS Storage
-
-
Core
-
Edit the Instance Type to be m4.2xlarge
-
Select 4 for the Instance count
-
Do not touch the EBS Storage or Auto Scaling
-
Install Python and Jupyter
To properly run and visualize the results from the Jupyter notebook demo we need to first install python and a few additional packages. We’ve created a bootstrap script to do that for you that can be found here:
This bootstrap script will install python, all necessary packages needed for this demo, and create the jupyter kernel to run the notebooks. This script needs to be run as a bootstrap action when creating the EMR cluster.
|
It is recommended to use the Accumulo bootstrap script as the first bootstrap script to setup your cluster. Doing so will let you use both HBase and Accumulo as long as you select HBase as a default application to add to your cluster from AWS.
For more information on setting up bootstrap actions visit the Amazon Web Services EMR quickstart guide. |
Run the Jupyter notebook
After your cluster has been created with the script above, you are ready to connect to the cluster and run the demo. Once you are connected to the cluster run the commands below to launch the notebook server.
|
For more information on connecting to the EMR cluster follow the instructions in the Amazon Web Services EMR quickstart guide. |
-
Launch the jupyter notebook server
jupyter notebook ./notebooks --ip=0.0.0.0 --no-browser-
This command will launch a jupyter notebook server from the cluster and output a link to connect to the server that will look like this:
http://0.0.0.0:8888/?token=87a7c6eb2d2723b9f2999b7c0d57d66c9a82dd9eae94af8f
-
-
Copy and paste the output url into your browser, and replace the "0.0.0.0" with the Master Public DNS of your EMR cluster.

-
The final url will look something like this:
http://ec2-34-226-244-139.compute-1.amazonaws.com:8888/?token=87a7c6eb2d2723b9f2999b7c0d57d66c9a82dd9eae94af8f
-
-
After connecting to the notebook server you should see a list of all notebooks in the browser. Select the geowave-gdelt demo notebook and follow the instructions there once the notebook loads to proceed through the demo. You can run each cell of the notebook by pressing [SHIFT + ENTER] while a cell is in focus.